DIY Storage for Back of Closet Door
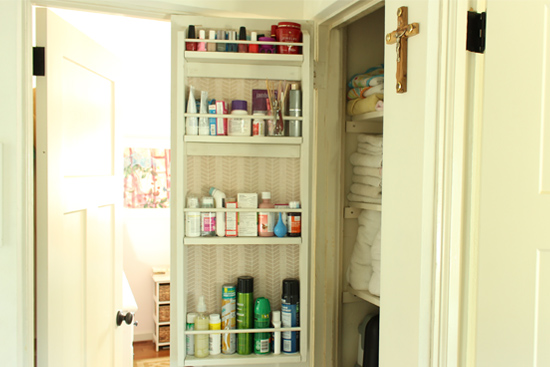 If you’re looking for just a little more storage in your bathroom closet or linen closet, this simple DIY shelf rack that mounts on the back of the door is perfect! You can customize the size to fit your door and items to be stored!
I created this a while ago, so a lot as changed! My closet shelves are no longer that deep, so this ‘closet caddy’ has become essential! The items on the shelves have changed quite a bit too! Less beauty products and more kiddy medicines!
Dimensions
The back of any closet door is perfect to claim more space for storage. You can see how I helped homeowner Toni Riales utilize the back of her pantry door in this video.
Moving on to the nitty gritty of how my closet door caddy was built. I knew it couldn’t be the full width of the door and still be able to close. So I subtracted two inches from the full width of the door. Then I subtracted an inch from the height to adjust for the door jamb at the top, and another three inches so it wouldn’t be hugging the doorknob.
My final dimensions for the caddy I built were 41½” by 15½”. All of the lists and dimensions below are for this sized rack. Adjust accordingly to fit your space! And I can’t forget the lovely drawing I created to keep everything straight during the building process.

Materials
- Handsaw/miter box or miter saw
- Putty knife
- Utility knife
- Sandpaper
- Paint/paintbrush
- Drill/drill bits
- Hot glue gun
- (2) 1x4x8s
- (1)1/4″x2’x4’MDF
- (1)3/8”x4’ wood dowels
- (1)1/4”x4’ wood dowels
- 1-3/4 yards fabric
- Nails and screws
- Wood glue
Cutting List:
- (2) 1×4 x 41½” (sides)
- (4) 1×4 x 14” (shelves)
- (2) 1×2 x 14” (cleats)
- (1) 1/4” x 15½” x 41½” MDF (back)
- (3) 3/8″ x 15½” dowels (shelf supports)
- (1) 1/4″ x 15½” dowels (top shelf support)
Cut to Size
We started by cutting all of the lumber to size using a handsaw and a miter box. This is perfect if you’re not ready to invest in power tools, or if you’re just not comfortable with them. But it does require a little more elbow grease.
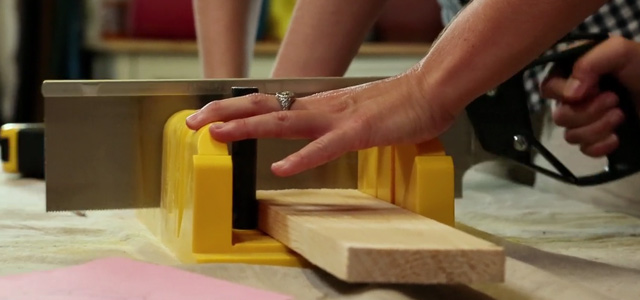
We were able to get one of the vertical pieces and two shelf boards out of each 1×4, with some leftover. Then we decided to add a little flair and cut an angle for the top of the vertical pieces. Our miter box had angles at 90, 45, and 22.5 degrees. We went with the 22.5 to keep it from being too severe.
Sand and Paint
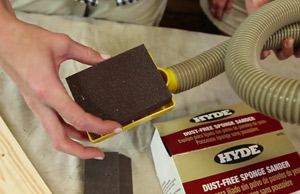
Before we got to the fun part of painting, we sanded all of the boards, especially the cut ends. We used the Dust-Free Sponge Sander* from Hyde. It’s an attachment for most wet/dry vacs that sucks up the dust as you sand.
 Then we got out the primer and went to work on painting what would be seen. Meaning, we didn’t paint the backside or ends of the shelf boards or back of the vertical pieces. We propped them up on these unpainted sides to dry. Pretty handy!
**This episode was sponsored by Hyde. However, all opinions are 100% honest and my own.
After the primer dried (it doesn’t take long!), we quickly painted everything with some leftover latex paint. And while that dried, we added my favorite part—the fabric background.
Fabric Background
Obviously, it’s not a necessary step, but it makes it so much more fun! We used hot glue, fabric (Greek Chevron fabric from Jo-Ann Fabric and Craft Store), the MDF and a smoothing tool. (I got the MDF cut to size at Home Depot. They will give you two cuts for free before they start charging 25¢ per cut. They don’t guarantee precise cuts, so you may need to do a little trimming once you get your lumber home.)
I spread the glue, then quickly pulled the fabric tight so Christina could smooth it out on top of the glue. Definitely made it easy having a second person for this!
I’ve since applied fabric in some projects using different methods. Check out my episode on upcycling a particleboard bookcase here and my post on lining dresser drawers with fabric here.

Assembly
Once the fabric was complete and the boards were dry, we assembled everything using some finish nails and a hammer. We put the shelf boards between the vertical pieces and nailed through the sides. I double checked the measurements and the spacing between before each board went in to make sure my bottles would fit when we were done.
We also used some leftover lumber to create cleats. We ripped a 1×4 in half, and nailed it the same way as the shelf boards. One went below the top shelf and one below the second shelf.
With all of the shelves in place, we flipped the caddy over and attached the back using the same finish nails. Then we used a drill bit slightly larger than the dowel rods to drill holes to slip the dowels through. We used a little wood glue on each end of the rod to secure them. We followed it up with painter’s putty to make the dowel rod hole flush with the rest of the vertical piece.
Attach to Door
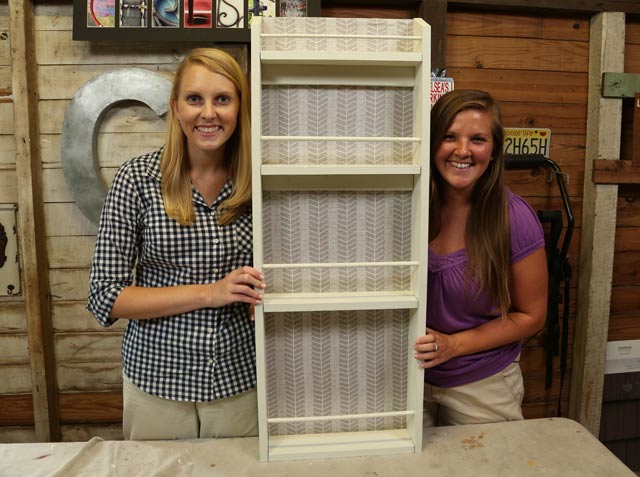
Then we moved inside to hang the caddy on the closet door and fill it up! We held it in place to check that the door would close, and then secured it to the door using drywall screws through the cleats. Make sure the screws go through the thickest part of your door if you have a recessed panel door like mine!

My second favorite part of the finished product (after the fabric background) is the small shelf on top for nail polish! It’s fun to see them all at once instead of in the dark abyss of their former home in a bag.
Having a place for everything is essential to an organized home! So little projects like this go a long way in increasing my happiness! Share in the comments if you make yourself a closet door caddy! I’d love to know how you use it in your home!
Thanks for Checking In! ~Chelsea


Beautiful work! I love your clear and precise instructions!
Thanks for watching Anne!
Love this! Great idea and clear instructions.
Thanks Penny!
I also have a small bathroom and this is a great idea! Thanks for the great video. (The apple doesn’t fall far from the tree!).
Thanks Betsy! It’s already made a difference in my house!
Clever use of space Chelsea! And great isometric sketching talent too 😉