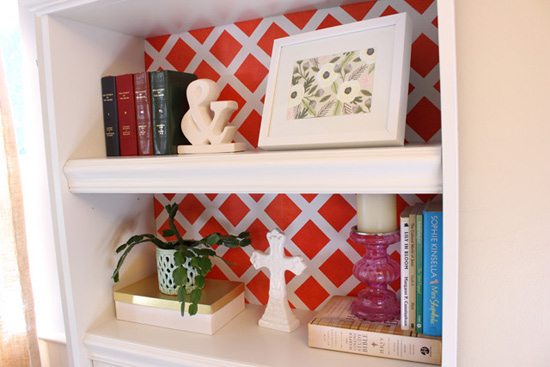
Several months ago I updated a hand-me-down bookcase that had a very 70s feel to it.

I added new molding on the edges of the shelves. And a small pop of color on the back…
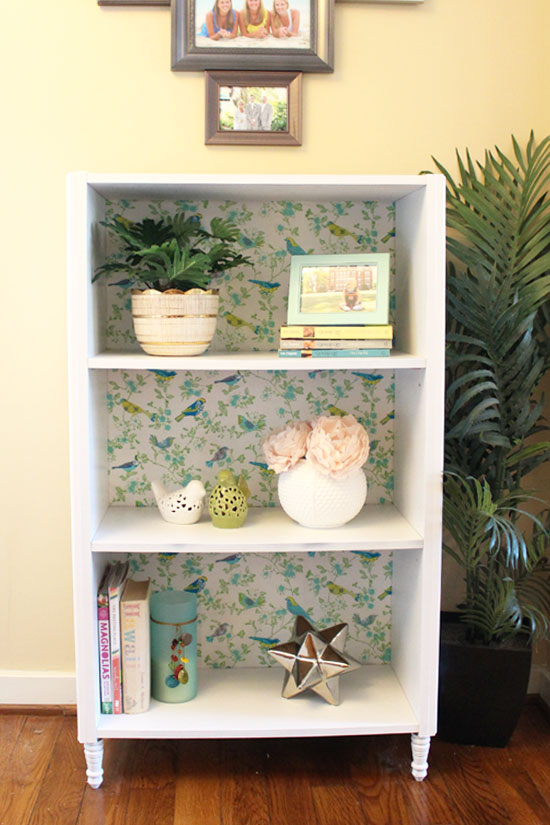
Well, the bookcase fairy is at it again for this month’s webisode! Here’s the after:
It was originally one of those brown, particle board bookcases that are inexpensive and budget-friendly.
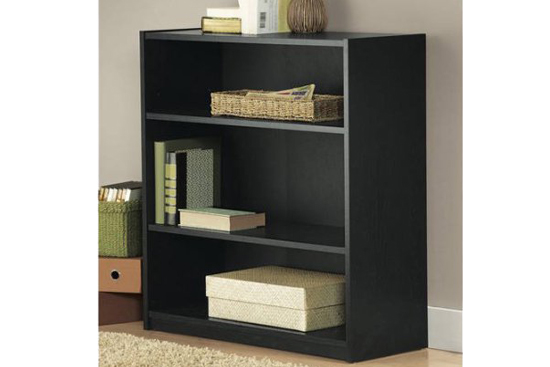
(source: Walmart.com)
We joke that it was one of the 3 things my husband brought into our marriage. We already removed it from the house when he helped me convert a sofa table into a bed bench for our room.
And now I’m totally getting rid of it by helping my friend Allison update it for her little girl’s room!
It seems like owning something made from particle board is a right of passage between college and real life. I know so many people who buy a bookcase or something similar for their dorm or first apartment. But at a certain point, most people are ready to upgrade to nicer furniture. So if you’re in that boat, be sure to watch the webisode above to see how we transformed this piece!
Here are the materials we used:
- tape measure
- decorative molding
- miter saw
- nail gun (w/ compressor, hose and small nails)
- drill/driver (w/ drill bit)
- furniture feet
- putty
- spray paint
- fabric
- scissors
- Glue Dots Advanced Strength
- Glue Dots Glue Squares
We used the molding to dress up the sides of the bookcase. You could put it on the front or even top if you wanted to! Anywhere you put it, though, you’ll need to measure from corner to corner and make your 45 degree angle cuts on a miter saw. Typically the fatter part of the molding goes on the outside, so make sure you make the cuts accordingly where the longest part of the molding is the thick part.
Once we had the molding cut for both sides, we applied our Advanced Strength Glue Dots. These are for a more permanent situation. But as you can see in the video above, they held their own and kept our molding right where we wanted it while we tacked it in place with small finish nails.
**Thanks to Glue Dots for sponsoring this post! All opinions are still 100% my own!
These would be essential if I didn’t have Allison helping me out. Nothing worse than bowed, mind-of-its-own molding when you’re trying to attach it somewhere! Ha!
Repeat the process for the other side.
This next step really ups the ante for this piece of furniture, installing feet! They cost about $4 a piece, but worth so much more in terms of fanciness! To install them, we used a drill bit slightly smaller than the bolt on the feet themselves. We eyeballed where we wanted them to go and then measured and mark the same distance on all 4 corners. You can add a little wood glue before screwing in the feet for extra oomph and security.
At this point, we removed the shelf pegs and put putty in the nail holes on the molding. And vigorously shaking our cans (paint cans, that is!), we spray painted the bookcase in its entirety. I find that it helps to start with the bookcase upside down so you can paint the feet really well before flipping it over and spraying everything else.
Having a method with your spray paint helps give you the best coverage. I like to spray in one direction (say, horizontally) for the first coat and then spray in the other direction (vertically) for the second coat to ensure everything is evenly coated. A light coat is all you want at first or, trust me, you’ll have paint running like there’s a sale at Target!
While the majority of the spray paint was drying, we took the back panel back inside my workshop to add some flair with fabric. This is where we used the Glue Squares. Applied on the edge of all 4 sides of the back panel, we gently set our fabric in one corner. Then we smoothed it out over the Glue Squares as we pulled it tight in all directions. Once it was secure on all 4 sides, we trimmed the excess fabric.
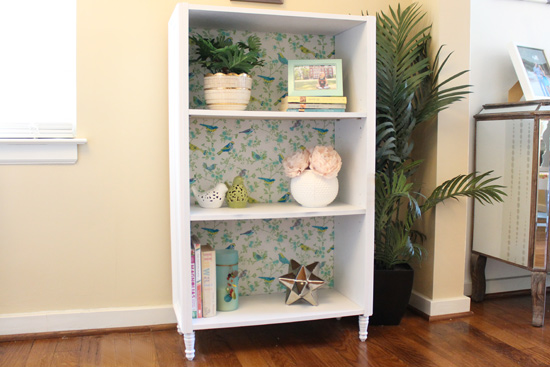
After waiting on the paint to dry, we reattached the back panel with the same small finish nails. The shelves were carefully set back in place and Allison’s daughter, Jillian, was able to stock it with her favorite books and toys!
As with a lot of projects I help other people on, I’m a tad jealous I don’t keep to keep this after dressing it up! I mean, it does fit right in with my dining room! 🙂
Thanks for Checking In! ~Chelsea



Such cute idea. I like how the fabric adds pop and covers up the thin, seamed backing of the bookcase. Looks perfect for little Jillian!
Thanks, Stephanie! ~Chelsea
great Job The little girl was so happy
Yes she was! Thanks for watching Jimmy! ~Chelsea
what brand spray paint are you using?
Hi Samantha! It’s from Rust-Oleum’s Universal line of spray paint. Here’s an affiliate link to purchase it on Amazon for your convenience! http://amzn.to/2y7aqIb ~Chelsea
Nice! Where did you get the furniture feet? I want to buy some for a project but I don’t know where to purchase them.
They have them at Home Depot and Lowe’s! ~Chelsea
Hold the PHONE!! Does that spray paint require no sanding or priming?? We just bought a cheap laminate cabinet at Wal-Mart and I would love to paint it, but the internet insists I sand it first and use fancy primer–please tell me I can use the Rustoleum by itself. Please!
Hi Leslie! As long as the spray paint has primer in it, you should be good to go! I checked with my friend who had this bookcase and she said the paint has held up! Go for it!! ~Chelsea
Wonderful! How did you get the backing off nicely without ruining it since it was nailed in? Im unsure how to take the back off of mine. My hammer can’t grip the nails.
Hi Kimberly! Try lightly tapping with your hammer from the inside to get the backing off. Particularly near the nails. Hope that helps! ~Chelsea
Any suggestions on best spray paint? About to do a project like this and I’d rather not mess with paint and primer and paintbrushes – spray painting would be so much easier! 🙂
Hey Angelina! I love Krylon brand spray paint. I know it’s available at Ace Hardware, not sure where else. Whatever brand or type you use, make sure you use a separate spray primer before hand! Just a light coat will do wonders, doesn’t have to be full coverage. ~Chelsea
Came here to say you really inspired me! I saw a great bare bones unit at my apartment trash and knew it had to be rescued. I used your backing with fabric concept and added a lot of my own touches. The fabric was something like 70% off so I spent maybe $15 total. You can see it here if you want: https://i.ibb.co/Gn00kZD/350138535-640079397984810-7784668056990805974-n.jpg
Aww yay! Thanks for sharing! Looks nice! ~Chelsea