
Stripping Paint from Bricks
It’s hard to stop peeling paint! But you can eliminate paint all together. Here’s how I stripped the peeling paint from our brick steps and then sealed them to prevent slipping.

Were you following me on Instagram when I started the painful process of stripping the stain from our wood deck? Weellllll, stripping paint from bricks can be a very similar, long, and painful process.
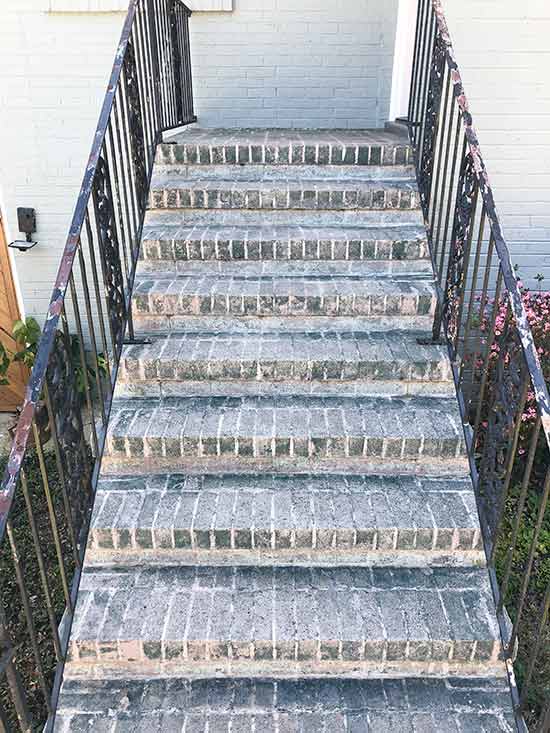
BUT sometimes there is no other option. On the stoop by our back door, water had obviously been dripping off the roof for years in the same spot. Leaving the painted bricks susceptible to peeling and wearing. (Even though there were gutters on this part of the roof!)

It obviously had been painted 6 or 7 times in the past 66 years!😮

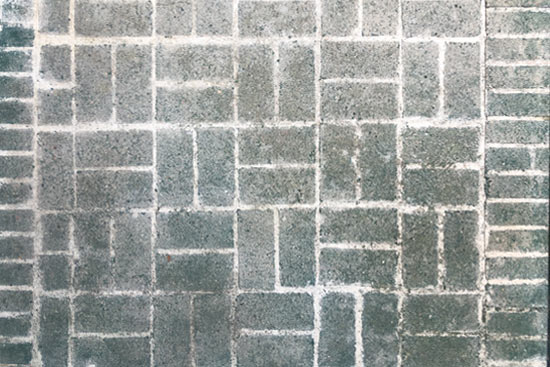
There were some other spots down the steps that had been painted the latest color but the spots where the paint had peeled were not filled in prior to painting so you could see the void.

I also did not want to repaint them, even if we did repair the peeling parts. I feel like it would have been too much blue 🤷🏼♀️ since there’s not a lot breaking up the blue house paint on this side.
Plus I kind of liked the idea of the gray blue bricks having their moment on the tops of the stairs. (We did something different with the stair side wall. But more on that in another post!) Oh, and these steps were slippery when they were wet! Just doesn’t seem right for brick anything to be slippery.
Since bricks are masonry and durable, I knew we could be much rougher when removing the paint than we could be with our old wood deck. We could scrub the stuffing out of it and use the most abrasive tip on a pressure washer.
So Brandon and I decided to tackle it, a few hours at a time!
Materials
- sprayable paint stripper*
- latex gloves*
- stiff putty knife*
- 4 inch paint brush*
- pressure washer*
- Clear anti-slip sealer*
Clean and Prep Bricks
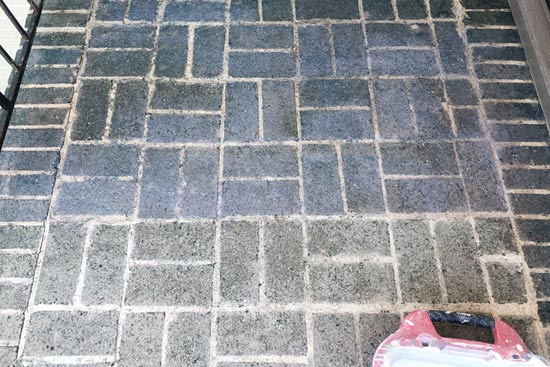
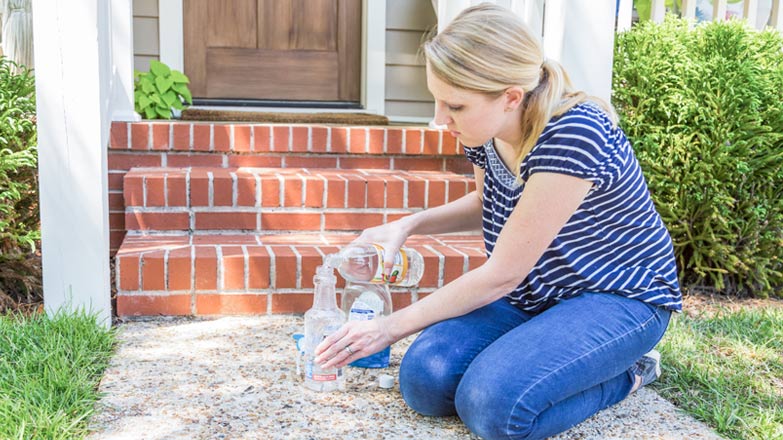
To narrow down the amount of paint our chemical stripper had to strip, we started by manually scraping any obvious chunks of peeling paint with our putty knife and pressure washing the entire surface. It was pretty filthy with mold, mildew and moss growth.😯
Then we were able to start applying the stripper, starting at the top on the landing. We worked on alternating steps at a time so that we could still go up and down the steps without spreading the stripper too much or slipping.
Applying Stripper to Bricks
We originally went with the sprayable stripper thinking it would be good for the vertical parts of the steps and side walls. Unfortunately we purchased it too far in advance and it didn’t spray well by the time we got around to this project. (I’m a chronic advance-purchaser.)
So we persevered and brushed it everywhere instead! We used a lower-quality paint brush to apply a heavy coat of the stripper to the bricks. Even though the stripper was no longer sprayable, an advantage is it starts working within 15 minutes!
If you’ve never used a chemical stripper like this before, you’ll want to wear long sleeves, pants, chemical-resistant gloves and safety glasses. The stuff can burn!!
Since it is ready to scrape in 15 minutes, you only want to apply it to an area you can work on in 15 minutes at a time. It doesn’t do you any good for the stripper to dry on the bricks.
Scraping Vs Power Washing
One of the perks of stripping paint from bricks is masonry surfaces are much more hardy and less-susceptible to damage from a pressure washer. And that was our plan…apply stripper, let it work and then power wash all of the old paint right off.
But it didn’t quite work that easily. It would remove some of the paint but it wasn’t a magic wand that erased all layers of paint right away.
So we tried scrapping it off after the stripper had been applied and it effectively worked the same, without paint jiblets* flying everywhere. (*My 7th grade math teacher used to call the tiny pieces of paper that were torn when you removed a piece of paper from a spiral notebook jiblets. Not a real word, but a word I use all the time nevertheless.)
Sometimes the mental break from physical scrapping was a good reason to use the power washer. And then sometimes we didn’t want to get wet, so we used the putty knives instead! We really did not find that one was an overall winner in the scraping game. It was painfully slow and time-intensive either way.
But we (really just Brandon, though) kept at it and used small pockets of time to get all of the old peeling paint removed from the tops and sides of the stairs and the retaining wall that borders our carport and 1/3 of our patio nearby.
A true laborer of love. Not love of scrapping paint but love for me! 🥰
Clean and Seal
By the time we were satisfied everything had been scraped, some areas had started mildewing again.🤣 So we did one last cleaning with the power washer and let it dry for a day.
Then I was able to start at the top with the landing and coat all of the tops of the stairs with a clear sealer that also adds anti-slip traction.
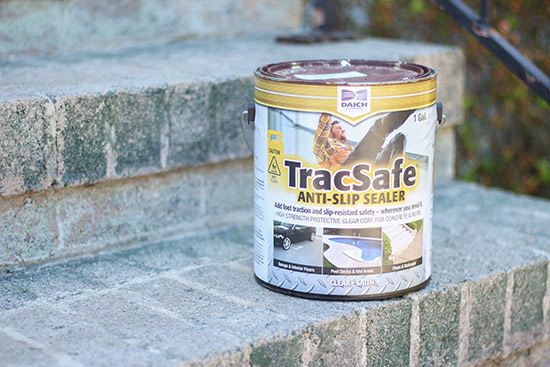
It goes on just like paint! It’s a little milky at first so you can see where you’ve been. But it dries totally clear and without a sheen. I definitely recommend 2 coats, especially on a masonry surface like bricks, to ensure adequate coverage.
A sealer like this offers 2 benefits. One, it seals the pores of the bricks, so water isn’t going to seep into them and cause mold or mildew as fast. It will stay on the top and evaporate into the atmosphere. (Science!🤯☁️) And that also makes it easier to clean them with a quick sweep or leaf blower action.
The second benefit is obviously the anti-slip traction it provides. I honestly don’t know how it works because it’s practically invisible, at least on these bricks.
We’ve also used this same stuff on outdoor wood steps for this Today’s Homeowner project. And I don’t recall there being a difference, once it was dry, between the steps and the un-sealed deck boards.
It doesn’t create a lot of texture that’s visible to the naked eye which I appreciate. Just because your steps are safe, doesn’t mean you want all of your guests to be able to see their ‘safe-ness’.
It can be our little secret, mmmkay?!
Of course now we need to clean and paint the handrails back here so they don’t take away from our paint-free steps. But that’s a project for another month.😴
Do you have peeling paint around your house? It’s so much easier to take care of it and treat it before it becomes a bigger problem!🚫(Each paint brand has a peeling primer similar to this one*.) But if it’s already too far gone, like our house, I hope this gives you an idea of what to do with it!
Thanks for Checking In! ~Chelsea
*This post contains affiliate links. I will earn a small commission without increasing the price for you!*
2 Comments
Catherine
This is very interesting. Will the same process work on a patio slab which I don’t think had sealer put on it before it was painted with paint that had sand in it? Thank you in adviance.
Chelsea Lipford Wolf
Hmm, it’s possible. Is it flaking at all? With it being unsealed beforehand I would say no. But then the sanded paint makes me think it would sit on the surface more and would be able to be stripped off. Not sure that helps, but a trial in an inconspicuous area may be in order! ~Chelsea