Just because your iron handrails are old, rusty, or peeling doesn’t mean you need to replace them! Easily update rusty iron handrails with a little elbow grease, spray paint, and painter’s tape!
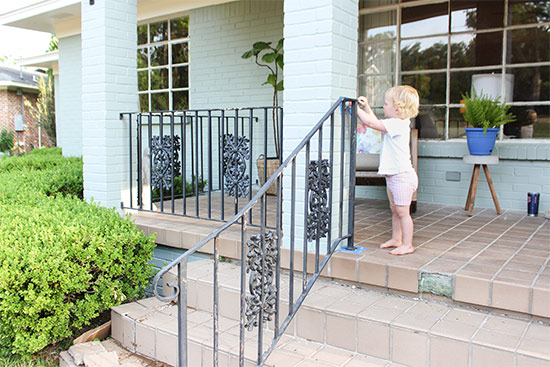
While iron handrails aren’t as popular as they used to be, there are still plenty of them around! Including on the front and back of our house! If yours are starting to peel or there are spots that are starting to rust, you’ll want to take care of them right away to avoid further decay.
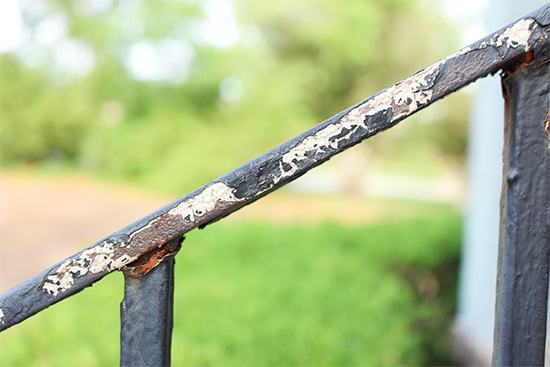
It’s not a complicated process, but it can take a little time depending on how ‘out of shape’ your iron handrails are currently.

If you’ve got wood handrails, here’s how I painted them on our old house and LOVED the results.
Materials for Painting Handrails
- putty knife*
- wire cup brush*
- drill*
- painter’s tape* (a lot)
- plastic drop cloth*
- rust-prohibiting spray paint*
I used about 5 cans of paint for our small expanse of handrail on the front of our house. That is for one coat and some touch-ups.
Prepping Handrails for Paint
The first and most important step in any paint project is the preparation! That can mean something different for each project. So here’s what you’ll want to do to prep your rusty iron handrails for paint.
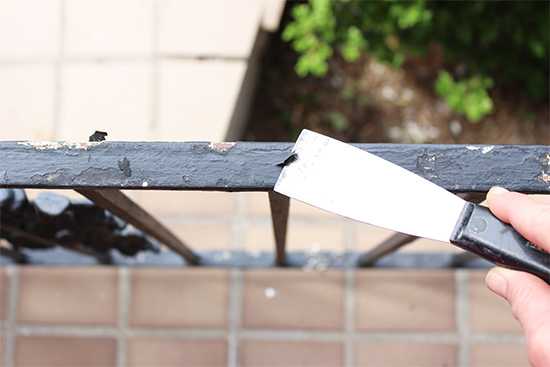
Start with whatever putty knife you’ve got and scrape any pieces of peeling paint, specifically on the straight and flat parts. If you catch your handrails before they get too bad, this part will be quick! If your handrails haven’t seen any love in a good long while, well, good luck! I wouldn’t expect perfection. But anything will be better and keep it from getting worse and unrepairable.
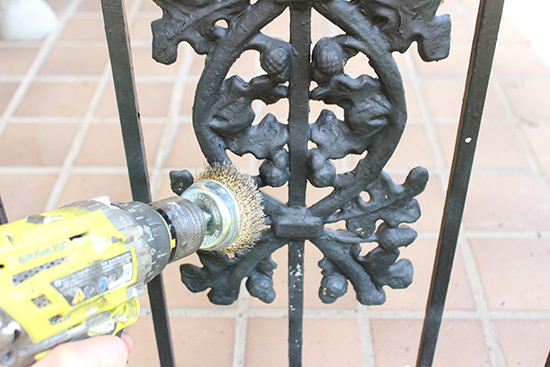
You’ll want to upgrade to a wire brush attached to your drill to sand and remove the peeling paint on any decorative features or rounded details. You can find these near the drill bits at the store!
Now, if you want, go back over the flat parts with 220-grit sandpaper on a power sander. Lightly sand the areas where you removed peeling paint to help feather out those spots.
Cover and Protect
Since I recommend using spray paint for handrails, you’ll want to spend time adequately covering the areas surrounding your rusty iron handrails. This is the most tedious part to me!
Start by applying painter’s tape around each connection point whether it’s a column, the floor or your house itself.
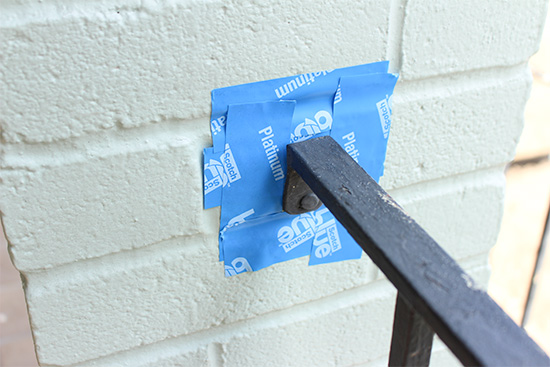
Next, cut a piece of painter’s plastic or plastic drop cloth to give you about 2-3 feet on either side. Cut a slit in the middle and slide it around the handrail fastener. Then add more tape to make sure no paint gets between the plastic and the wall.

You’ll also want to add a few pieces of tape to hold up the rest of your plastic so it doesn’t blow over your fresh paint.
Lastly, use another piece of plastic or a canvas drop cloth to lay on the ground under your handrails. This will protect the porch floor or steps when you’re spraying the bottom rail.
Because I don’t like buying plastic very often, I prepped one section off my handrails, painted it and then re-used the same plastic on the next section.
Spray Those Handrails
Now that the surface is prepped and the adjacent areas are covered, you can go to town spray painting those bad boys! I only recommend using spray paint for this type of project because it’s the easiest and best way to get good coverage without worrying about lap lines and missing any intricate spots.
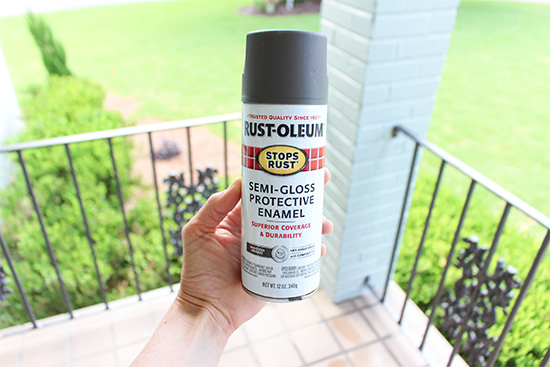
But mostly because most spray paints these day are rust-inhibiting and help protect your handrails from rust in the future!👏🏻 I almost forgot to mention that spray paints are also oil-based which means they’ll stand up to the sun and other elements better and longer. (We used color Anodized Bronze from Rust-Oleum*)
When it comes to spray paint, especially, remember it’s better to do 2 light coats versus one heavy coat. The last thing you want is to have paint dripping off of your handrails at this point!
If you can stand it, wait to remove the plastic until the paint is dry so the wind doesn’t blow it back onto your fresh handrails. Another reason I love spray paint-it dries fast!

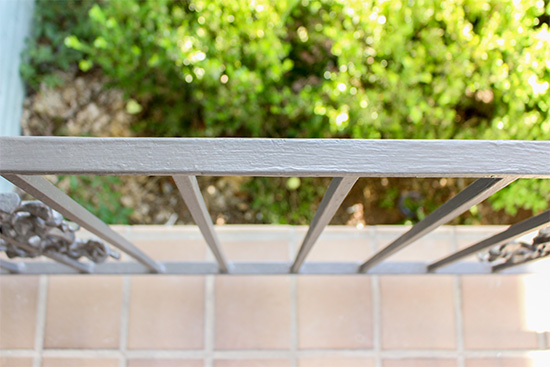
Thankfully when it comes to painting old, rusty iron handrails, the last step is the easiest and quickest! Once the plastic is gone, it’s like nothing happened. Except your handrails look great and you don’t have to grimace anymore when you walk by them. Or maybe that’s just me.😉


If you can’t help but notice my porch plants in the background, here’s how you can make your own concrete plant stand!😍
Thanks for Checking In! ~Chelsea
*This post contains affiliate links. I will earn a small commission from your purchase without increasing the price for you!*


Why is it that I believe that you are able to read my mind, whenever I have a job to do, and don’t know where to start, there you pop up and tell us how to do it. I have a wrought iron hand rail on my inside stairs, and need to remove a ton of paint before repainting it, but didn’t know where to start, low and behold you gave me the answer without being asked. Thank you
Ha! Love this, Jean. Glad we can be DIY soul sisters! ~Chelsea
Soon I will be a pro like you and your dad, I took a step out of the box, and I painted my fireplace black, and I love it. My next task is to spruce up my bathroom counter top, without replacing it, trying not to spend money that I do not have. I know that you will rescue me.
Way to go Jean! We love the countertop kits from Giani! Or just acrylic craft paint with a water-based sealer could work too. Good luck! ~Chelsea
I’ve been looking at doing my hand rail for a couple years now and wasn’t sure to brush paint or spray paint so this was very helpful.
One question I have is did you start spray painting with the top rail or does it really matter? Thanks
Hi Ruth! I’m glad this could be helpful for you! Good question – I would say to start at the top and work your way down. That way if you sprayed the bottom and then got heavy-handed at the top it won’t run down and ruin everything below it. ~Chelsea
I can not find those heavy panels that go in behind the bath tub. Like the ones they install from Bath Fitters. It seams you can only buy the ones that have a seam in them and not the ones that are one pc across the back wall. I want the heavy panels. I went to a company and they said they only sell to company’s that install these. Can you tell me who sells the bath panels. Also can I use Red Gurd on the cement board before I install the panels. Do you have any video’s out on this type of install. I watched your Dad for years on TV. I still watch you guys on the net.
I have aluminum handrails. How does one freshen up those? Thanks for your help and sensible suggestions on all kinds of house and yard options! len
Hi Len! I don’t really have experience with aluminum handrails, but I imagine you would want to sand with 180 or 220 grit sandpaper, apply a metal primer (spray paint!) and then a spray paint of your choice! Thanks for your comment.☺️ ~Chelsea
It was helpful when you mentioned that it is a good idea to do 2 light coats when you are spray painting iron handrails. I would like to purchase some iron handrails for the wooden deck that I am constructing in my backyard. I probably will only need one can of spray paint since I won’t be installing too many handrails.