For a few years now, my dad has been talking about transforming the back patio on his and my mom’s house into a great outdoor kitchen.

The backyard has gone through a few transitions over the years, including adding a beautiful swimming pool my senior year of high school. Which, by the way, was 10 years ago already! Say What?!
Well dad is finally getting his dream kitchen and I got to play a small part.

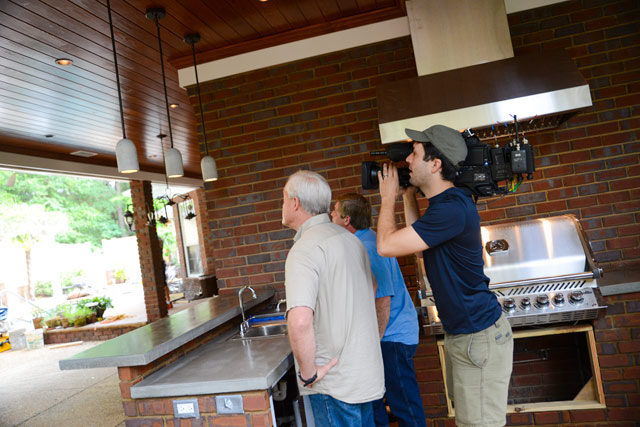
The wonderful exterior designer who helped my parents put their ideas together, Catherine, helped me create some awesome concrete lights to hang above the new bar area. (See more of her cool projects on her website!)
To get started making your own concrete masterpieces, don’t forget to watch the video above for all the details and fun we had along the way. Here are the materials we used:
- Quikrete’s Sand/Topping Mix
- 2 soda bottles, different sizes
- mixing bucket
- pendant cord kit
- mixing spoon
- old coffee can
- drill/driver
- pilot & Phillips bit
- razor knife
- scissors
- cooking spray
- 2 1/2″ screws
- permanent marker
- palm sander
- sandpaper
- eye protection
- waterproof gloves
- light bulb
After removing the labels from our 2-liter and 1.25-liter bottles, spraying the smaller one with cooking spray, and making them into forms using the screws, we mixed up the Sand/Topping Mix. This stuff is so fine, it’s like dust particles. But it’s perfect to create the smooth, finished feel we wanted for the pendant lights.
Since we were making 3 pendant lights to hang next to each other, we definitely wanted them to be the same. So we measured and marked our soda bottle forms before spooning the concrete in to ensure they all came out the same length. We set the forms in old coffee cans while they dried so the top (which ends up being the bottom of the fixture) would be level.
But before it dried too much, we did something silly. We “sanded” the form. OK, what we really did was use a palm sander without any paper on it to get any air bubbles out of the middle of the concrete. Essentially it helps the concrete drop to the bottom and the air and excess water rise to the top, eliminating most holes and pock marks from the finished pendant. It’s also really fun to watch the bubbles coming up…if you’re easily amused like me. 🙂
The pendants sat undisturbed for 20+ hours to cure before we used a razor knife and scissors to remove the plastic bottles from the outside and inside. The inside one is the trickiest, but fortunately it’s ok to scratch up the inside with the knife or scissors since the light bulb will cover it later on.
You can then drill a hole in the top of the light to feed your pendant cord through. We used a pendant cord kit from Lowe’s that’s made to thread your own shade on. But instead of attaching our “shade” with the threads provided, we just fed the cord through and allowed it to basically hang on the top of the cone of the cord kit.
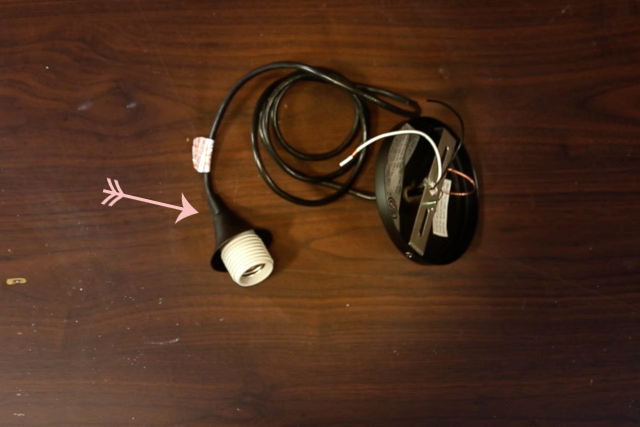
Once the fixtures were wired above, we screwed in some vintage Edison bulbs for a cool look and flipped the switch! (Tips on installing light fixtures can be found in my living room here and my front porch here.)

My favorite part about the lights is that my mom wasn’t sure she would even keep them after installation, but she ended up liking them better than the fixtures she had bookmarked online. Score!
You can watch the entire transformation of my parents’ outdoor living space the weekend of July 1st on Today’s Homeowner TV!
As always, comment below with any specific questions that might not have been clear. I’d love for you to tackle a project I’ve shown and don’t want under-information to hold you back! So just let me know. Thanks for Checking In! ~ Chelsea


I love these concrete pendants! So, cool. You could make so many shapes with this “recipe” if you had different size pendant molds. It makes a difference in a home when you have these kind of personal touches.
That is too cool! My husband is very handy and we have a lower deck that has some awnings attached to the house (if that makes sense) that need lighting. Will have to show this to him, will definitely be back with any questions!
These look super cute and fun! But I think I’d need my Husband to help me out. IF I could get him to help me.Might need to bribe him first haha.
I would have kept the lights too. An outdoor kitchen is on my wish list for our house.
These are really unique light fixtures and who knew you could make them with a soda bottle. I love the concrete look and they look relative easy to make!
They were definitely easy to make! Hardest part was waiting for the concrete to cure before taking them apart! Ha!
Wow, this turned out great! I would have never thought to use concrete for lighting. It looks awesome in this space!
Thanks, Jenna!
That is so cool that this will actually be on TV too! I love working with concrete to make cool kitchen fixtures and such.
This is so fun! I’m not the crafty type but I would love to do this. Lighting can get really expensive and this looks great.
Thanks, Wendy! You could definitely tackle it!
What an awesome tutorial! I think it’s awesome how the pendants match the concrete countertops! I loved the video and am definitely bookmarking for future use!
Great, Tabitha! Thanks for stopping by!
These lights look so simplistic, yet so lovely. I would love to have something like this in our basement. We are hoping to add a bar, and game setup down there. These lights would make for a great addition.
Ooo! They would look good in a basement!
I am in LOVE with how these lights turned out! What a great idea for an outdoor patio space. Thanks for sharing the video such an awesome tutorial to do ourselves.
Thanks so much, Codi Lynn! They’re fun to make too, if you don’t mind getting a little messy! Ha!
These look like they turned out awesome! So modern, plus fairly easy to make at home! Thanks for the inspiration!
Oh these pendant lights look so unique and gorgeous. We’re actually renovating our home at the moment so might add these 🙂
Those are too cool. I like how they look on your patio. Well done.
I like the minimalistic looks of these lights! Great and brings out the room gives it a different flair.
Wow..those lights turned out great!
I wish I had of seen this a month ago when we were changing out the lights in our kitchen. These lights would be perfect in our kitchen.
Wow, amazing! I wouldn’t ever think of hanging my own lights, but this tutorial makes it look so simple. I will be pinning this for future projects, thank you!
That is absolutely beautiful! Love the concrete pendants…wow! First time I’ve seen something like it actually! LOL! Now I want to try making it! Haha!
I LOVE IT!! What an amazing project to do just for your mom! I hope you all get to enjoy making a lot of memories out there!
Thanks, Roxanne! We can’t wait to make memories!
How do you get the cap of the smaller bottle out of the concrete?