How to Make Large Letter for Outdoor Decor

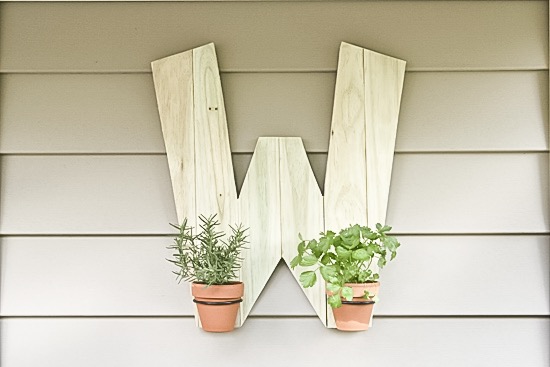
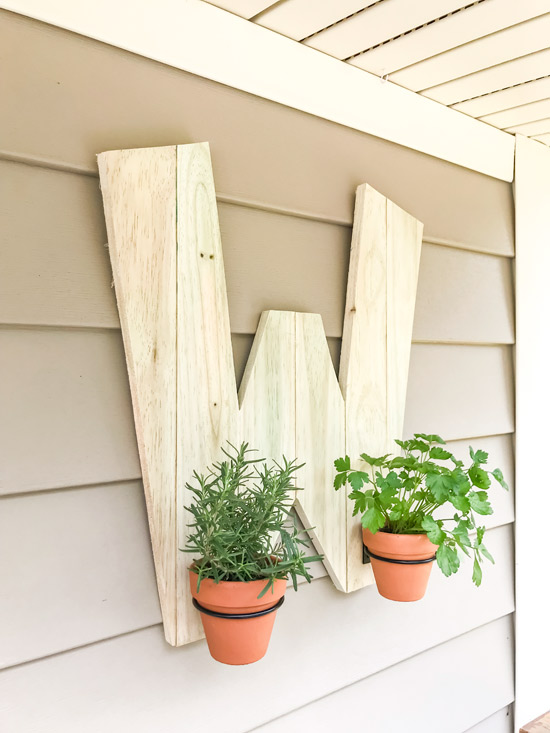
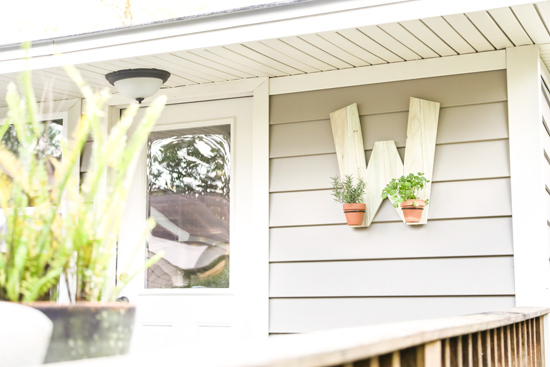
I love a big, bold initial to fill a space. But this time, I’m creating one to hang on the outside of my house!
Materials
- (2) 1x4x8′ pressure-treated boards
- Titebond III Wood Glue**
- clamps* and/or bungee cords*
- circular saw
- jigsaw
- D-ring hangers*
- 4 inch planters
- pot hangers*
- herbs
Measure It Out
Before you can cut your boards, you’ll need to roughly sketch how your particular letter will be cut out. With my ‘W’ for example, the two sides need to be taller than the middle. So I knew I could cut the middle boards shorter but keep the overall scale of the letter large.
Continuing with my ‘W’ for example, I measured, marked and cut (4) 25 inch pieces from the 1x4s. Then cut 2 more shorter pieces around 19 inches.
Prepare to Glue
Since this letter is large and wide, I decided to glue and clamp the 2 halves separately. One reason is because you can get 2 smaller clamps for the price of one large clamp. And since I don’t do woodworking projects of this size often, I thought the smaller clamps would get more use.
Another reason-I didn’t want to use any fasteners, just wood glue. So in order to give the best chance for the glue to make a superior bond, I didn’t want too many boards clamped together at once. It increases the chances of them not being flush and therefore not as much glue-to-wood contact.
But more important than the clamps is the type of glue you use. I only keep one kind of wood glue in my garage because I can use it on indoor and outdoor projects. And since I’m trying to minimize what we keep around our house, having one product that does both is right up my alley!
For this project, I used Titebond III Ultimate Wood Glue**. It’s waterproof (obviously needed for the rainiest city in America!) but also can still be cleaned up with water. And since I still haven’t figured out how much glue to use per square inch, I just use a lot and so clean up is usually necessary.?
**This episode is sponsored by Titebond. However, I’ve never used any other wood glue in my life, so my opinion is honest and 100% my own.**
Clamp It All Together
Let the glue dry as long as your patience will allow you, overnight is best. But since I was eager to finish this project to share with you and Titebond III has a great initial tack, I waited about 45 minutes before carefully moving on.
Before I clamped the 2 sections together, I set them together so I could measure and trace out my W pattern. I measured where each point would be so each half would mirror the other. Then used a spare board as a straight edge to connect the dots. If you have a rounded letter, use a paint can or big bowl to trace the rounded parts. I don’t like my handwriting so I don’t like to freehand if I don’t have to!
To clamp the 2 halves together, I applied glue in the middle and then used a bungee cord! This is a a little cheat to work around buying big clamps. Choose one that starts smaller than your boards are wide so that when it’s stretched out, it pulls the boards together really tight and snug!
Because the hooks of the bungees wrapped underneath the boards, I set 2 scrap boards underneath as well near the middle to keep the boards from caving into themselves and ruining the glue bond in the middle. (Watch the video above to see this demonstration!)
Accessorize
Now this part I would let dry overnight for sure. It’s the weakest point because it’s smaller and it’s in the middle. But while it’s drying you can accessorize! I turned my letter face down before I clamped it so I could go ahead and attach D-rings which will be used to hang it on my house later.
I also planted small rosemary and parsley plants in 4 inch terra cotta pots.
Cut and Hang
After the glue was cured, I was able to cut along the lines previously traced. Use a circular saw for the long runs and a jigsaw for the tight spaces in the middle. A jigsaw is great for rounded parts in letters too! Just go slow and you should be able to follow the line just fine!
I turned my letter over after cutting and attached my pot hangers with small wood screws (not included). And another clever trick I use is to color the screw head with a permanent marker to match the black rings!
To hang this whole glorious initial on my vinyl siding, I used vinyl siding hooks* I recently discovered! They slip into the grooves of the vinyl laps and hook on! No holes required!

Not only does it serve a pretty purpose by beautifying our back deck, but it also serves a practical function! We can clip herbs and put them straight on the grill. Or we can clip them for the kitchen which is right inside our back door!

As much as I love pretty things, I love pretty things that serve a function the most! If you’re trying to create this with a different initial, leave a comment! I’d be glad to try and help you figure out how to clamp and cut your letter out!
Thanks for Checking In! ~Chelsea
*This post may contain affiliate links*


I loved your W Chelsea.
Thanks
Love this idea !
How would I make the letter B ?
Thank you
Hi Carolyn! I would just use 4 boards, about 24 inches in length, glued side-by-side! You can make the outside edge of your left board the straight part of the B and save yourself a cut! Hope that helps. ~Chelsea