-
How to Build a Beautiful Laundry Sorter
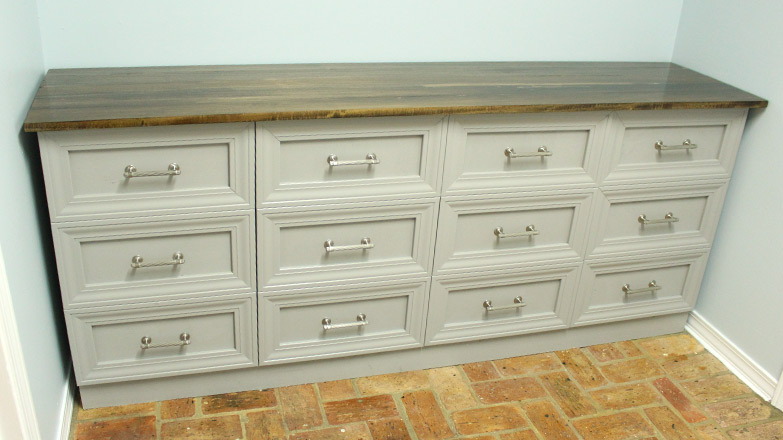
DIY Laundry Sorter That Looks Like a Dresser Plans for building a laundry hamper sorter that actually looks like a dresser. Such a pretty way to dress up your laundry room while adding function at the same time! It’s finally here! The tutorial you’ve all been waiting for! Or maybe it was just me? The laundry sorter-that-looks-like-a-dresser is complete after I think a month of trying to work on it. But that was more my schedule and timing than the time it took to actually make the thing. It looks like a dresser with 12 drawers…but it’s actually 4 pullout hampers! The color is Casual Gray from Behr* and the…
-
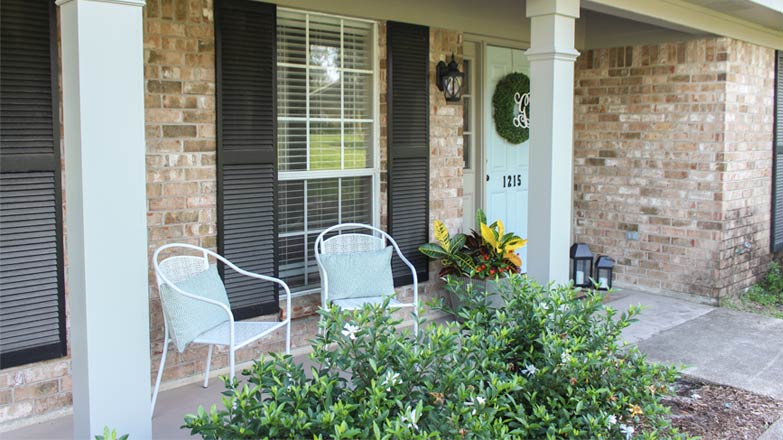
DIY Large House Numbers
Did you know that you’re required to have the street number of your house clearly visible either on the house itself or on your mailbox? I remember reading that when I was researching how high to set my mailbox back in 2011 when I moved in. (There was an elderly lady who lived here before me who had a mailbox mounted on the house. I wasn’t allowed to use it since I’m able-bodied. I still have it displayed in my office though!) Well, just because something is a necessity doesn’t mean it can’t be fun! I used the same techniques used in this video to create them, just on a smaller…
-
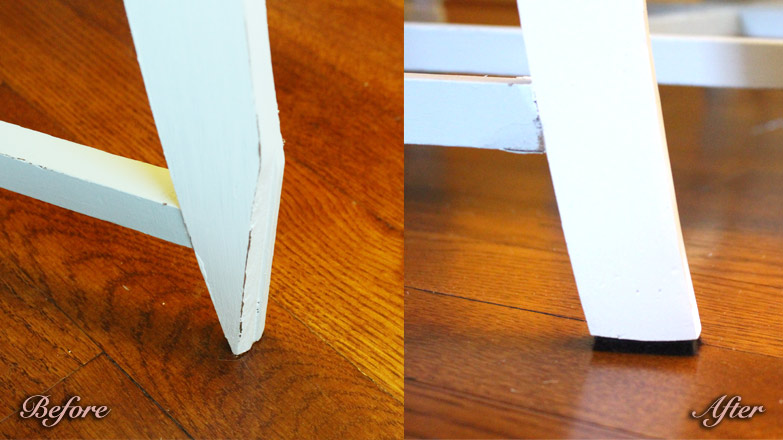
How to Repair Wooden Chair Leg
Projects are moving slow in the Wolf household. But it’s for good reason. We were away this past weekend celebrating my youngest sister’s graduation from Auburn University. Mary Helen got into the War Eagle spirit too! Her father may disown her since he’s a diehard fan of the Notre Dame Fighting Irish, but she’ll redeem herself with all of the ND gear she’ll be sporting come football season this fall! Go Irish! Before we headed north to the plains of Auburn, Alabama, though, I put the finishing paint touches on my dining room chair repairs! And I’m so glad I did.
-
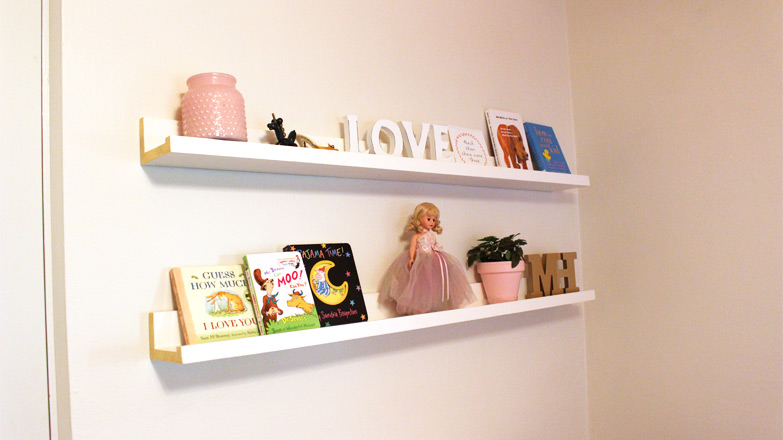
Living on the Ledge
As the calendar inches closer to my due date (t-minus 6 days…), I’ve been cutting back on projects around the house. But I undertook one last project in the nursery this week with some help from dear ole Dad. We built these simple picture ledges to hang above the diaper changing station on my old dresser. It really helps fill a void in the room! Plus it adds a neat place to keep books and pretty things. I originally got the idea when I saw some inexpensive ledges just like them at IKEA (Ribba Picture Ledge). But they didn’t have the longer length in white. I briefly thought about spray…
-
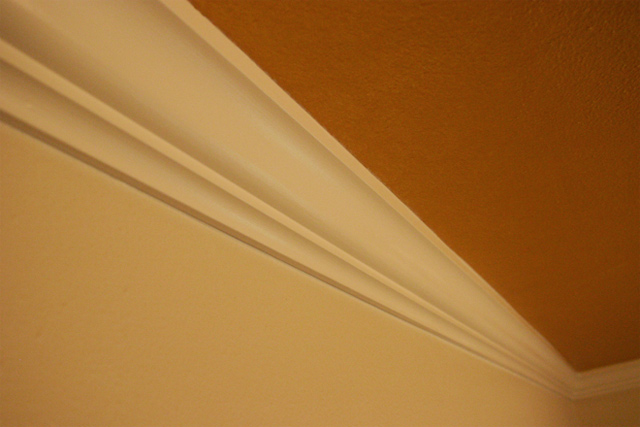
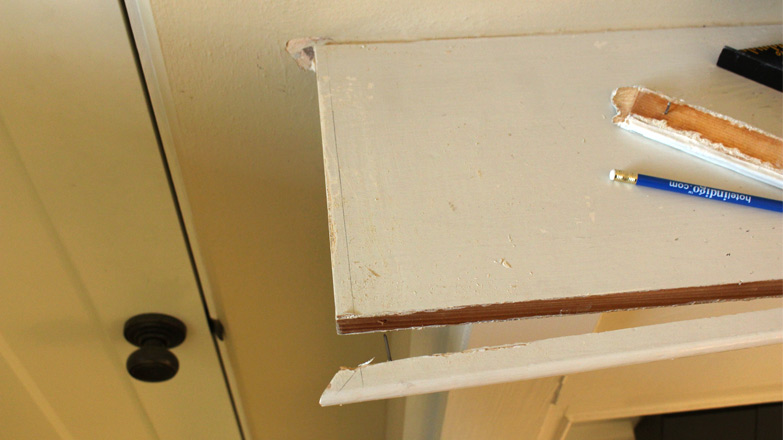
How Not to Hang Crown Molding
We had quite the experience trying to hang crown molding on our plaster walls! Read more to see how we ended up getting it to "stick"!
-
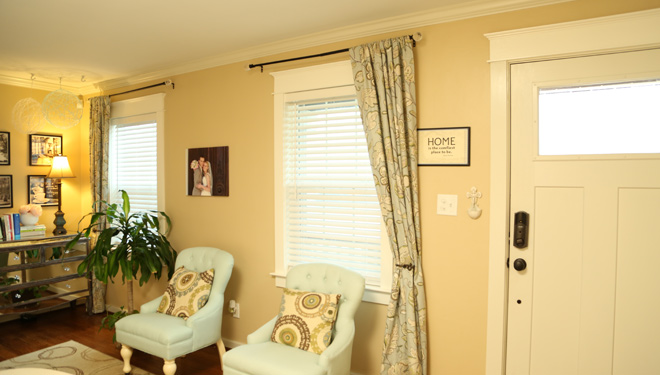
Final Window Trim Roundup
I've put the finishing touches on my window trim and the results are mighty fine. Click to read any steps and tips you'll need to complete this project.
-
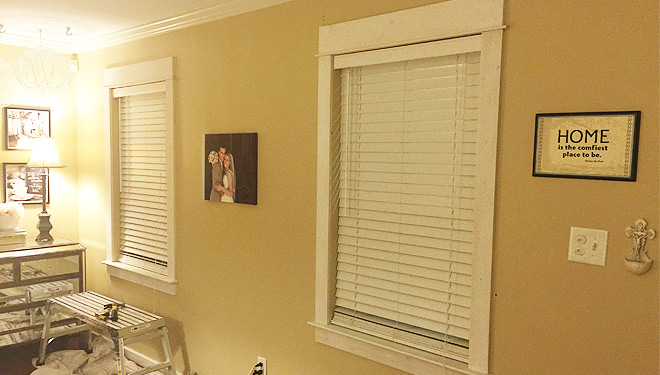
Trimming Right Along
One step at a time to spruce up my living room area and I'm starting by adding trim around the windows. Click to read how you can add Craftsman style trim in your house!
-
Brick Wall, Waterfall
Brandon and I rebuilt our front retaining wall over a 3 week period. Hope the unfinished state of our project along the way didn't disturb our neighbors! Read to find out more!
You May Also Like

Building with Community
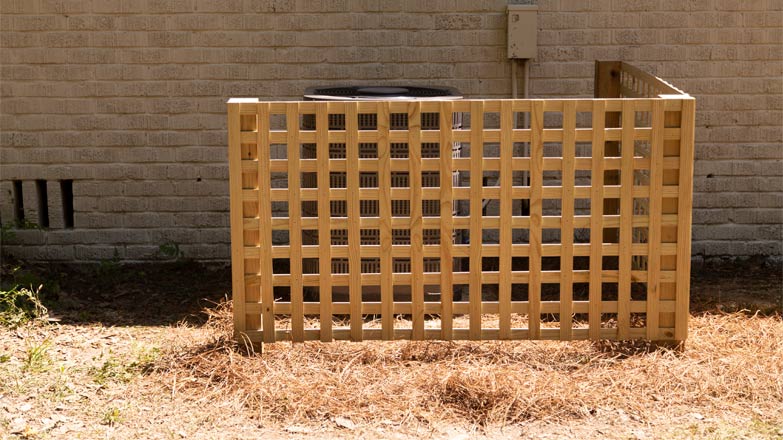
Hide Your AC Unit with a Trellis
$200 Front Porch Makeover
-
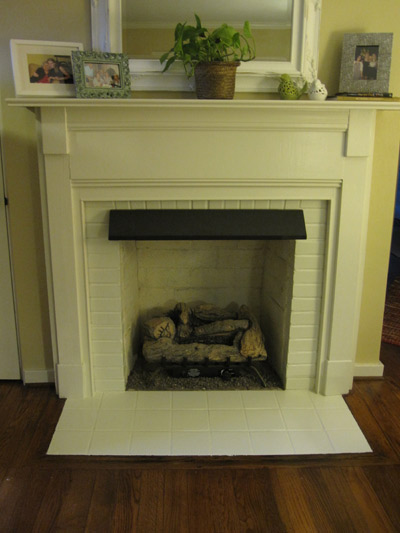
Guess Who’s Back with a Brand New Hearth
The red brick around my fireplace and maroon hearth tiles didn't do much for the décor of my living room, but I found a way to improve it by painting the brick and tile white. Read on to find out how I went about it.