Checking In With Chelsea

DIY ideas, crafts, and tips for your home

subscribe and never miss a thing!

Receive Free Email Updates

  • About
  • Videos
  • Projects
    • Indoor Projects
    • Outdoor Projects
    • Craft Projects
  • House Tour

Final Window Trim Roundup

March 4, 2015 By Chelsea Lipford Wolf 6 Comments

Believe it or not, it has taken me close to a month to complete my window trim from start to finish. No, it shouldn’t have taken that long. But sometimes I enjoy sitting on my couch and watching my TV shows more than caulking, puttying, and painting window trim. (Also hard to believe, right?!)

But I’m done and feeling very victorious!

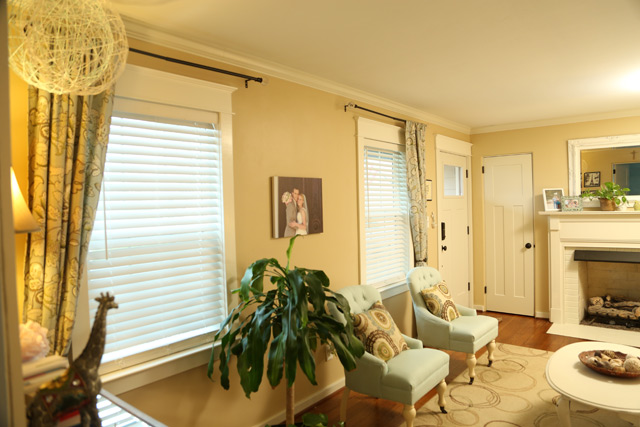
robbin eggs blue tufted chairs in yellow living room with white craftsman window trim

My last post about this trim was pertaining to cutting and installing the bed molding that went on top.

Since then, I’ve applied putty to all of the nail holes and applied caulk to all of the new cracks I created by nailing wood to the wall.

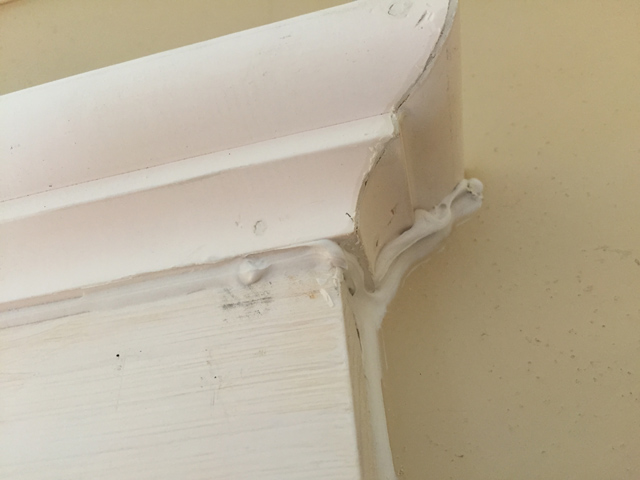
If you’ve ever used caulk before, you know it makes a world of difference in the finished product. And this trim is no exception. You’ll want to apply it where every piece of wood meets the drywall and meets another piece of wood. The hardest place to do this was at the top where the bed molding meets the wall. It’s easy enough to squirt the caulk along the curves, but smoothing it out is a more difficult story.

gobs of white latex caulk on bed molding

Patience is key when it comes to any caulking task, I suppose.

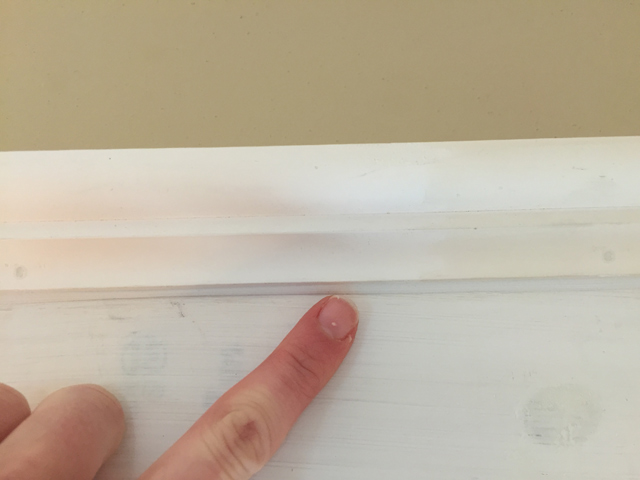
Other places to apply caulk include between the bed molding and 1×6 header,

finger pointing at caulk under bed molding

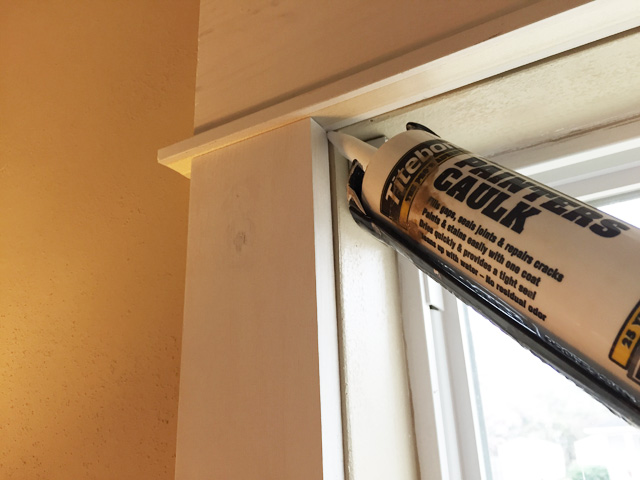
at the 1/8 inch reveal between the drywall return and new 1×4,

titebond painter's latex caulk tube in caulk gun window trim

and along every edge of the new stool and apron.

white caulk on window stool

white caulk on primed 1x4 window apron and stool

Clearly I’m more of slap it on and clean it up later type of caulker. Geesh, that’s a lot of caulk!

Once the excess caulk had been wiped away and it dried overnight, I used my palm sander with 120-grit sandpaper to rough-up the drywall returns surrounding the windows. That includes the 2 sides and the drywall at the top. Since drywall is finished to be smooth, this helps it mimic the look of wood (which is the same reason for the 1/8 inch reveal during the installation of the 1x4s).

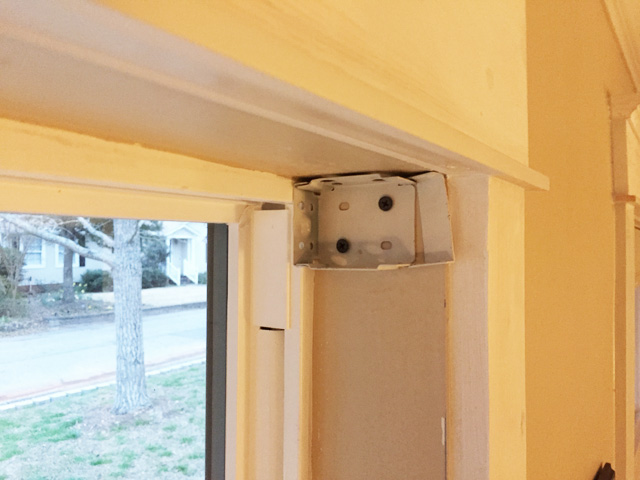
After wiping the dust and removing the bracket that hold the blinds,

white bracket for faux wood blinds

I was able to apply the first and second coats of paint (Benjamin Moore Simply White color-matched in Behr). I really appreciated my forethought in pre-priming everything at this point. One less coat of tilting my head sideways to carefully cut in along the walls.

The brackets were reinstalled in the same place after the paint had dried and the blinds were hung with care so as not to scuff the fresh paint.

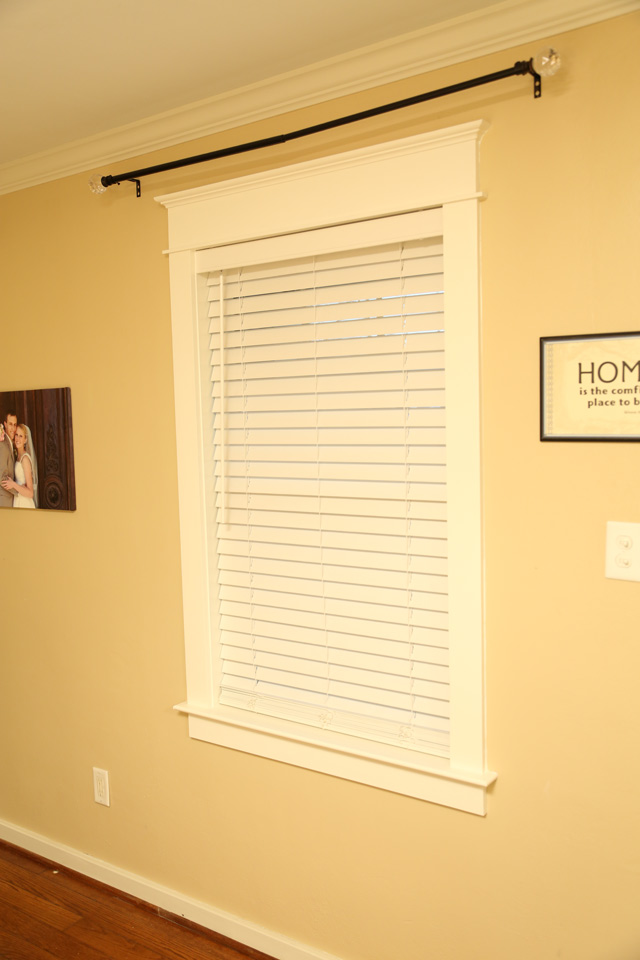
craftsman window trim without curtains

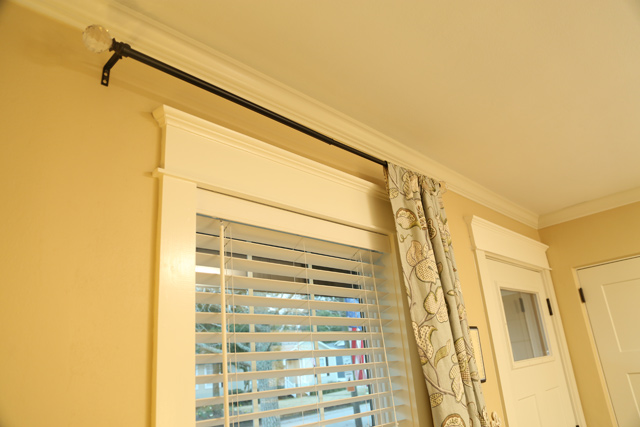
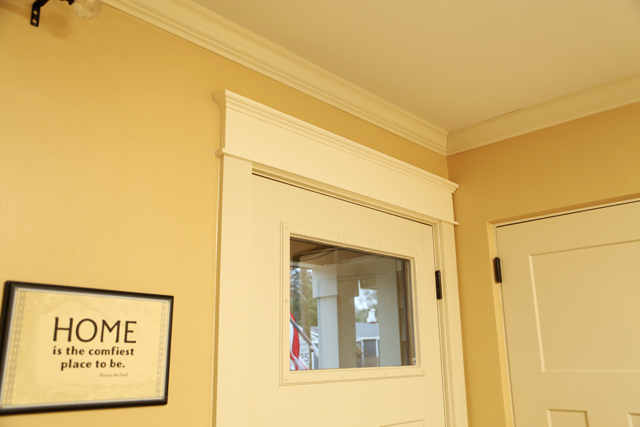
Oh yea. I almost forgot to mention that while I was trimming out the windows, I also replicated the same header over the front door. It previously had just a 1×4 that I removed for the cause of matching trim.

craftsman trim above window and white front door

New Header Above Front Door

This can be filed under “Improvements No One But You Would Notice” category. That is until I proudly point it out to any visitors. 🙂 But it’s still worth it since no one enjoys my home as much as I do! (Well maybe my husband, too.)

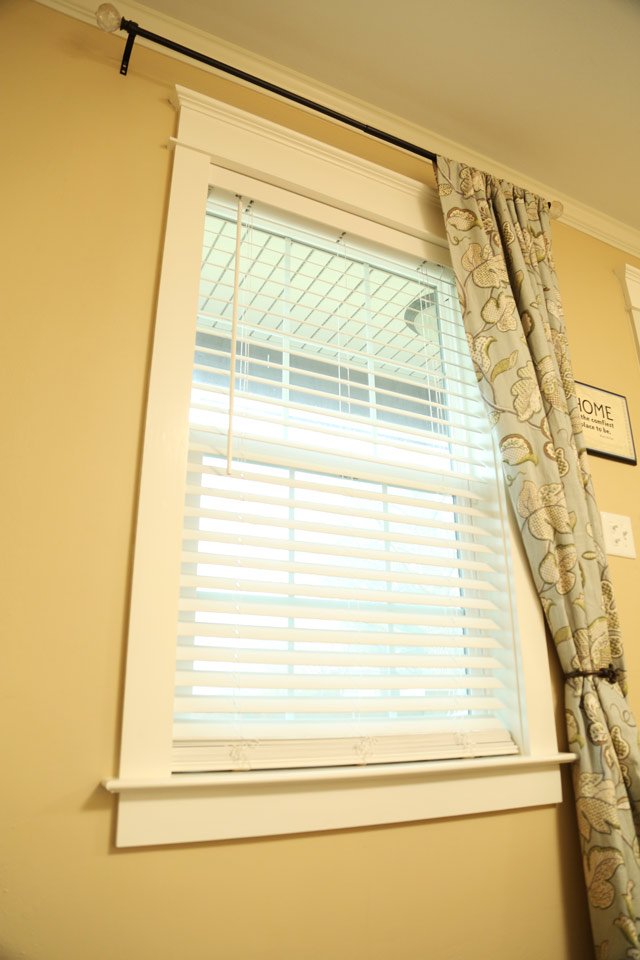
white faux wood blinds hanging in window with craftsman trim

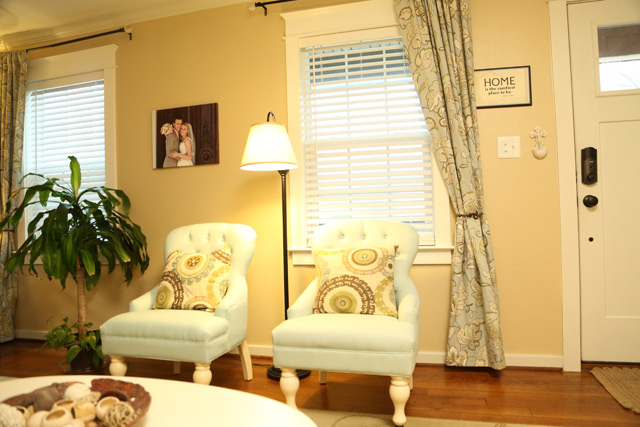
I’ve rearranged my blue chairs since I thought up my living room to-do list.

living room with blue chairs yellow walls

But the arrangement is still a work in progress since the tree/plant is just kind of there.

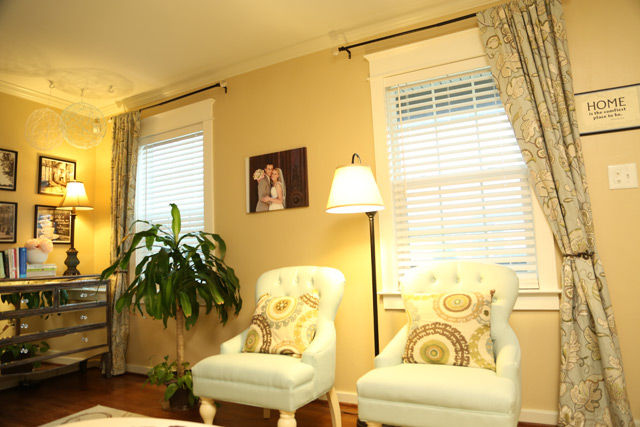
View from Couch of Completed Trim

And now it’s even more obvious that since I moved the mirrored dresser with the lamp on it, it’s really time to improve the wall hangings between the two windows. (The picture canvas isn’t even centered. Oh the shame!) All in time, I guess!

Anyone have any recommendations on a table to go between the 2 chairs? Or does the tall lamp fill in the space, OK? Any advice on rearranging or decorating this side of the room is welcome!

Thanks for Checking In ~ Chelsea
Subscribe for Free Updates!

Stay up-to-date on Chelsea's latest projects, tips, useful resources and more.

Previous Post
Featured on Today’s Homeowner: Efficient Kitchen
Next Post
Crafty Closet Makeover

Related Content

Brick Retaining Wall How to Waterproof and PaintWaterproofing Vertical Masonry WallSitting on Back Steps After Finally Sealing BricksStripping Paint from BricksCompleted Wire Shelf Pantry UpgradeWire Shelf Pantry MakeoverCompleted $200 Front Porch Makeover$200 Front Porch Makeover

Comments

  1. Sandy says

    April 5, 2015 at 1:54 pm

    Chelsea, your home is simply adorable! You have worked so hard on it and it really shows.

    My recommendation on the chair placement is yes, they need a table….a small round one. I also would center them between the two windows.

    Thank you for sharing your home and talents with us.

    Be blessed,

    Sandy

    Reply
    • Chelsea Lipford Wolf says

      April 8, 2015 at 1:10 pm

      I appreciate your suggestion, Sandy! Thanks for Checking In! ~ Chelsea

      Reply
  2. rob says

    January 7, 2020 at 12:01 am

    This is just what I have needed to find. Thank you! This is great!
    What do you do to cover the top part of the blinds? I see you have it covered, wondering how you did it?

    Reply
    • Chelsea Lipford Wolf says

      January 10, 2020 at 1:46 pm

      Hi Rob! It’s a plastic piece that came with my blinds! ~Chelsea

      Reply
  3. Julia says

    May 15, 2021 at 12:34 pm

    Thanks so much for posting this! I just had this kind of trim installed around some french doors and I was trying to figure out a way to have drapes but still showcase the header. Thanks! It looks great

    Reply
    • Chelsea Lipford Wolf says

      May 21, 2021 at 10:37 am

      Whoop! So glad it could help you! ~Chelsea

      Reply

Please Leave a Comment Cancel reply

Your email address will not be published. Required fields are marked *

Welcome!

I’m Chelsea. DIY
enthusiast who loves
sharing my victories
and mishaps!
Learn more
here.

CHECK IN WITH CHELSEA ON INSTAGRAM

Thank Heaven for little girls!💕The best part of Thank Heaven for little girls!💕The best part of having daughters is getting to dress them up in clothes from my baby hood.😍🥰Not sure where Clara got her dark hair but it’s a fun change to have a baby with actual hair this time around! Doesn’t she look like a little baby doll?!
.
.
#newbornlife #changingtable #babygirl #thankheavenforlittlegirls #mommasgirl #allpinkallthetime
Welcome home Baby Clara! We love you so much alrea Welcome home Baby Clara! We love you so much already!💕
.
.
#welcomehome #familyofsix #babygirl #happybirthday #3girls1boy
Monogrammed washcloths and clear hooks was an inex Monogrammed washcloths and clear hooks was an inexpensive fix to a constant headache in my kids’ bathroom!🤯 As with many organization projects, hanging it on a wall makes all of the ugly go away!👏🏻
What simple fixes have you done around your house lately?Washcloths used here➡️ https://amzn.to/3bd9Gpv
Clear hooks here➡️ goto.target.com/zaGZ5x
She’s a Brick. House. Who went through mighty mi She’s a Brick. House. Who went through mighty mighty changes to get here!👏🏻Peeling paint was our nemesis on this project, but we eliminated it with persistence and determination. 👊🏻
.
.
We took it a step further by waterproofing these bricks to PREVENT paint from peeling in the future. A fresh coat of matching house paint and it’s like it was always meant to be🥰
.
.
All the details are in my latest blog post which is linked in my profile now! I know it’s not a project on everyone’s list but save it if you have a painted brick house or retaining walls around!
.
.
#brickhouse #paintedbrick #bricksteps #homemaintenance #homerepair #diyrepair #diyhouse #diyhouseprojects #diypainting #ironhandrails #wroughtiron #wroughtironwork
Still pregnant over here🙃Just finished up these Still pregnant over here🙃Just finished up these concrete spheres and will have a video to share soon! I first discovered them visiting my sisters in Mountain Brook, AL. They seem to be used to keep people from parking in the yard along the street. But I think they are so neat just as yard decorations! What other purposes could they serve?
.
.
#rainymonday #39weekspregnant #yardwork #paintedbrick #exteriorrenovation #cedarshakes #cornerhouse #lawndecor #yarddesign #yarddecor #yarddecorations
For my 4th baby, clothes become nursery decor. Bud For my 4th baby, clothes become nursery decor. Budget-friendly and practical. But how stinking sweet?! Most of these my sisters and I wore as babes 30 years ago😳Still trying to figure out the origin of the sweet blue dress though.🤔
.
.
What have you reused or repurposed as wall decor in a nursery or other space? I just love personal touches like this!
Load More... Follow on Instagram

Indoor Projects Outdoor Projects Craft Projects
Facebook Pagelike Widget
  • Contact
  • FAQs
  • Advertise with Chelsea
  • Media
  • Today’s Homeowner

Search This Site

Receive Free Updates Via Email

Copyright © 2022 Checking in With Chelsea • All Rights Reserved