Checking In With Chelsea

DIY ideas, crafts, and tips for your home

subscribe and never miss a thing!

Receive Free Email Updates

  • About
  • Videos
  • Projects
    • Indoor Projects
    • Outdoor Projects
    • Craft Projects
  • House Tour
You are here: Home / Indoor Projects / Laundry Room Makeover Revealed!

Laundry Room Makeover Revealed!

December 27, 2016 By Chelsea Lipford Wolf 5 Comments

The laundry room is done, done, done! So that means it’s time for a full reveal of the space with everything decorated and pretty and not at all how it will be in real life! Ha! There’s also a ton of sources at the bottom in case you’re looking for similar items for your home!
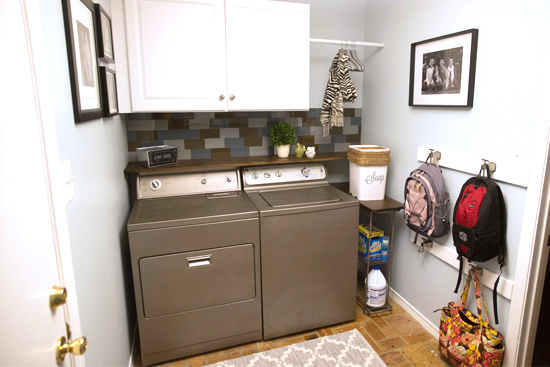
Washer and Dryer Side of Completed Laundry Room

This side of the room is where the biggest changes took place. Besides the immediate change from painting the walls, I created a drop zone for backpacks, updated a thrifted laundry cart, hung cabinets above the washer and dryer, painted the washer and dryer, created a ledge and installed a glass tile backsplash.

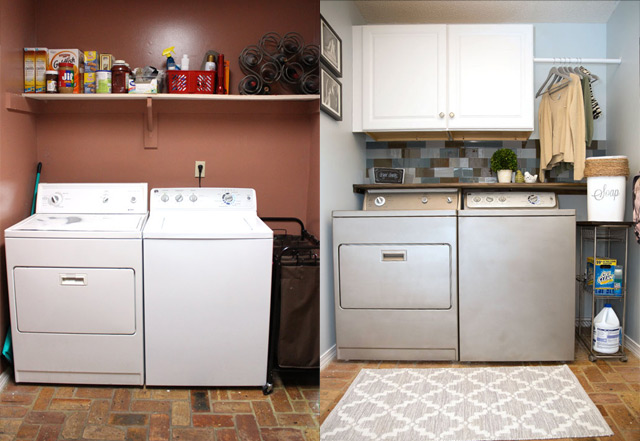
Here’s what it looked like before:
Washer and Dryer Side of Laundry Room Before Updates

Just a tad different…

Laundry Room Before and After Washer/Dryer Side

The cabinets serve their purpose as overflow pantry storage well.
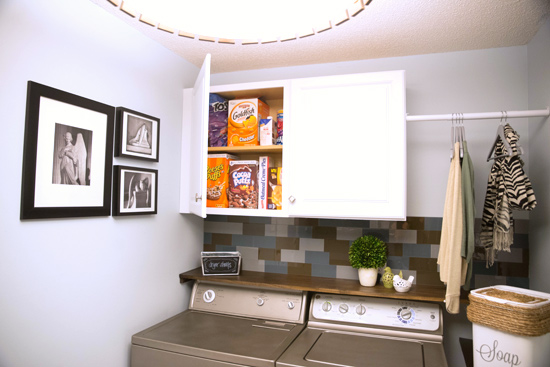
Cabinets with Overflow Pantry Items in Laundry Room

And the washer and dryer are looking a lot fresher.
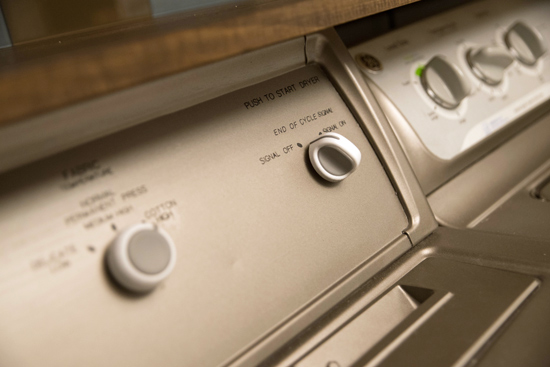
Dryer Controls After Painting and Vinyl Stickers

Oh and I can’t forget the lovely repurposed laundry detergent container.
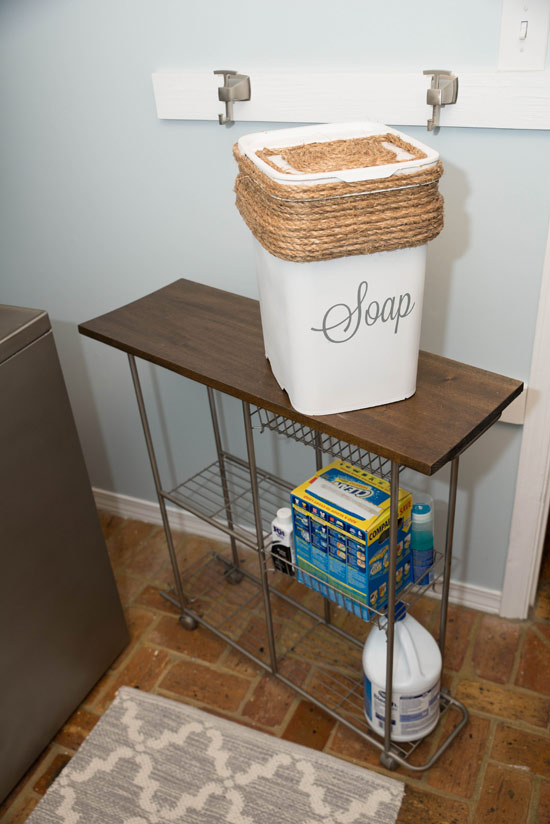
Stained Laundry Cart in Completed Laundry Room

Stepping back a little you can see the wood-toned light fixture I installed to replace the old fluorescent.
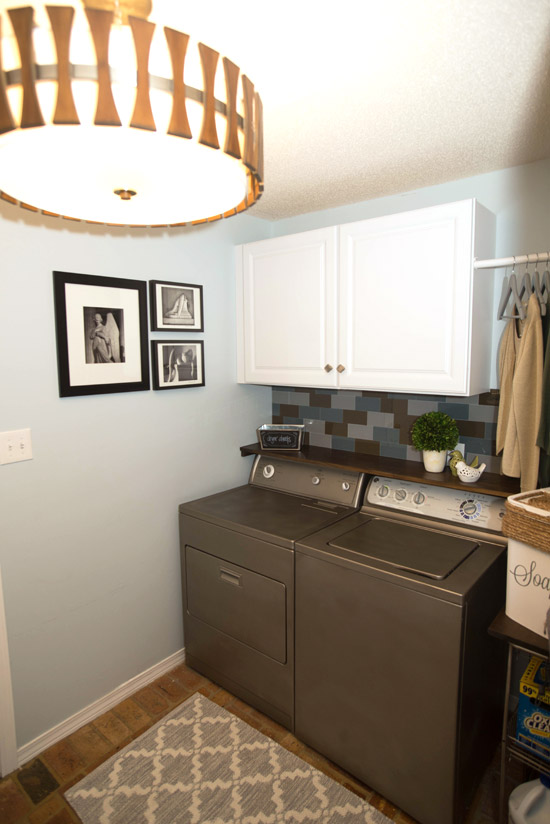
View of Laundry Room from Kitchen

The opposite side of the room is nothing to scoff at either. The before picture really shows the lack of storage that was available before I got started.
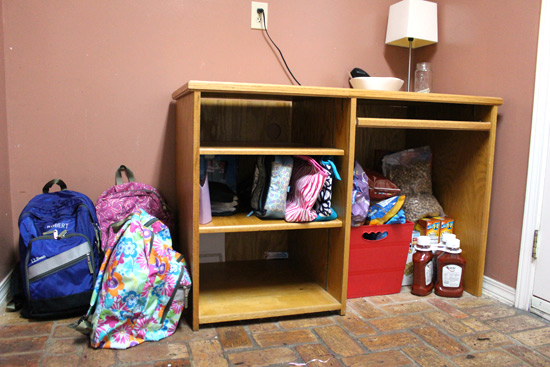
Laundry Room Opposite Washer Dryer Before

And after building a DIY laundry sorter and hanging a cube organizer on the wall, it’s way more functional and stylish.
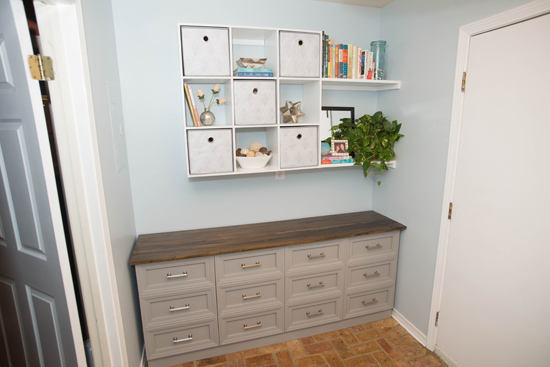
Cube Organizer and Laundry Sorter After Makeover

The bins in the cubes are great for hiding smaller household items like light bulbs or batteries!
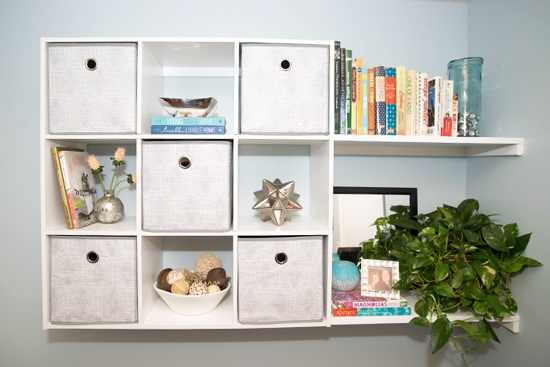
Bins Used to Hide Stored Items on Wall

It definitely took me a lot longer to complete this from start to finish than I had originally thought and planned. It’s totally different working on a project that isn’t in your own home. Also there’s that little 1 year old cutie that slows me down. But the results make it worth it!

I’ve been citing sources as I’ve shared individual project tutorials. But I’m including them below as well so everything is in one spot! If there’s anything I missed that you’d like to know about, comment and I’ll let you know!

And a big thank you to Moen, Amerock, RYOBI, Aspect, and Kichler for donating tools and materials for this project!

Sorter Pulls – Amerock Hardware Sea Grass

Cabinet Knobs – Amerock’s Carolyne Collection

Wood Stain – Minwax Espresso

Hooks – Moen Hensley

Cube Organizer (similar)

Light Fixture

Cabinets – Hampton Bay found at Home Depot

Glass Tiles – Storm Cloud, Sienna Bark, and Steel from Aspect Peel & Stick Tiles

Washer and Dryer Paint – Rust-Oleum Professional Enamel Spray Paint in Stainless Steel

Wall Paint – Behr Offshore Mist

Thanks for Checking In with me throughout this project! I hope you’ll check back in again soon and see what else I’m up to. Hopefully I’ll be improving something at my own house ! ~ Chelsea

Subscribe for Free Updates!

Stay up-to-date on Chelsea's latest projects, tips, useful resources and more.

Previous Post
Have Yourself A Merry Christmas!
Next Post
Upcycle: Potting Bench

Related Content

Completed Hand Painted Pennant Flag Banner Kid BedroomDIY Pennant Banner for Kids RoomCompleted Large Lighted Two and Zero NumbersDIY Lighted Marquee NumbersBrick Retaining Wall How to Waterproof and PaintWaterproofing Vertical Masonry WallSitting on Back Steps After Finally Sealing BricksStripping Paint from Bricks

Comments

  1. freidia Martindale says

    December 28, 2016 at 6:42 pm

    Love, Love, Love the end result!

    Reply
    • Chelsea Lipford Wolf says

      December 29, 2016 at 8:14 am

      Thanks, Freidia! ~Chelsea

      Reply
  2. Sandy says

    January 12, 2017 at 9:26 pm

    Beautiful! Great job! Please share how to replace lettering and numbers around washer and dryer knobs after paintng.

    Reply
  3. Tunya Foster says

    January 14, 2017 at 3:50 am

    I’m in desperate need of a laundry room makeover ASAP!

    Reply
    • Chelsea Lipford Wolf says

      January 15, 2017 at 10:32 pm

      Take it one project at a time, Tunya, and you can get it done! ~Chelsea

      Reply

Please Leave a Comment Cancel reply

Your email address will not be published. Required fields are marked *

Welcome!

I’m Chelsea. DIY
enthusiast who loves
sharing my victories
and mishaps!
Learn more
here.

CHECK IN WITH CHELSEA ON INSTAGRAM

Ask me how I know😑Whether you’re doing a smal Ask me how I know😑Whether you’re doing a small patch or a whole room, this drywall sanding hack will keep the dust at bay and keep the rest of your house looking good😎
.
.
#drywall #diyhack #tipsandtricks
A Spring Break to remember! Thanks to CeeCee and P A Spring Break to remember! Thanks to CeeCee and Pop Daddy for bringing the Wolfpack along on vacation! A long travel day ahead of us but it’s always worth it to spend time with family and get some r&r.☀️😴 Happy weekend!
9 years!✨Brandon and I will be celebrating 9 yea 9 years!✨Brandon and I will be celebrating 9 years of marriage this week. And how perfect we were invited to a wedding tonight walking distance from our home.🥰Sometimes reality is better than the movies and this weekend is one of those times. Enjoy, friends!☀️
What else do you use paper plates for besides eati What else do you use paper plates for besides eating?? Spray paint onto a paper plate and dab a small paint brush to do spot touch ups! Life hack when you’re working on a project but don’t need to paint the whole surface!👏🏻
.
.
#lifehack #diyhacks #spraypainting #painttips #paintprep #paintpro #shutters #craftsman #1940style
Didn’t mean for this to be #ASMR but here we are Didn’t mean for this to be #ASMR but here we are!🤷🏼‍♀️ I bought this orchid 15 months ago to use the flowers in our hair for my sister’s wedding. I’ve already repotted it once and it’s bloomed 3-4 times! Time to do it again with a pretty new pot that matches our new kitchen cabinets!🤩
.
.
Steps to repot an orchid:
1-large pot without drainage holes
2-plastic pot slightly smaller with holes
3-trim if needed so plastic pot is at or below outside pot
4-add layer of orchid specific potting mix (it looks like bark!)
5-add orchid, fill in around roots with more bark- don’t forget to add some mix under the leaves!
6-to water, soak bark and fill up outside pot, rinse the leaves too!
7-let sit for 5-10 minutes, then drain and dry the outside of your pot.
8-set in place and enjoy!🌷
New laundry, who dis? Our laundry room was a BLANK New laundry, who dis? Our laundry room was a BLANK slate after the kitchen renovation left it reconfigured too. So Dad and I tackled simple projects that make this space functional and of course visually pleasing too!👏🏻The full project airs this weekend on @todayshomeowner!
.
.
I love that the cabinets and hardware match what we have in the kitchen since the spaces are right next to each other! Synergy!
.
.
What do you love about your laundry room?
Load More... Follow on Instagram

Indoor Projects Outdoor Projects Craft Projects
Facebook Pagelike Widget
  • Contact
  • FAQs
  • Advertise with Chelsea
  • Media
  • Today’s Homeowner

Search This Site

Receive Free Updates Via Email

Copyright © 2023 Checking in With Chelsea • All Rights Reserved