Checking In With Chelsea

DIY ideas, crafts, and tips for your home

subscribe and never miss a thing!

Receive Free Email Updates

  • About
  • Videos
  • Projects
    • Indoor Projects
    • Outdoor Projects
    • Craft Projects
  • House Tour
You are here: Home / Indoor Projects / Ditching the Fluorescent

Ditching the Fluorescent

November 7, 2016 By Chelsea Lipford Wolf 13 Comments

Something that’s been hanging over my head (quite literally) the last few weeks while working at the laundry room project turned out so much better than I expected!
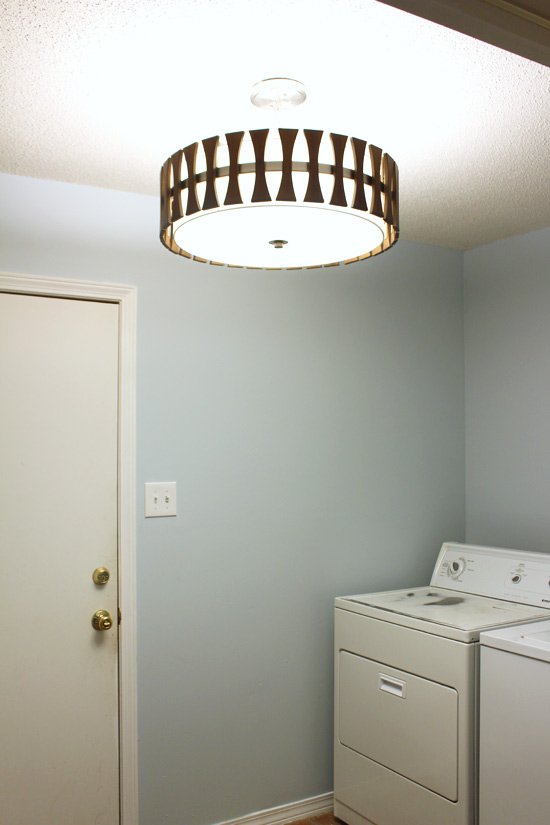
Light Fixture Hanging Above Washer and Dryer

I was nervous to ditch the old fluorescent light fixture since the one advantage to having a fluorescent is how much light they give off.
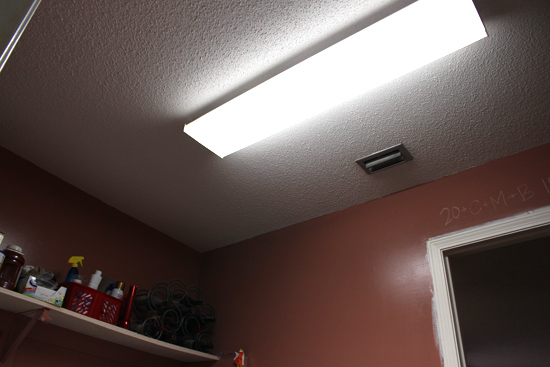
Fluorescent Light Fixture Hanging in Laundry Room

But my worry was unfounded since the fixture the homeowner, Stephanie, and I picked out had 4 bulb sockets, up to 100 watts each! Oh and did I mention it’s a real looker too?!

Wood Tone of Light Fixture Surround

Hubba hubba! It’s from the Cirus collection from Kichler. (*They graciously donated the fixture for this project. All opinions are 100% my own).

We landed on this fixture for several reasons. With only 8 foot ceilings, we couldn’t get a glamorous chandelier like a fresh laundry room deserves. So we searched the semi-flush mount options that wouldn’t be flush against the ceiling, but also wouldn’t hang down too much either. And then it has that beautiful wood tone that gives it a fun wow factor!

Changing out the light fixtures was relatively uneventful since I turned off the breaker to the fixture first. 🙂 But I was very impressed that this fixture came with a hook designed to hang the fixture close enough to do the wiring without having to hold or prop it up. What a relief since I was installing this bad boy all by myself!
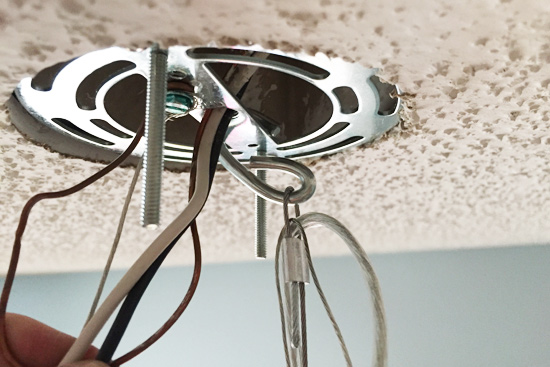
Hook Holding Fixture in Place for Wiring

Once the new fixture was installed, I then had plenty of light to repair the 2 holes in the ceiling left behind by the fluorescent. They were smaller than a quarter, but still noticeable!
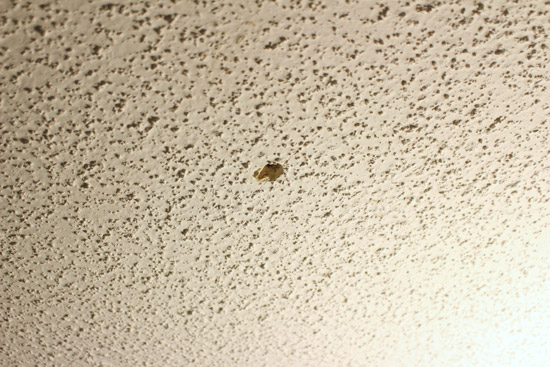
Hole Left Behind by Fluorescent Light Fixture

First step was to fill the hole. I used white painter’s caulk and tried to make it flush with the drywall, not the texture.
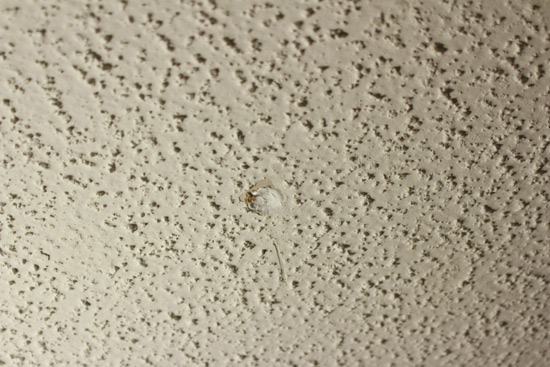
Hole from Fluorescent Filled with Caulk

Then I shook up some popcorn-texture-in-a-can.
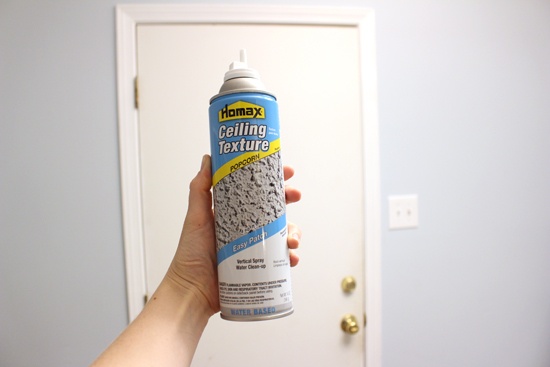
Homax Popcorn Ceiling Texture Can

I did a few test sprays outside on some cardboard since I’ve never used this stuff before. Then I covered the floor with a drop cloth and followed the directions on the can, lightly spraying my repair area.

Hole in Ceiling Covered with Popcorn Texture

If you know what you’re looking for, you could spot the repair area. But to the untrained eye, you wouldn’t ever know there used to be a hole there! I call that a remodeling win!

I once heard a designer call light fixtures the jewelry of the room. And I think that’s a good way to look at it! This light fixture would be a bold, statement necklace for sure! What do you think? What kind of lighting situation to you have going on in your laundry room? Please share below! Mine’s a fluorescent, unfortunately!

Thanks for Checking In! ~Chelsea

Subscribe for Free Updates!

Stay up-to-date on Chelsea's latest projects, tips, useful resources and more.

Previous Post
How To Hang A Cube Organizer
Next Post
Adding a Stained Top to a Metal Cart

Related Content

Small Laundry Room Makeover Facelift CompleteDivide and Conquer Laundry Room ClutterMaster Bathroom Layout Floor Plans with Vanity Moodboard DesignBathroom Planning: Design and LayoutUpdated Review on Whether Chip Fix Repair Kit WorksChip Fix Review UpdateHow to Install a Wall Sconce Light Fixture without Running Electrical WiresDIY Wall Sconce Installation

Comments

  1. Stephanie says

    November 10, 2016 at 7:26 am

    What a beautiful light fixture! I love how the decorative wood shapes on the perimeter add texture and dimension. Definitely a nice way to dress up one of the hardest-working rooms in a house!

    Reply
  2. Sabrina says

    November 11, 2016 at 9:26 am

    I love the new light Chelsea, it looks so pretty and stylish. So much better than the old fluorescent light fixture!!

    Reply
    • Chelsea Lipford Wolf says

      November 14, 2016 at 9:27 am

      Thanks, Sabrina! Anything would have been better than the fluorescent! Ha! ~Chelsea

      Reply
  3. Vanessa @ {nifty thrifty things} says

    November 11, 2016 at 4:12 pm

    This looks SO much better than the old fluorescent light fixture! I love that is kind of retro looking and modern at the same time!
    XO! Vanessa

    Reply
    • Chelsea Lipford Wolf says

      November 14, 2016 at 9:28 am

      Yes it does kind of look retro and modern at the same time! Haven’t thought about that. Thanks, Vanessa! ~Chelsea

      Reply
  4. Sarah @ Making Joy and Pretty Things says

    November 13, 2016 at 7:54 am

    Love the new light fixture. We currently have a single light bulb screwed into the ceiling in our laundry room HAHA! It’s a 100+ year old house so there’s no re-doing that area at this point. You really can’t even see the holes left from the fluorescent light!

    Reply
    • Chelsea Lipford Wolf says

      November 14, 2016 at 9:29 am

      Haha! Well something is better than nothing I suppose! ~Chelsea

      Reply
  5. Colette @ Restyle it Wright says

    November 14, 2016 at 7:14 am

    Definite upgrade! bye-bye fluorescent and hellllllo chic!

    Reply
  6. Lora says

    November 14, 2016 at 8:00 am

    This is such a stylish flush mount (well, almost flush mount, I guess). It’s got a very modern vibe! So much better than the fluorescent light.

    Reply
    • Chelsea Lipford Wolf says

      November 14, 2016 at 9:29 am

      Thanks Lora! ~Chelsea

      Reply
  7. Zan Turner says

    November 15, 2016 at 7:37 pm

    The lighting in our laundry room is nothing special. But yours looks so much better. And how about that tiny hole repair?! I probably would not have noticed the repair area if you had not shown the hole.

    Reply
  8. Shani | Sunshine & Munchkins says

    November 16, 2016 at 8:25 pm

    We just have the same boring light fixture that came with our house when we built it. But I’m hoping to start doing some work on the laundry room this winter and changing it out!

    Reply
    • Chelsea Lipford Wolf says

      November 17, 2016 at 2:52 pm

      Oh fun! Can’t wait to see! ~Chelsea

      Reply

Please Leave a Comment Cancel reply

Your email address will not be published. Required fields are marked *

Welcome!

I’m Chelsea. DIY
enthusiast who loves
sharing my victories
and mishaps!
Learn more
here.

CHECK IN WITH CHELSEA ON INSTAGRAM

Lookie! It’s a shelf for your bookies! 🤣Build Lookie! It’s a shelf for your bookies! 🤣Building a shelf unit custom for ANY space in your home is so simple and can be done over and over again to add much needed storage aka sanity! The kids were running all over the house at bedtime trying to find a book to read because we had them stashed in baskets and shelves in several different rooms. So I took advantage of this space in the hall next to a closet to create a central location for their books and some of mine too! Plus it adds a little character to an otherwise blah space!🙌🏻
.
.
A full how to video is on checkinginwithchelsea.com! Book nerds can be DIY nerds too!🤓
.
.
#booknerdsunite #diyskills #beginnerdiy #bookshelfie #halldecor #storagesolutions #storageideas #bookstorage #bookstorageideas
5 months in and she’s at the top of my favorites 5 months in and she’s at the top of my favorites list!🥰
.
.
Couldn’t resist using this audio.😅
Using my grandmother’s cookie press to make 🎄 Using my grandmother’s cookie press to make 🎄cookies I used to make as a kid in our brand new kitchen. My heart could burst!😭 I hope you are enjoying the preparation for the main event 😇and bring love and joy to your home, no matter what it looks like.❤️💚
.
.
#christmascookies #christmastrees #familytraditions #christmasbreak #newkitchen #kitchendecor #kitchendesign #madewithlove
3D art install in my girls’ girly bedroom!🦋😍Love this $13 pack of butterflies that comes with everything you need to fill a large wall! And it only takes 30 minutes!🙌🏻 Putting the link to the butterflies in my bio! (https://amzn.to/3VmfZsB)
.
.
First step is to layout the flow of your fluttering butterflies with the large and medium sizes from the pack, leaving room for the small ones. Then fill in spaces with the small size and pat yourself on the back! So easy!
The whole Wolfpack has been staying at my parents’ house on the river for the past week while our hardwood floors are being refinished. Since the kids had the whole week off of school it has really felt like a vacation! Complete with a sunny Sunday boat ride after Mass!🥰🚤☀️Enjoy the rest of your weekend! 😘
.
.
#generationalliving #3generations❤️ #4kidlife #grandparentlife #boatday #riverside #riverlifestyle #fowlriver #alabamalifestyle #alabamablogger #nofilterneeded
Dad and I got our tickets to the gun show!💥 . . Dad and I got our tickets to the gun show!💥
.
.
@todayshomeowner @visitmobileal #exploreyourhometown #hometownpride #mobilealabama #battleship #ussalabama #visitmobile
Load More... Follow on Instagram

Indoor Projects Outdoor Projects Craft Projects
Facebook Pagelike Widget
  • Contact
  • FAQs
  • Advertise with Chelsea
  • Media
  • Today’s Homeowner

Search This Site

Receive Free Updates Via Email

Copyright © 2023 Checking in With Chelsea • All Rights Reserved