Checking In With Chelsea

DIY ideas, crafts, and tips for your home

subscribe and never miss a thing!

Receive Free Email Updates

  • About
  • Videos
  • Projects
    • Indoor Projects
    • Outdoor Projects
    • Craft Projects
  • House Tour
You are here: Home / Indoor Projects / Cover Up Your Bathroom

Cover Up Your Bathroom

January 10, 2019 By Chelsea Lipford Wolf 1 Comment

Bathroom Makeover Without Removing Tile

Installing Tile Over Tile in Small Hall BathWith all of my potty talk lately, I thought I’d jump ahead of all the planning to inspire you with a finished bathroom we completed recently for Today’s Homeowner.

Beige and Dark Before

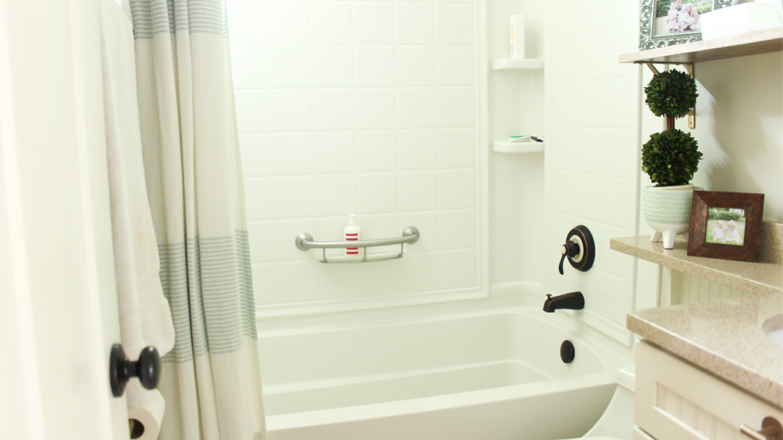
The bathroom was in great shape but aesthetically it needed a little improvement. I loved the shape of the tiles, but the color just felt dated and drab.

Tan Hexagon Tiles on Floor of Bathroom

Then there was a tall, dark cabinet between the vanity and the toilet.

Dark Dingy and Dated Hall Bathroom Before Updates

Who doesn’t need more storage? But in this case, there was already a very deep linen closet on the opposite wall.

Stained Wood Built In Linen Closet Before Updates

It reminded me of the small updates I did to my bathroom last year. The medicine cabinet over my toilet was blocking the light and contributed to the room feeling smaller and less open. Much like the cabinet here.

Tall Wood Cabinet Makes Bathroom Feel Cramped

Remove and Cover

Our first step was to remove the tall, dark and handsome cabinet and vanity. It immediately made the room feel 2x bigger.

After removing the cabinetry we realized it was not installed on the tile. They were actually built on a base that was 1.5 inches below the tile. No problem since we were going to install new tiles over the existing tiles anyway. Just a little more prep work.

You can watch everything we did to prep and tile the new floor in this full episode.

Besides the floor, another thing we ‘covered up’ was the wall color and stained wood of the built-in linen closet. A fresh coat of paint always does wonders for a room!

Built-In Linen Closet in Bathroom with Fresh White Paint

Put It Back Together

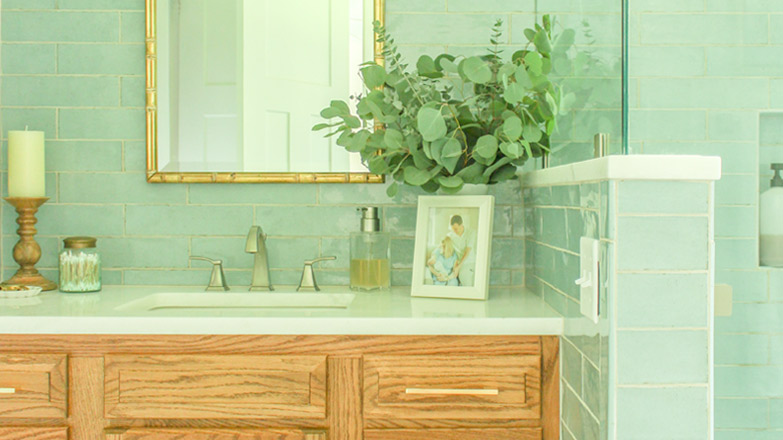
Before installing new, larger tiles and a new vanity, we had a plumber run the plumbing for a second sink and Dad easily ran additional electrical for a second light fixture. So when everything went back in, there were 2 sinks with a light over each.

Marble Vanity Top with Double SInks

Since we extended the vanity, the homeowners got back some of the storage that was lost from removing the tall cabinet without closing off the room.

The larger-format tiles also helped make the room feel bigger. And the tiling job went fast since they were so large! Bonus!

Installing Tile Over Tile in Small Hall Bath

Even if you don’t remove and replace your vanity like we did here, you can cover up anything in your bathroom to make it look new! Paint those cabinets, tile over ugly tile, or change the wall color and you’ll have a fresh space you’ll love even more! And that’s what home is all about!

Dark Dingy and Dated Hall Bathroom Before UpdatesWhite Marble Guest Hallway Bathroom

I would have loved to have saved those hexagon tiles but we haven’t found a paint-type product that’s suitable for tile floors yet. Have you heard of one? Share your thoughts in the comments please!

Thanks for Checking In! ~Chelsea

Subscribe for Free Updates!

Stay up-to-date on Chelsea's latest projects, tips, useful resources and more.

Previous Post
Bathroom Planning: Toilet
Next Post
Cherry-Picked: Happier Podcast

Related Content

Completed Updates in Modern Master BathroomHow to Make a Pink Tub Look CoolMinty Green Bathroom Vanity with White CountertopUpdating Our 1950s Bathroom with StyleMoodboard for Calm and Cozy Family Room DenCreating a Calm and Cozy Family RoomFrosted Windows in Blue Tiled BathroomHow To Install Beautiful Privacy Window Film

Comments

  1. Sandi says

    February 15, 2019 at 8:30 pm

    Love the updates. Great job.
    We just bought another home to redo. That bathroom has 4” glazed tile on the floor. It looks pretty but not suitable for bathroom. It’s slippery and I need to cover up. Any ideas.

    Thanks

    Reply

Please Leave a Comment Cancel reply

Your email address will not be published. Required fields are marked *

Welcome!

I’m Chelsea. DIY
enthusiast who loves
sharing my victories
and mishaps!
Learn more
here.

CHECK IN WITH CHELSEA ON INSTAGRAM

Ask me how I know😑Whether you’re doing a smal Ask me how I know😑Whether you’re doing a small patch or a whole room, this drywall sanding hack will keep the dust at bay and keep the rest of your house looking good😎
.
.
#drywall #diyhack #tipsandtricks
A Spring Break to remember! Thanks to CeeCee and P A Spring Break to remember! Thanks to CeeCee and Pop Daddy for bringing the Wolfpack along on vacation! A long travel day ahead of us but it’s always worth it to spend time with family and get some r&r.☀️😴 Happy weekend!
9 years!✨Brandon and I will be celebrating 9 yea 9 years!✨Brandon and I will be celebrating 9 years of marriage this week. And how perfect we were invited to a wedding tonight walking distance from our home.🥰Sometimes reality is better than the movies and this weekend is one of those times. Enjoy, friends!☀️
What else do you use paper plates for besides eati What else do you use paper plates for besides eating?? Spray paint onto a paper plate and dab a small paint brush to do spot touch ups! Life hack when you’re working on a project but don’t need to paint the whole surface!👏🏻
.
.
#lifehack #diyhacks #spraypainting #painttips #paintprep #paintpro #shutters #craftsman #1940style
Didn’t mean for this to be #ASMR but here we are Didn’t mean for this to be #ASMR but here we are!🤷🏼‍♀️ I bought this orchid 15 months ago to use the flowers in our hair for my sister’s wedding. I’ve already repotted it once and it’s bloomed 3-4 times! Time to do it again with a pretty new pot that matches our new kitchen cabinets!🤩
.
.
Steps to repot an orchid:
1-large pot without drainage holes
2-plastic pot slightly smaller with holes
3-trim if needed so plastic pot is at or below outside pot
4-add layer of orchid specific potting mix (it looks like bark!)
5-add orchid, fill in around roots with more bark- don’t forget to add some mix under the leaves!
6-to water, soak bark and fill up outside pot, rinse the leaves too!
7-let sit for 5-10 minutes, then drain and dry the outside of your pot.
8-set in place and enjoy!🌷
New laundry, who dis? Our laundry room was a BLANK New laundry, who dis? Our laundry room was a BLANK slate after the kitchen renovation left it reconfigured too. So Dad and I tackled simple projects that make this space functional and of course visually pleasing too!👏🏻The full project airs this weekend on @todayshomeowner!
.
.
I love that the cabinets and hardware match what we have in the kitchen since the spaces are right next to each other! Synergy!
.
.
What do you love about your laundry room?
Load More... Follow on Instagram

Indoor Projects Outdoor Projects Craft Projects
Facebook Pagelike Widget
  • Contact
  • FAQs
  • Advertise with Chelsea
  • Media
  • Today’s Homeowner

Search This Site

Receive Free Updates Via Email

Copyright © 2023 Checking in With Chelsea • All Rights Reserved