Being pregnant has lots of perks. People holding doors open for you and offering to do your heavy-lifting, etc. But one thing I’m not digging (pardon the pun…) is not being able to be out in my yard during the high heat of summer.
Here in Mobile, most days during the months of July, August, September and half of October get into the 90s with humidity at 85%+ giving a heat index of over 100!! It’s no joke to be playing outside in the middle of the day. So I had to turn a blind eye to the mess my yard was becoming. It was painful since I’d worked so hard to maintain and keep it up since I got all new landscaping and grass in 2012.

So when the temperature was forecasted to be in the mid 70s last weekend, my husband and I got a sitter for Mary Helen and tackled our yard from sun up to sun down, almost quite literally!
The main objective was to make everything look pretty (again) for the dormancy of winter. Because as much as I hate working in the yard during the heat of summer, I might hate being cold to my bones while working in the yard even more!
I don’t have any immediate before pictures for you because I was so focused and down right excited to get to work that it slipped my mind!
We started the day by power washing our worn-out deck. Stripping the previous stain and re-staining the deck was our first project as a married couple back in 2014. But 2.5 years was enough time for the sun to eat away at the stain and just leave our deck thirsty-looking and well-worn. (All but the 2 feet closest to the house gets full-sun almost all day long.) This time we decided not to strip the stain completely, but we’d simply clean and touch up the stain instead.
Brandon saw me taking a picture of him as he was power washing and was not a fan…

This is a great project to tackle during the more mild temperatures of fall. It’s not good to apply stain in direct sunlight or when it’s too hot because it dries too quickly and does not look good. Trust me, I’ve been there! And if it’s too cold when you’re applying or gets too cold at night after you’ve applied it, it never quite cures completely and stays tacky/sticky.
The yard work we tackled included pulling weeds and grass in the flower beds, edging all of the beds, mowing the grass one last time, trimming and pruning some overgrown trees and bushes, and digging up some plants we’ve had enough of. We also transplanted a hydrangea which isn’t loving its new home just yet. 🙁 But I’m hopeful and will keep watering it daily and making sure the soil is packed tightly until it officially kicks the bucket.
After all of the messy work was done, we headed over to my parents’ house. Their street has a ton of pine trees that drop my beloved pine straw right into the street. (Read: free pine straw!!) So we raked it up and bagged it before bringing it back to our house to spread in our freshly-tended flower beds!

I think I’ve shared my love for pine straw here before. But in case I haven’t, I really do love the look of freshly-spread pine straw. It makes a yard look so polished and well-cared for. All the heart eyes for pine straw!!
Since all of the weeds had been pulled, we (but really just Brandon) spread Preen in the flower beds on top of the straw to help prevent new weeds from germinating during the fall and winter. I’ve done this for several years and really do believe it helps keep the weeds at bay before spring gets into full-swing.
Speaking of weeds, Brandon also spread a winterizer weed and feed in the grass at the end of the day to help keep weeds from forming in the lawn over the dormant season as well.
Whew! Just recapping our day makes me tired! But it didn’t stop there. The next day, sans babysitter, we had to apply our deck stain. The deck needed some time to dry before doing this, so we waited until nap time the next day to get it done. Like I mentioned earlier, we weren’t overly concerned with full-coverage so much as touching up the most obvious sun damaged areas.
Even after applying the stain, you can still see the difference in the deck that was exposed to the sun (on the left) and the deck that’s been under the outdoor rug I painted for over a year (on the right).

Fortunately, the rug is still in great condition after it also got power washed. So we put it back in place to hide the difference in coloring and because I love the pop of color on the brown wood!

Again, sorry for the lack of before photos. I wish you could have seen it before to appreciate the after as much as I do! It’s one of those things that I walk by (or on) everyday and say to myself, “Ugh, we really need to do something about this deck.” And we finally did!

Now if I could get the inside of my house to look like the outside…but I think a toddling 1 year old will see to it that that doesn’t happen for a while!

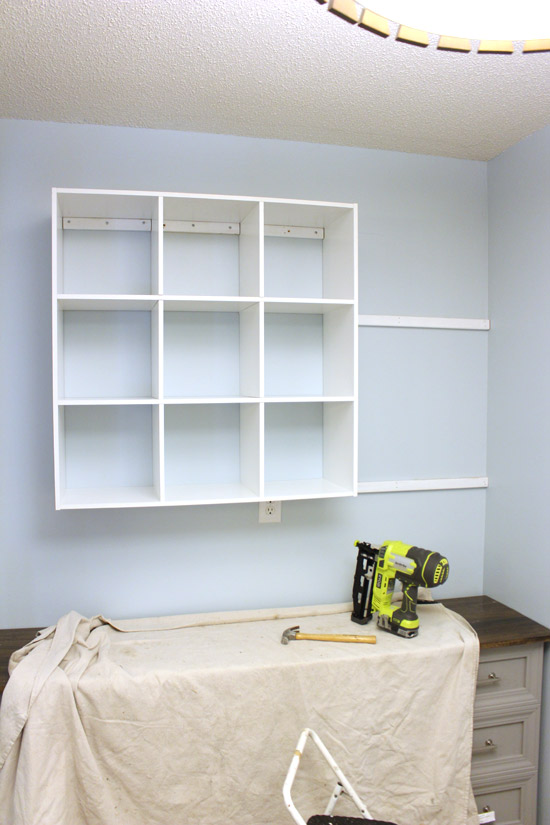
I’m thisclose to finishing up a fun storage solution as part of my laundry room project. So I’ll be sharing the details on that next week!
Here it is in-progress to pique your interest!

Happy weekend, y’all! Thanks for Checking In! ~Chelsea


Adoro estar aqui ver os projetos.