Waterproofing Vertical Masonry Wall
Moisture can wreck havoc on painted bricks. But applying a simple masonry waterproofer prior to painting can eliminate that headache!

In my last post, I shared how we stripped the peeling paint from the brick steps along the back of our house. Unfortunately our peeling paint problems didn’t end on the tops of the steps.
Almost all of the painted bricks surrounding the steps and patio area were peeling. And peeling badly at that.
Troubleshooting Peeling Paint
Now when it comes to peeling paint, it’s important to figure out WHY it’s peeling before you try to correct or repaint it.
In our case, there were what I believe to be 2 different issues going on. On the top of the steps, there was wear and tear and water damage from rain, etc. Which is to be expected, especially in our damp climate.

On the sides of the steps and the retaining wall around our patio, though, I think there was moisture coming from the ground behind causing the paint to peel.

I came to this conclusion partly because there was a white powdery substance under the paint and partly because the bricks on the house itself were not peeling.

A third problem could be that the bricks were not prepped properly before painting, ie cleaned and primed. But I did not suspect that since the rest of this house was so well maintained and done well.
Applying Waterproofer
Because I wanted to treat these bricks for moisture, I needed to apply a waterproofing product specific to masonry. Unfortunately most masonry waterproofers require you apply it to unpainted, unstained and unsealed masonry.
So, yep, you guessed it! We stripped the paint from all of the vertical brick surfaces! It was done the same time as the steps using the same materials, so please reference that post if you need to do the same at your house! And I’m sorry in advance if you do, because gross. It is not a fun or pretty home project. But very necessary in some situations.

Once Brandon scraped, stripped, and power washed the vertical parts of our outdoor area, I was ready to apply the waterproofer. It goes on just like paint using a roller or brush. I used a discontinued product from Quikrete we had around our workshop to waterproof our bricks. But Drylok* is similar and the leader in the market for this problem!

You’ll definitely want to apply two coats as recommended. If you are rolling it on, I always like to roll it in one direction for the first coat (say up and down) and in the other direction for the second coat (side to side) to make sure you get in all of the nooks and crannies.
Here’s a neat tip for you…when you’re picking up your waterproofer at the store, have it tinted to a color similar to your final paint color. Might save you a coat of paint in the end!
Paint to Match
After your second coat of waterproofer has had 24 hours to dry, you can topcoat it with your exterior paint color of choice. (Ours is Benjamin Moore Misted Green mixed 50/50 with Greyhound.)
Because I was working with a relatively small surface area, I sprayed our topcoat with my favorite paint sprayer.

The red tape along the tops of the stairs is stucco tape*. A great option to use as a painter’s tape when you’re working outside on masonry surfaces. It sticks better than actual painter’s tape on brick but still provides crisp lines.
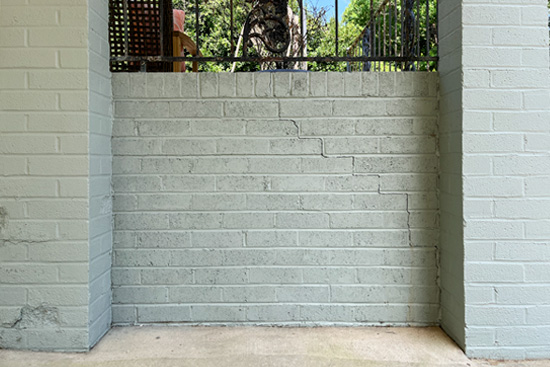
Of course, after painting I realized there are a few small cracks I could have caulked. And I can still tackle them and touch up the paint. But the walls already look 1000x better than the funky peeling pink paint we had before! I feel bad for the neighbors who had to look at it unfinished for so long while B and I got our act together!
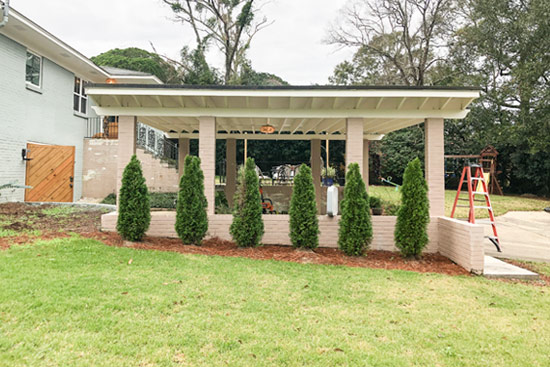
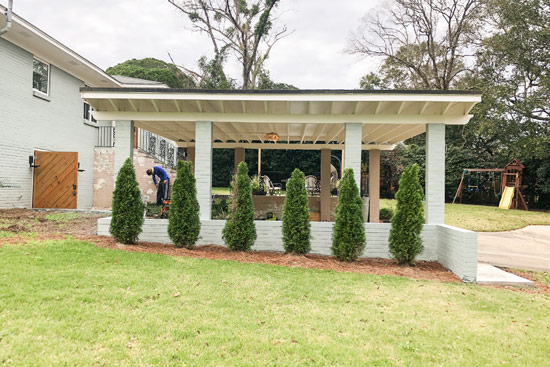
For reference, we had the house painted in April/May of 2021. And we just completed the painting of this patio area in May of 2022.😬 No overnight projects happening here!🙃
Tip to Prevent Overwhelm
When I’m working on a project that can’t be completed in a single day, I like to focus on what I have completed! Sometimes that means squinting or hold my hand over the unfinished part.😆
Sometimes I adjust my perspective and take a picture of the completed area with the ugly out of view. This was taken back in january after I painted the carport columns on the street side.
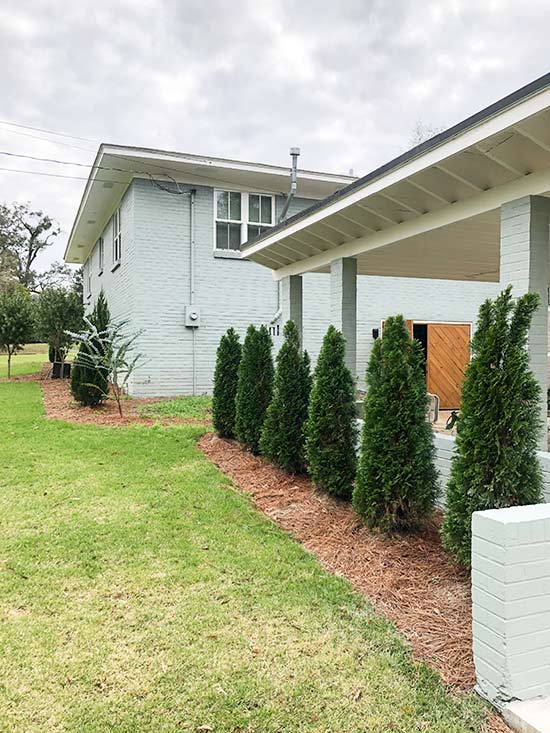
If I hadn’t told you, you’d think all of the carport had been painted at this point, right?!🤫
With all of the exterior bricks being painted now, our exterior is about 95% completed. Of course I have long term dreams of a renovated patio space which is not included in that number. But just getting the existing outdoor areas up to speed is almost done! The only item left on my to-do list right now is spray painting the handrails on the back to match what I did on our front handrails.

Ok and now I want to add more landscaping too. We did the minimum last year and I love plants so much I’m ready to add more! But maybe I’ll wait until I’m not pregnant and it’s planting season in the spring. Maybe.

I’ll keep you posted when that happens! But until then, don’t forget to follow me on Instagram for projects as they happen! I love sharing over there!
Thanks for Checking In! ~Chelsea
*This post contains affiliate links. I will earn a small commission without increasing the price for you!*



7 Comments
Pam Stephens
Can’t believe all you have accomplished in a year. Of course your lucky to have a Dad that helps a lot. Also it’s amazing to me all
you do and being pregnant, again!
Im too old now to do your projects now , I still like to watch your show and follow your growing family. God Bless.
Darlene
My husband and I enjoy watching you and your dad on Sundays – we have your show set to record. We get so tickled at your dad’s humor! And I enjoy getting your updates on your new home renovations!
Thank you!
Chelsea Lipford Wolf
Thanks Darlene!☺️ ~Chelsea
Lou
Everything looks so nice! You did a great job (as always)! Would sandblasting offer a clean slate for being able to paint the bricks, or is that too haphazard?
Would we need to do the basic same routine for inside a garage where cinder blocks are up against the earth and have been painted?
Does your carport have a flat roof (no pitch to it)? How is it covered? (shingles? something else?)
Love your show and your e-mails!
Chelsea Lipford Wolf
Hi Lou, I don’t know much about sandblasting, so I can’t speak to it! If the paint is peeling in your garage, I would say yes, you’ll need to go through the same routine. Sealing our cinderblock garage walls is on my project list for 2023. Our carport has a flat roof covered in asphalt. Hope that helps! Thanks for following along! ~Chelsea
Phil Johnson
Hello Chelsea and Happy Thanksgiving to both yourself and Papa… Quick question… I remember you using block foam insulation, maybe 4-5 inches thick in the attic on one of your projects… Please advise on the name of this material..
Thanks,
Phil
Chelsea Lipford Wolf
I believe you are thinking of Rockwool insulation! Best, Chelsea