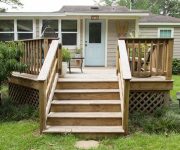
Quick, Easy Plant Stand Adds Warmth to a Front Porch
Watch this how-to video and build your own trendy wood stand for a planter of any size! Perfect for adding height and texture to your porch, deck or patio. And it only costs $6 in lumber!

Materials
- 1×2 cedar board*
- pocket hole jig*(newer version of what I used)
- miter saw*
- tape measure*(my favorite!)
- drill/driver
- wood chisel*
- wood glue*
- clamps*
- sander*
- planter (personalized crock like mine)
Obviously if you don’t have all of the tools and screws on hand already, this project will cost more than the $6 piece of cedar. But it’s still a great, easy piece to make!
Cut Cedar
You’ll need to make 6 cuts-2 for the cross support and 4 legs. First, determine the width of your planter stand based on the width of your planter. Add 1/4″-1/2″ to your planter number and cut 2 pieces to that length.
Then determine how tall you want your stand to be (mine is about 14 inches) and cut 4 legs at that length. Keep in mind that the part the planter will actually sit on will be recessed a few inches once it’s assembled. So you’re planter won’t be as tall as the legs. I wouldn’t recommend going much higher than 14″ without adding a second cross support.
Once your 6 cuts are made, you’re ready for some chiseling!
Chisel Cross Section
To create the horizontal support for your planter, we need to cut, chisel, and remove a little of each of your support pieces so they can lock together. (Watch video above for the best explanation and visual representation.)
So start by marking the center both horizontal and vertical on one piece. Then from the center mark add 3/8″ on either side. 3/8″+3/8″=the thickness of the 1×2 cedar.
I created a clean cut on each edge with a miter saw, stopping halfway down at my mark. Then I finished cleaning out the mid section with a sharp wood chisel. You could use a 5-in-1 painter’s tool in a pinch too!

Once the meat is chiseled out of both of the support pieces, test them out to make sure you removed enough and they fit snug together. Then take them apart again so you can add wood glue for extra-oomph.
Pick the ‘pretty side’ and put it face down so you can secure them together with a screw on the underside. I recommend using a small bit to pre-drill a hole first to keep the thin cedar from splintering.

Pocket Holes
Now for my favorite part! This little jig can take any project from amateur to pro-fresh!

Again, watch the video above for the best understanding of how it works, but you follow the guides and directions that come with the jig and clamp it on your crossbar support based on the thickness of the wood you’ll be attaching to, in this case it’s roughly 3/4 inches.
Use the funky drill bit with the stop adjusted to the right depth. (Read the directions that come with your model, it’s super easy!)
Seriously, you will feel like a woodworker after successfully using a pocket hole jig!
Once you have all 4 holes drilled, it’s time to assemble!
Attach Support to Legs
With one of my leg pieces laying flat, I held the support bar up to see how far down I wanted it to be attached. (About 2.5 inches!) Then I marked it and measured so I could replicate the same distance on the remaining 3 legs.

I was able to attach the first 2 legs with my drill. But after that my drill was too big to fit in the middle so I switched to an old-fashioned screwdriver. Fortunately the wood is soft enough that it was not a challenge!
Finishing Touches
Before you set your new planter stand out to be admired, you’ll want to give the whole thing a light sanding. Pay special attention to the cut edges. A quick sanding can really polish them off and make them look like factory-finished edges!

Lastly, if you want, apply a coat of an exterior wood sealer, like that used on decks or fences. No doubt it will help it last longer. But one of the nice things about using cedar is it’s bug, moisture, and decay resistant!
Add your planter and maybe another plant on the ground and you’re all set for a cozy, welcome home vibe on the front porch! As you can see I made a second planter stand a little taller (and added a second support crossbar near the bottom). I actually made it to hold our Berkey water filter* which I shared in my Instagram stories a while back. So, maybe you have something ‘out of the box’ you could use these plans for too!
Plants are my happy place, so I hope this project brings a little happy to you and your home too!
Thanks for Checking In! ~Chelsea
*This post may contain affiliate links.*


Hi Chelsea.love the videos and congratulations on the new house. I was wondering if you could give me any advice on how to lay down pavers and do you have to have any thing under them
We have a small incline that gets a lot of foot traffic. And every time it rains or snows it all turns into mud .Thank you sincerely Deborah Atkins
Hi Deborah! Yes you really have to prep the area under the pavers for them to last in the long run. It involves removing dirt (or mud as the case may be!), putting in paver base, and a small layer of sand. Here’s a video on a paver patio: https://todayshomeowner.com/video/tips-for-laying-a-paver-patio/ Good luck! ~Chelsea