-
How I Reused an Old Wood Window
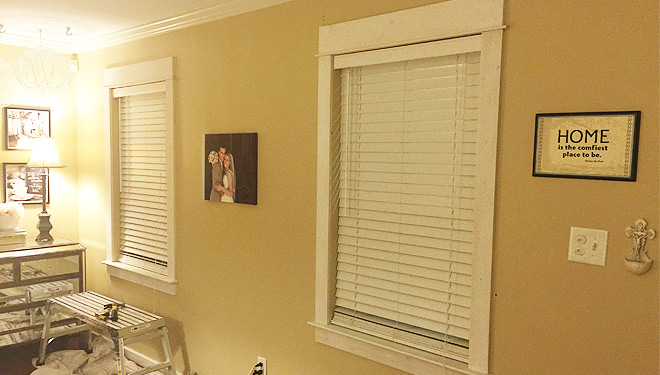
Repurposing a Window and Planter Box Looking for an inexpensive way to add some character to the outside of your home or garage? That’s exactly what I did with an old wood window and leftover planter box. Find the Right Trash The best part about this project? 100% free! I already had this hand-me-down metal wall hanging on the outside of my garage that faces our backyard. But I was ready to change things up. You may remember an earlier rendition of my dining room had this old wooden window hanging in it. It was removed from one of my dad’s construction company‘s jobs several years ago. And one man’s trash…
-
DIY Stained Wood Shelves
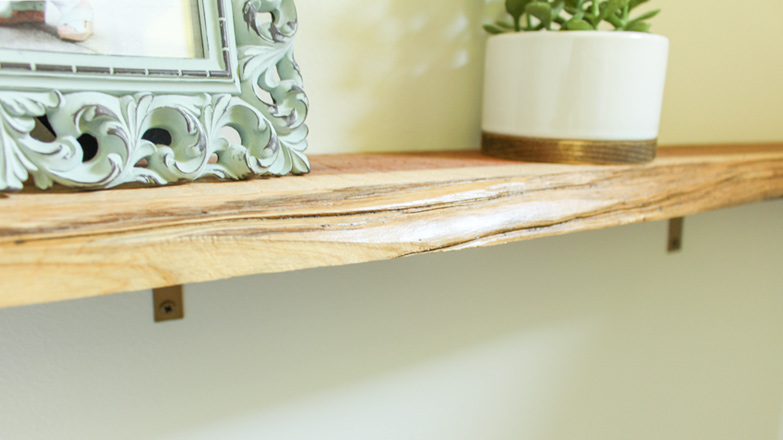
CANNOT believe it has been 4 weeks since we welcomed our sweet boy into the world! Fortunately for me, he eats and then falls right back to sleep. So I was able to knock out these shelves for his room that I didn’t quite get around to completing before he made his grand entrance. I wanted something a little more manly than the crisp white ledges I made for Mary Helen’s room. And in my mind, gray wood tones=manly. Before I cut and made the shelves, I ordered IKEA’s EKBY BJARNUM shelf brackets to hold them up. (Since the closest IKEA is 5 hours away, I ordered mine from Amazon.)…
-
Footstool with the Fur
Since I’m only 39 weeks pregnant, I thought it was time for a little post about the new nursery in town. Fit for a baby BOY! My husband and I went back and forth about where to let the new little one sleep during his first months at home. We contemplated our room until he slept longer at night at which time we could move him in with his big sis. But co-sleeping didn’t work out too well for us with Mary Helen. Babies make a lot of noise in their sleep! So instead, I cleared out all of my “junk” from our guest room and turned it into a…
-
Upcycle: Potting Bench
I don’t know if you’ve noticed this about me lately, but apparently I’m on an upcycle and repurpose kick. I really do love giving something new life! Especially when it comes to cheap or free furniture pieces. That’s where this large-and-in-charge potting bench comes into play. On a recent episode of Today’s Homeowner, we transformed a shed into a gardener’s potting shed paradise for homeowner Delores.
-
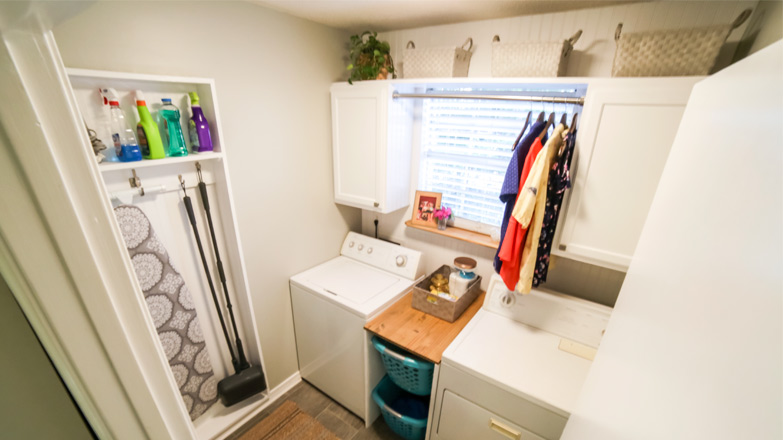
Laundry Room Makeover Revealed!
The laundry room is done, done, done! So that means it’s time for a full reveal of the space with everything decorated and pretty and not at all how it will be in real life! Ha! There’s also a ton of sources at the bottom in case you’re looking for similar items for your home! This side of the room is where the biggest changes took place. Besides the immediate change from painting the walls, I created a drop zone for backpacks, updated a thrifted laundry cart, hung cabinets above the washer and dryer, painted the washer and dryer, created a ledge and installed a glass tile backsplash. Here’s what…
-
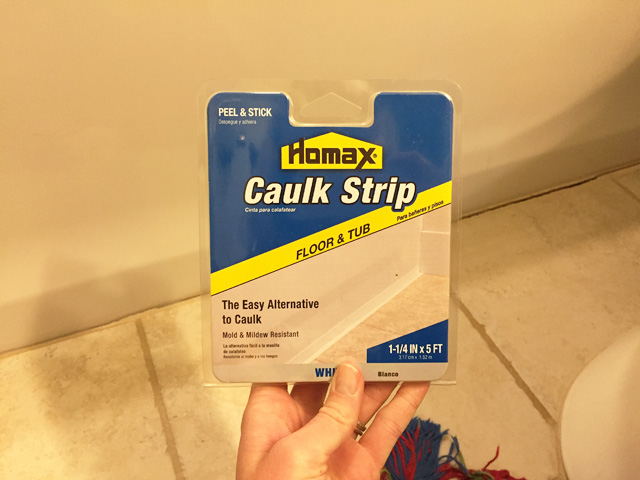
DIY Peel & Stick Tile
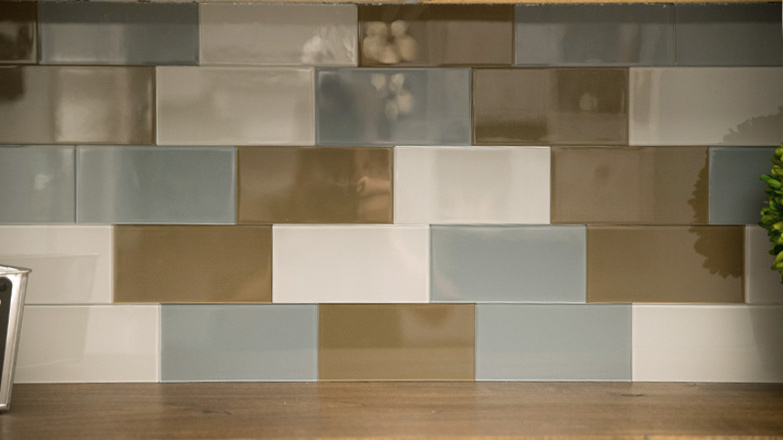
After the washer and dryer were painted and the ledge was installed, the empty wall above the two was begging for something! So I decided to add a tile backsplash. But what’s cool and different about the tiles I used is they don’t require thinset OR grout!! What?! They are peel and stick tiles from Aspect Ideas. I had heard about these tiles at the Haven blogger conference I attended back in August. I didn’t have a tile project in mind at the time. But I filed away the info for later. And here we are! (*Aspect Peel & Stick Tiles sent the tiles for this project. However, all positive…
-
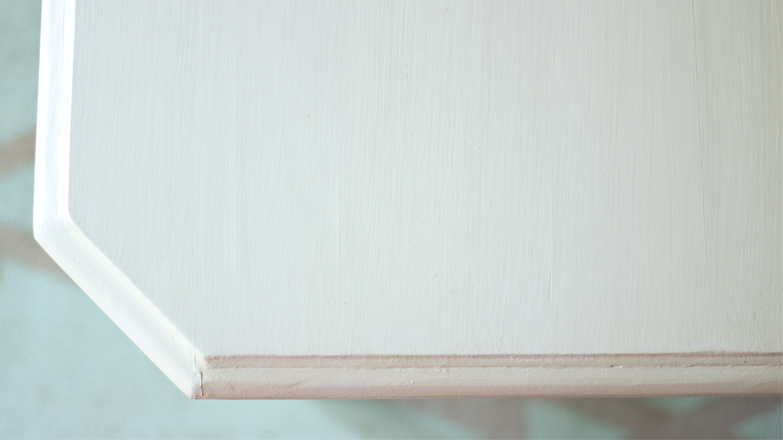
Stained Shelf in Laundry Room
Adding a shelf, or ledge, above your washer and dryer is such an easy and relatively inexpensive way to add more style and storage to a plain old laundry room. So after hanging cabinets and painting the washer and dryer in my laundry room project, that’s exactly what I set out to do. If you’ve been reading all of my posts, you may have noticed I installed the cleat to hold the ledge a long time ago, before hanging cabinets or painting the appliances. It’s the same system I used to hang the shelves on the opposite wall next to the cube organizer. But this time, I was staining the…
You May Also Like

Great White Whale

Sunny Spot Off the Sunroom
How Not to Refinish Your Dining Table
-
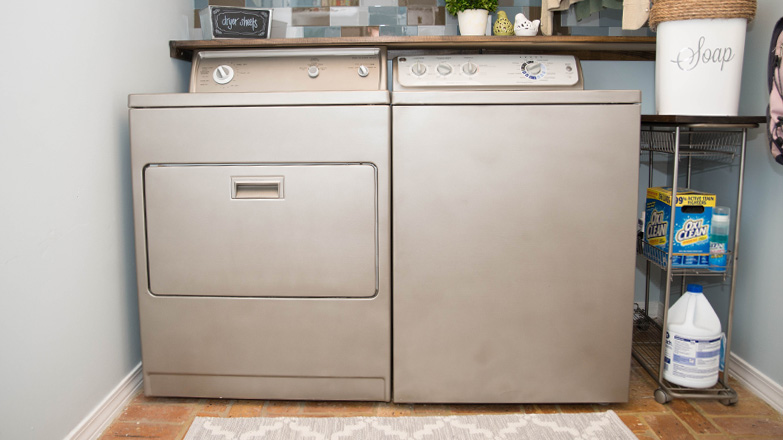
Painting Washer and Dryer
I’ve finally finished the physical work over at my laundry room project. The bad news is you’ll have to wait another week or two to get all of the posts to wrap this puppy up! After I had a little help hanging cabinets on the wall, I got to work painting the washer and dryer. I know it’s a common scenario to have mismatched washer and dryers. In this case, they’re both white, but the dryer looks much older than the washer. Most budgets don’t allow homeowners to update both appliances at once when only one is broken. And when neither of them are broken, you keep on trucking! The…
-
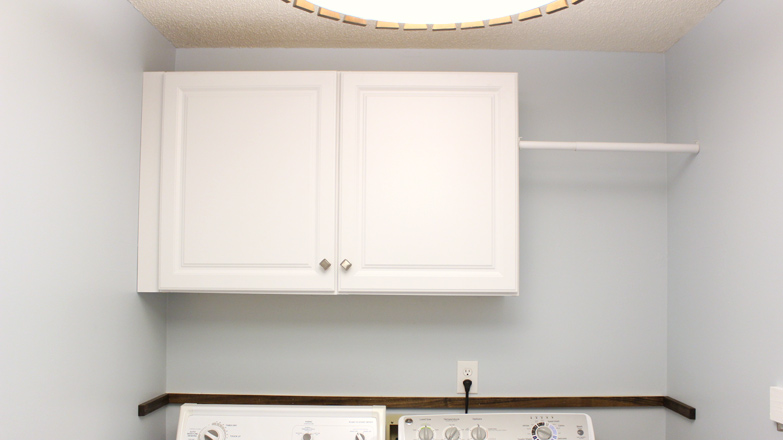
Installing Wall Cabinets
A big issue I planned to correct when I started this laundry room project was a lack of storage. With 4 kids living in the house and the laundry room’s proximity to the kitchen, it serves as overflow for big box store food storage like cereals, chips, and snacks. I already added a little storage on the wall opposite the washer and dryer by hanging a cube organizer. But nothing compares to good old cabinetry! So that’s what happened above the washer and dryer.