Checking In With Chelsea

DIY ideas, crafts, and tips for your home

subscribe and never miss a thing!

Receive Free Email Updates

  • About
  • Videos
  • Projects
    • Indoor Projects
    • Outdoor Projects
    • Craft Projects
  • House Tour
You are here: Home / Indoor Projects / Living Room To-Do List, January 2015

Living Room To-Do List, January 2015

January 9, 2015 By Chelsea Lipford Wolf 3 Comments

Back in 2011 when I first bought my house, I could barely afford it. So there certainly wasn’t a lot of spare change to buy dream items for any room of the house. Fortunately though, I practically had a house’s worthy of free furniture at my disposal. Anytime my parents upgraded or replaced a piece of furniture in their house, they stored the old stuff in the big garage at our office. So I went “shopping” to make something work for my house.

Most everything in my house was used except for the Ikea bed frame and headboard I bought for $100. Just the frame and headboard. The mattresses were leftovers, too.

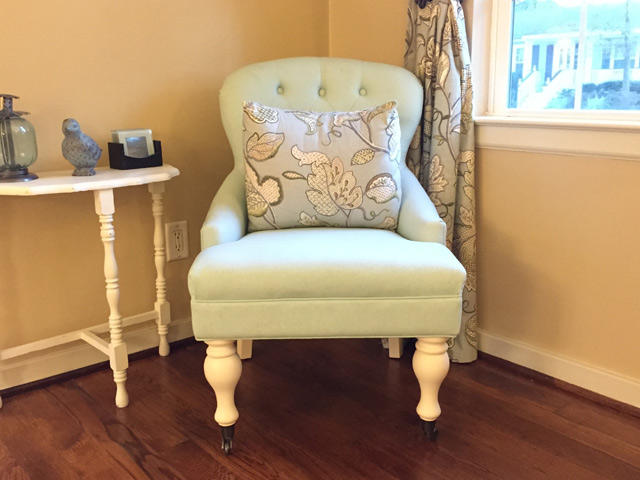
Then when I moved back in after the completed renovation in 2012, my parents were gracious enough to buy me a few things for the final “beauty” shots in the First Time Homeowner series, like a writing desk for my otherwise empty “office” and this chair:

robbins egg blue tufted chair in corner of living room with blue floral curtains on window

Now I’m at a place where I can slowly replace my used, that-will-do-for-now pieces with furniture that coordinates and that I actually get to pick out! And I’m starting with our living room!

I am no designer or decorator. But I’m making it my goal over the next few months to give my living room a facelift of sorts that other home enthusiasts can swoon over on Pinterest.

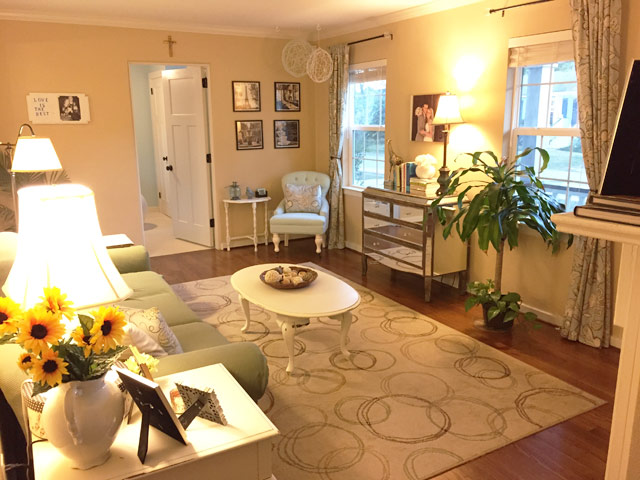
Here she is in her current state, circa 2015.

tan rug with green and tan circles, mirrored dresser, hardwood floors and yellow tan wall paint color

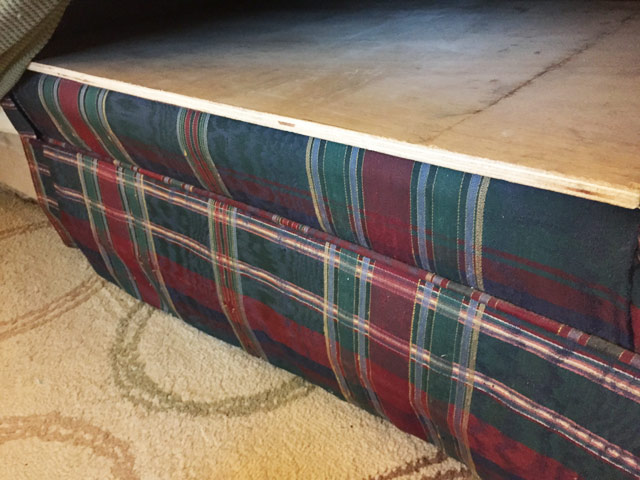
This good ole family couch can be found in pictures dating back to 1991. So that makes it 24 years old. Besides the dated plaid pattern and colors, it was sagging in the middle. I remedied it with a piece of thin scrap plywood placed under the cushions to hold it over.

green blue and red plaid ouch with plywood under cushions for support

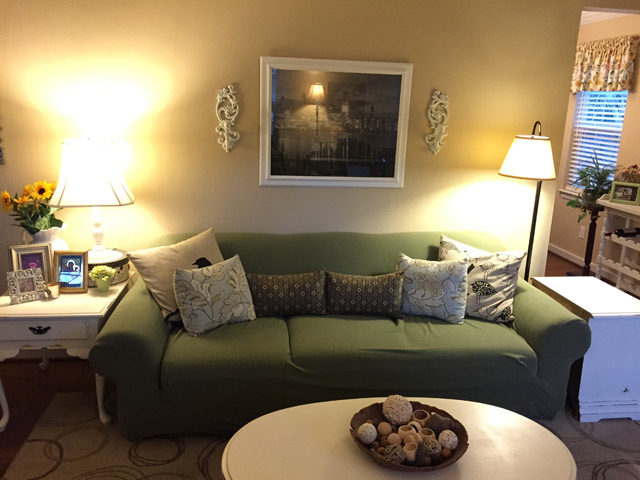
And the plaid was easily covered with a stretchy slipcover I bought on sale back in 2011.

green slipcover on couch in yellow paint living room with sconces and framed poster on wall

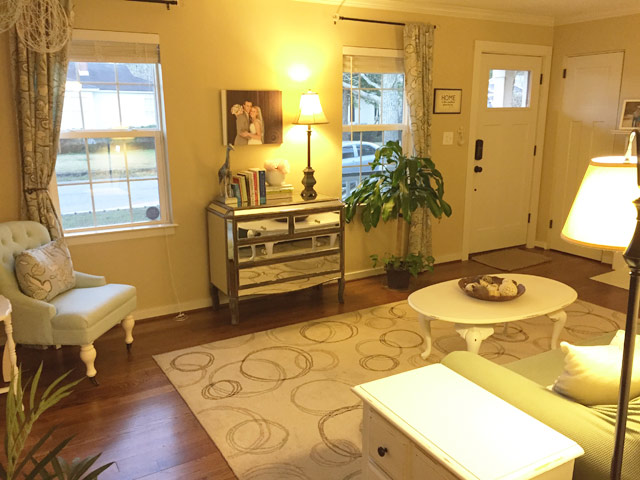
I’ve always wanted a mirrored dresser. But with most of them way out of my price range, I never had high hopes of owning one. But when I saw the one currently in my living room for half off the regular price, I snatched it up like nobody’s business! It was originally in my guest room, but made its way out to the living room. I’ve probably had it for close to 2 years now.

Living Room Before-2

That little blue chair mentioned above is the catalyst for a whole living room makeover/redesign/upgrade. I thought it seemed a little lonely over in the corner by itself, so I asked Santa for a second blue chair for Christmas. He (but really a she-my mom) obliged. But they both can’t sit in that corner. Plus one time when we had a poker game in our living room, we temporarily moved the mirrored dresser into that corner and I loved it!

So in addition to moving the mirrored dresser more permanently to the corner, here’s what else I’ve got planned for our little home’s entry room:

  • Rearrange to create more of a traditional living room, i.e. chairs across from couch
  • Purchase new couch, I’m thinking a tan one like this one
  • Paint walls a creamy gray or other color that compliments a tan couch and my drapes
  • Change trim paint to a more stark white instead of the current gray-white
  • Buy or change out end tables next to couch and for in between new blue chairs
  • Buy a new lamp or two for above end tables since there’s no overhead lighting
  • Find and install some real sconces above the couch where we have candle sconces now
  • Build a metal & wood coffee table from my old cedar tree like this one made from driftwood
  • Move my yarn chandeliers to a more centered position in the room
  • Add simple trim around the windows similar to this
  • Update wall hangings once furniture position is established

Just in general, I’m hoping to make the room look more intentional and purposeful in its style.

Living Room Before-3

But it’ll take a while to get there! I’ll be updating you on my progress as I go along. And I’ll also be working on other small projects for other rooms in the house, too. So you can still stick around even if decorating living rooms isn’t your forte! Please, please feel free to comment with any ideas or suggestions in the comments below. I read them all!

Thanks for Checking In! ~Chelsea
Subscribe for Free Updates!

Stay up-to-date on Chelsea's latest projects, tips, useful resources and more.

Previous Post
Dresser Rehab
Next Post
Dresser Drawer: Ugly No More

Related Content

white washer and dryer before updates and upgradesThe Laundry Room ProjectFireplace Molding UpdateDining Room To-Do List, April 2016Today's Homeowner Episode with Tips for Creating a Room with Many PurposesDouble-Duty Homeschool Playroom

Comments

  1. Sheena says

    January 10, 2015 at 10:28 pm

    Fun!! It looks great right now! I’m excited to see what else you do! Our living room is on my to-do list too!

    Reply
    • Chelsea Lipford Wolf says

      January 12, 2015 at 10:42 am

      Thanks Sheena! Any suggestions are welcome!

      Reply
  2. Harriet says

    May 15, 2015 at 6:25 am

    Your house looks really great! You did a good job! I would never guessed that you were gathering the furniture pieces little by little! Thanks for sharing.

    Reply

Please Leave a Comment Cancel reply

Your email address will not be published. Required fields are marked *

Welcome!

I’m Chelsea. DIY
enthusiast who loves
sharing my victories
and mishaps!
Learn more
here.

CHECK IN WITH CHELSEA ON INSTAGRAM

Ask me how I know😑Whether you’re doing a smal Ask me how I know😑Whether you’re doing a small patch or a whole room, this drywall sanding hack will keep the dust at bay and keep the rest of your house looking good😎
.
.
#drywall #diyhack #tipsandtricks
A Spring Break to remember! Thanks to CeeCee and P A Spring Break to remember! Thanks to CeeCee and Pop Daddy for bringing the Wolfpack along on vacation! A long travel day ahead of us but it’s always worth it to spend time with family and get some r&r.☀️😴 Happy weekend!
9 years!✨Brandon and I will be celebrating 9 yea 9 years!✨Brandon and I will be celebrating 9 years of marriage this week. And how perfect we were invited to a wedding tonight walking distance from our home.🥰Sometimes reality is better than the movies and this weekend is one of those times. Enjoy, friends!☀️
What else do you use paper plates for besides eati What else do you use paper plates for besides eating?? Spray paint onto a paper plate and dab a small paint brush to do spot touch ups! Life hack when you’re working on a project but don’t need to paint the whole surface!👏🏻
.
.
#lifehack #diyhacks #spraypainting #painttips #paintprep #paintpro #shutters #craftsman #1940style
Didn’t mean for this to be #ASMR but here we are Didn’t mean for this to be #ASMR but here we are!🤷🏼‍♀️ I bought this orchid 15 months ago to use the flowers in our hair for my sister’s wedding. I’ve already repotted it once and it’s bloomed 3-4 times! Time to do it again with a pretty new pot that matches our new kitchen cabinets!🤩
.
.
Steps to repot an orchid:
1-large pot without drainage holes
2-plastic pot slightly smaller with holes
3-trim if needed so plastic pot is at or below outside pot
4-add layer of orchid specific potting mix (it looks like bark!)
5-add orchid, fill in around roots with more bark- don’t forget to add some mix under the leaves!
6-to water, soak bark and fill up outside pot, rinse the leaves too!
7-let sit for 5-10 minutes, then drain and dry the outside of your pot.
8-set in place and enjoy!🌷
New laundry, who dis? Our laundry room was a BLANK New laundry, who dis? Our laundry room was a BLANK slate after the kitchen renovation left it reconfigured too. So Dad and I tackled simple projects that make this space functional and of course visually pleasing too!👏🏻The full project airs this weekend on @todayshomeowner!
.
.
I love that the cabinets and hardware match what we have in the kitchen since the spaces are right next to each other! Synergy!
.
.
What do you love about your laundry room?
Load More... Follow on Instagram

Indoor Projects Outdoor Projects Craft Projects
Facebook Pagelike Widget
  • Contact
  • FAQs
  • Advertise with Chelsea
  • Media
  • Today’s Homeowner

Search This Site

Receive Free Updates Via Email

Copyright © 2023 Checking in With Chelsea • All Rights Reserved