How Not to Hang Wallpaper
Lessons I Learned While Hanging Wallpaper

I made a few mistakes hanging wallpaper for the first time. And I’m sharing them with you so you don’t have to make the same ones!
Have Plenty to Go Around
I purchased my wallpaper many years ago at a local Goodwill store for around $5. I bought it to use in the back of bookshelves or some other small space as an accent.
When it came time to update our 3rd bedroom as a girl nursery, I thought it’d be a sweet, subtle accent on the side of the room with the closets. But since it was old, I’m not even sure it was a full roll.

So my first mistake was having barely enough wallpaper. Strictly measuring linear feet, I had enough. What I didn’t account for was losing some of those linear feet to match up the pattern or have excess to trim at the molding for clean lines. I knew better, but I’ll admit I was a little stubborn and determined to use this paper.
Plus I thought, well, it’s just polka dots, so it doesn’t really have a repeating pattern. It took me about 3 weeks after it was installed to notice that diagonally the dots do not match up.
Fool-Proof Planning
Besides making sure you have enough paper on hand, I’d also suggest going with a subtle pattern on your wallpaper to start. Mistakes are less obvious that way!
That part I did right! One thing I wish I had done a little differently is to paint the wall behind the paper the same as the background color of the wallpaper. Which in my case was white.
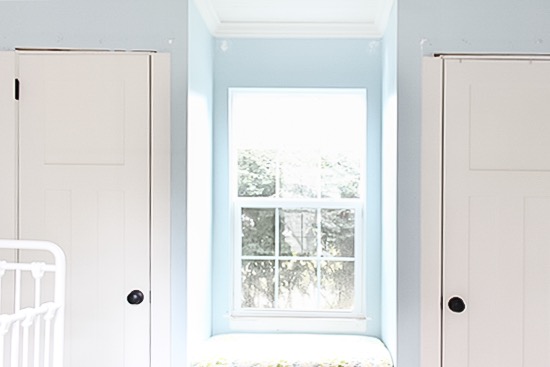
Because I wasn’t practiced in lining up seams and whatnot, some of the blue of the walls showed through on the edges, particularly around the trim. I went back with a small paint brush and painted it with my white trim paint and it looks so much better!
But it would have been less tedious if I was painting the whole wall with a big brush versus doing touch-ups.
Cut with a Sharp Knife
This one may be obvious. But the best way to get a nice clean line up against trim is to cut the wallpaper after it is hung up. And to do so, you need a really sharp X-acto or razor knife. Otherwise it will tear the paper! Even if you think you have a sharp knife, I’d recommend changing it out for a fresh blade.

I also found it handy to use a straight edge to slide your blade against. You’ll get better results than marking and cutting free-hand or with scissors.
Take Your Time to Smooth
Have you ever tried to apply a plastic screen protector to your smart phone? And gotten frustrated in the process and maybe even wasted a protector? Well, hanging wallpaper can be very similar if you don’t take your time!
To smooth any bubbles and get full wall-to-paper contact, you’ll want a plastic smoothing tool. You don’t want to use a metal smoothing tool like a drywall knife because it can cut your paper.

I used one of my Bondo spreaders*. It also came in handy as a straight edge when trimming along the crown molding and baseboard. (On a side note, if you haven’t seen my post on repairing chair legs with Bondo, go check it out! I love using it to repair chunks of wood!)
Pretty much you don’t want the paper to touch the wall until you are smoothing it down. Otherwise, in my experience, you’ll have to re-apply your bonding agent. My paper was pre-pasted, so I brushed liquid starch on the wall, lined up the paper at the top, and then held the paper off the wall with my head/body while I reached my hand around to smooth it down and out. Can you believe I wasn’t able to grab a picture of that scenario??
Avoid Outside Corners
You don’t have to avoid them. But I’d advise against wallpapering a space with outside corners the first time you attempt to wallpaper. They turned out decently enough for me, but they were agonizing to do and took multiple attempts.
What I did was line up and apply my starch to one side of the corner, smooth it well, and let it dry before turning the corner.

I think what made it most difficult was mistake #1 (having barely enough wallpaper), so I was painstakingly matching up the piece of wallpaper along the door frame, crown molding, baseboard, window seat, and adjacent seam all at the same time while also trying to smooth out bubbles.

We’re our own worst critics and I’m probably the only one to notice now that it’s all done. But I have to share in case you find yourself in the same conundrum!

As you may be able to tell in the photos, after the wallpaper was hung, I installed trim around the window and updated the trim on top of the doors. That definitely made wallpapering slightly easier knowing some of the edges didn’t have to be perfect because they were going to be covered later.
Every time I update a room in our house, I make an effort to add trim around the windows since our house had zero trim when I bought it! You can read about my window trim method here or watch my episode on trimming a cased opening which uses the same materials and technique.

I also quickly updated the window seat by upholstering the bench with an old shower curtain. You can watch the how-to on building the built-in bench and drawer in this episode with my dad!

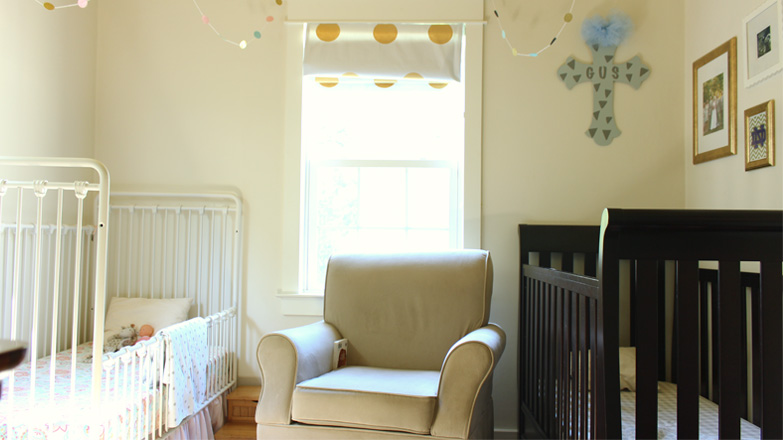
Besides painting the walls and updating the color on the trim, we haven’t done much else to this baby girl nursery. But I’ll be posting the finished space soon! It’s my favorite room in the house and brings me so much joy just by walking by!

I hope sharing my (minor) mistakes helps you if you’re planning to wallpaper an accent wall or entire room! I know it helps me to read about mistakes, not just tutorials! Share your experiences with wallpaper in the comments! I know there has to be some good and bad stories out there! Ha!
Thanks for Checking In! ~Chelsea


2 Comments
Sharon Lipford
I remember your dad and I hanging a wallpaper border in your nursery. (Borders were big way back then!) That paper stretched and folded and it took us WAY too long to hang that little strip of paper. Needless to say, that is not a DIY that either of us will do again!
Chelsea Lipford Wolf
Haha! Still scared 31 years later! 🙂