Checking In With Chelsea

DIY ideas, crafts, and tips for your home

subscribe and never miss a thing!

Receive Free Email Updates

  • About
  • Videos
  • Projects
    • Indoor Projects
    • Outdoor Projects
    • Craft Projects
  • House Tour
You are here: Home / Videos / Styling a Gallery Wall Around a Thermostat

Styling a Gallery Wall Around a Thermostat

October 1, 2015 By Chelsea Lipford Wolf Leave a Comment

Video Playback Not Supported

Happy Fall Y’all! The change in seasons is always an exciting time. Especially when you have fun projects to do! And getting a new thermostat and creating a gallery of family photos to go around it are what I call a good time!

I’ll admit I was a little appalled my friend Kimberly did not already have a programmable thermostat installed in her house. (Sorry Kimberly!) Setting a schedule for the temperature to raise and lower in your house whether you’re home or not is one of the greatest home improvement tricks I can think of. Besides blow drying plastic film on your windows.

So we started our project by upgrading her thermostat to a cool, savvy, “smart” thermostat from Carrier* called the Cor. Since Kimberly has a complex, duel-fuel HVAC system, she called a licensed dealer to install her thermostat. But if you’ve got a simpler system, you can pick up this same thermostat at The Home Depot or through my Amazon affiliate link above and install it yourself! (UPDATE: The Car thermostat is now compatible with Amazon’s Alexa!)

Once Chris the installer had it on the wall, Kimberly and I set a quick program based on her family’s current schedule. Since this thermostat is WiFi-capable, we downloaded the app that allows her to control her t-stat from anywhere! And since this unit is “smart” it will learn her family’s habits and re-program itself based on the temperatures they adjust it to when they’re home and turn the temp up or down when they’re not home.

A little freaky, a little awesome!

With the new, square hardware on the wall, I had one small trick to show Kimberly. We replaced the air filter just below the thermostat and added a few drops of her favorite grapefruit essential oil. So when her HVAC system is pulling air through the filter, it’ll also add a delicious scent to the air in her home! You can also use vanilla, almond, or orange extract if you don’t have essential oils!

Now Kimberly was ready to update the look of her family’s main “entry wall”. With 2 young kids, she has a ton of digital photos but none of them have made it on the walls around the house. So we gathered a bunch of frames of various sizes but with a matching finish to create a gallery wall.

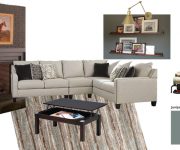
There are so many different ways to put a gallery wall together! And they all depend on you and your home’s style. You could have frames all the same size, but different colors. Or different types and size of frames with the same color. Or what I did for my daughter’s nursery was create a wall of mixed frames and other items that were all gold, pink or white.

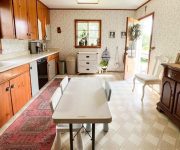
To start, we worked and reworked our frame configuration on Kimberly’s dining table. We used a 4″x4″ piece of newspaper to be the thermostat in our layout.

Thermostat Newspaper Template with Frames

Once we were satisfied with how our frames were shaping up (based solely on personal preference), we began tracing our frames onto newspaper.

scissors cutting newspaper for photo frame template for gallery wall

After we cut out and labeled all of the templates, we used painter’s tape to put them in place on the wall. This is great if you’re a visual person. It allows you to see the layout in the actual space without hammering a bunch of nails before you’re ready! And it helps eliminate having to measure between frames to hang them just right since your templates are already adjusted to look great!

newspaper templates for photo frames taped on wall for framed gallery wall

We moved a few templates around before we had it just the way we wanted. The templates also come in handy for the next step-nails! Simply measure from the top of the frame to the hanging point on the back. Then use that measurement to mark on the newspaper templates. Instead of one nail in the middle per frame, we used two nails on either side of center to keep the frames from shifting and becoming unlevel.

Using small wire nails, we put a nail in every mark on the templates before tearing the newspaper off. It also helps to use a level if you’re using 2 nails per frame to make sure they’re level with each other.

using torpedo small level to check nails for picture frame

Next it was time to hang the frames! Easy, peasy and the results look great! Even though Kimberly has a large dining table (for her large extended family) that’s normally in front of this wall, I think the family photos will outshine it and be the focal point in this room!

wood stained photo frames in gallery wall with carrier cor thermostat

Thanks for Checking In! ~ Chelsea

*This post contains affiliate links*

Subscribe for Free Updates!

Stay up-to-date on Chelsea's latest projects, tips, useful resources and more.

Previous Post
Budget Ways to Improve Energy Efficiency
Next Post
How To Paint An Exterior Door

Related Content

Completed Girls Bedroom Makeover Pink PanelingPink Girls’ Shared Bedroom Evolution1950s Ranch Kitchen Before Renovation1950s Kitchen Renovation IdeasTips for Selling Your Stuff OnlineHow to Make Big Money Decluttering Your HomeMoodboard for Calm and Cozy Family Room DenCreating a Calm and Cozy Family Room

Please Leave a Comment Cancel reply

Your email address will not be published. Required fields are marked *

Welcome!

I’m Chelsea. DIY
enthusiast who loves
sharing my victories
and mishaps!
Learn more
here.

CHECK IN WITH CHELSEA ON INSTAGRAM

Ask me how I know😑Whether you’re doing a smal Ask me how I know😑Whether you’re doing a small patch or a whole room, this drywall sanding hack will keep the dust at bay and keep the rest of your house looking good😎
.
.
#drywall #diyhack #tipsandtricks
A Spring Break to remember! Thanks to CeeCee and P A Spring Break to remember! Thanks to CeeCee and Pop Daddy for bringing the Wolfpack along on vacation! A long travel day ahead of us but it’s always worth it to spend time with family and get some r&r.☀️😴 Happy weekend!
9 years!✨Brandon and I will be celebrating 9 yea 9 years!✨Brandon and I will be celebrating 9 years of marriage this week. And how perfect we were invited to a wedding tonight walking distance from our home.🥰Sometimes reality is better than the movies and this weekend is one of those times. Enjoy, friends!☀️
What else do you use paper plates for besides eati What else do you use paper plates for besides eating?? Spray paint onto a paper plate and dab a small paint brush to do spot touch ups! Life hack when you’re working on a project but don’t need to paint the whole surface!👏🏻
.
.
#lifehack #diyhacks #spraypainting #painttips #paintprep #paintpro #shutters #craftsman #1940style
Didn’t mean for this to be #ASMR but here we are Didn’t mean for this to be #ASMR but here we are!🤷🏼‍♀️ I bought this orchid 15 months ago to use the flowers in our hair for my sister’s wedding. I’ve already repotted it once and it’s bloomed 3-4 times! Time to do it again with a pretty new pot that matches our new kitchen cabinets!🤩
.
.
Steps to repot an orchid:
1-large pot without drainage holes
2-plastic pot slightly smaller with holes
3-trim if needed so plastic pot is at or below outside pot
4-add layer of orchid specific potting mix (it looks like bark!)
5-add orchid, fill in around roots with more bark- don’t forget to add some mix under the leaves!
6-to water, soak bark and fill up outside pot, rinse the leaves too!
7-let sit for 5-10 minutes, then drain and dry the outside of your pot.
8-set in place and enjoy!🌷
New laundry, who dis? Our laundry room was a BLANK New laundry, who dis? Our laundry room was a BLANK slate after the kitchen renovation left it reconfigured too. So Dad and I tackled simple projects that make this space functional and of course visually pleasing too!👏🏻The full project airs this weekend on @todayshomeowner!
.
.
I love that the cabinets and hardware match what we have in the kitchen since the spaces are right next to each other! Synergy!
.
.
What do you love about your laundry room?
Load More... Follow on Instagram

Indoor Projects Outdoor Projects Craft Projects
Facebook Pagelike Widget
  • Contact
  • FAQs
  • Advertise with Chelsea
  • Media
  • Today’s Homeowner

Search This Site

Receive Free Updates Via Email

Copyright © 2023 Checking in With Chelsea • All Rights Reserved