Checking In With Chelsea

DIY ideas, crafts, and tips for your home

subscribe and never miss a thing!

Receive Free Email Updates

  • About
  • Videos
  • Projects
    • Indoor Projects
    • Outdoor Projects
    • Craft Projects
  • House Tour

Budget Ways to Improve Energy Efficiency

September 1, 2015 By Chelsea Lipford Wolf Leave a Comment

Video Playback Not Supported

This month I help my friend Marie get her new room ready to be occupied. The house she’s moving in to is a lot like mine before we remodeled it 3 years ago. Lots of character, but old with drafty single-pane windows.

And even worse, the exterior walls of her bedroom are practically just those windows.
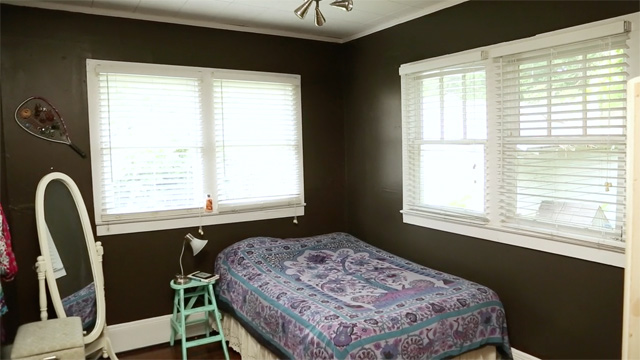
brown bedroom walls with single-pane windows

So we start by updating them without replacing them by applying a window insulation film. This basically creates an extra pane essentially making the windows double-pane while still being able to see out of them.

The kit we used from Duck Brand* comes with everything you need except scissors (or razor blade) and a hair dryer, which I’d imagine most people already have on hand!

Once we had our supplies ready, we removed the faux wood blinds to access the window trim. Then we wiped the edges around the window with the included alcohol wipes. Got to make sure there’s no residue to inhibit the tape from sticking!
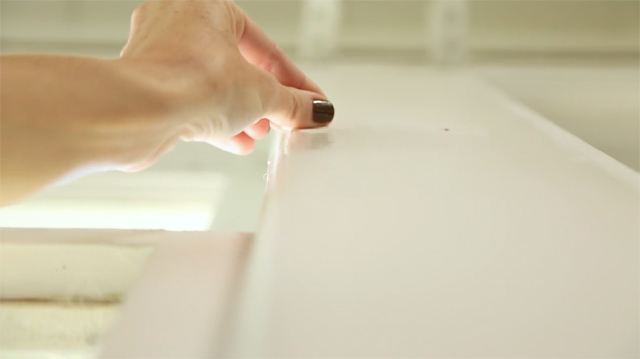
using alcohol wipe to clean edge of white window trim

We decided to insulate each window separately. Although the way Marie’s windows were structured, we could have easily done the 2 windows near each other as one.

Next we applied the double-sided tape that came with the kit along the 2 sides and the window sill of each window. Our window film comes with one pre-taped side, so that goes along the top. Leave the liner on the tape until the plastic is in place.

Roll out the pre-taped plastic film along the top of your window, leaving a few inches on either side. Unfold the plastic and cut it to length, also leaving about 2 inches. Now you can remove the liner from the tape. Touch the plastic to the double-sided tape in a few places to make sure the plastic is lined up correctly without major wrinkles. Readjust the plastic on the tape as necessary. But don’t pull the plastic super tight right now. That will come later. Seriously, leave a lot of slack in the middle.

It’s not going to be 100% wrinkle-free, but once you’re satisfied that the big wrinkles are gone, firmly press the plastic to the tape around the window.

Now comes my favorite part…the hairdryer!

Run the hairdryer over the film slowly on high heat to watch the wrinkles dissipate! Start several inches away from the film because you DO NOT want to get too close. It can burn a hole in the plastic without even touching it.

And I only know this from personal experience. I used this same kit on the old, aluminum windows at my house over 4 years ago before they were replaced with new ones. Fortunately I wasn’t blogging at the time, so there’s no evidence to prove I was too aggressive with the hairdryer!

Seriously, it is so satisfying to watch the wrinkles disappear before your eyes. But the real magic is that this thin piece of plastic can save you big monies on your energy bill this winter. AND improve the comfort of the room. (I also know this from experience.)

OK, once all 4 windows had been properly insulated, we trimmed the excess on the outside of the tape and replaced the faux wood blinds.

Then it was time to upgrade the look of the windows with curtains. We kept it simple by creating no-sew curtains which I’ve made before on an episode of Today’s Homeowner.

You take a fitted bed sheet (we used a queen-size since the windows are rather wide), fold it in half, and slip a curtain rod through the middle. Then tie a coordinating ribbon along the curtain and over the rod to cinch it in several spots. We did this 3 times for each curtain we made.

Instead of using traditional hardware to hang the curtain rods, we opted for adhesive hooks so Marie won’t have any holes to patch when she decides to move out. They’ll come clean from the wall without causing damage.

We hung the curtains on our hooks and then fluffed the sheet draped between the ribbons to even it out and make it look great!

light blue no-sew valance curtain over white windows

Now with the windows looking sharp and operating way more efficiently, I had one last thing before I left Marie to finish her moving. We installed gaskets (Socket Sealers also from Duck Brand) around the outlets on the inside of her exterior walls. Just one won’t make a difference in Marie’s heating and cooling costs. But adding them to every outlet and light switch on those exterior walls throughout the house, in addition to the window film we installed, she should be nice and cozy and stress-free when she receives her first utility bill this winter!

Once winter is passed, she can easily remove the film. And if she decides to move, she can be stingy (like I would be!) and take her gaskets with her!

Thanks for Checking In! ~ Chelsea

*This post contains affiliate links*

Subscribe for Free Updates!

Stay up-to-date on Chelsea's latest projects, tips, useful resources and more.

Previous Post
Rustic Cabin Decorating Projects
Next Post
Styling a Gallery Wall Around a Thermostat

Related Content

Simple Board and Batten Fireplace UpdateDIY Double Batten Accent WallCompleted Wire Shelf Pantry UpgradeWire Shelf Pantry MakeoverTips for Selling Your Stuff OnlineHow to Make Big Money Decluttering Your HomeMoodboard for Calm and Cozy Family Room DenCreating a Calm and Cozy Family Room

Please Leave a Comment Cancel reply

Your email address will not be published. Required fields are marked *

Welcome!

I’m Chelsea. DIY
enthusiast who loves
sharing my victories
and mishaps!
Learn more
here.

CHECK IN WITH CHELSEA ON INSTAGRAM

Feeling like a million bucks at the Daytime Emmy C Feeling like a million bucks at the Daytime Emmy Creative Arts and Lifestyle Awards with my forever date! 6 more weeks until baby!🤩🏆 
.
.
Hair by me
Makeup by me
Earrings by @elledragoclayco 
Dress @azazieofficial borrowed from @brittany_baugh 
Shoes @lulus borrowed from @emilylipford
B’s suit from @laurenralphlauren

#daytimeemmys @daytimeemmys
Home sweet home!✨It was a nice respite to go on Home sweet home!✨It was a nice respite to go on a work trip to @exploreclt after spending a week on a road trip with 3 small kids.🙉But there’s no place like home!
.
.
Now time to tackle Mt Laundry because thankfully the little people wore clothes while I was away! What’s on your agenda this weekend?
.
.
#homesweethome #sweethomealabama #noplacelikehome #familyroom #familyroomdecor #familyroomdesign #roundcoffeetable #ikeaforthewin #ikeadecor #kidslivehere
An occasion to get dressed up? We are here for it! An occasion to get dressed up? We are here for it!👏🏻 Nothing beats a family wedding on a beautiful spring day!☀️ Happy Memorial Day Weekend!🇺🇸
Happy 3rd birthday🎈to the biggest mama’s girl Happy 3rd birthday🎈to the biggest mama’s girl I’ve ever known! She weighs as much as her big siblings but still likes Mommy to hold her.😜 She’s got plenty of sass and insists on doing everything herself. Which is why she normally has hair in her face and a tornado of chaos all around her. Pretty much our life since she came into it. But the best kind of chaos that grows and stretches you and teaches you to slow down and accept them just the way they are.☺️
.
.
Can’t believe it’s been 3 years!🥺
.
.
#celebratethem #birthdayshoutout #girlbirthday #girlparty #3rdbirthday #springbreak2022 #familyvaca #vacay2022 #vacationmode #visitflorida #staugustinefl
Cheers to the weekend, friends! May it be filled w Cheers to the weekend, friends! May it be filled with plenty of sunshine and bright spots!☀️🥰
.
.
#happyweekend #friyay #feelslikesummer #weekendvibes✨ #mothersdayweekend #beachday #plentyofsunshine #pocketfullofsunshine #girlbedroom #twinbeds #pinkvibes
FINALLY painted this eyesore of a wall and finishe FINALLY painted this eyesore of a wall and finished just before dark last night!🙌🏻 My husband and I decided instead of starting a new project (ahem a baby nursery) we should finish the projects we’ve already started. Since baby is due in the summer, it will be so nice to have our backyard up to par so we can rest and relax out there during recovery. ☺️
.
.
We started this project back in October by stripping and scraping the many layers of paint so we could waterproof the bricks and paint the wall to match the house. But the house was painted exactly a year ago. So it was way past time to knock this huge item of the time-do list. And it feels like such a relief to not have to walk by the unfinished-ness every time we come home now!
.
.
Next up we’ll slowly tackle patching hardwood floors and finish painting and replacing our interior doors that are taking up room in our garage.👏🏻
.
.
What’s something you’ve knocked off your to-do list lately?!
Load More... Follow on Instagram

Indoor Projects Outdoor Projects Craft Projects
Facebook Pagelike Widget
  • Contact
  • FAQs
  • Advertise with Chelsea
  • Media
  • Today’s Homeowner

Search This Site

Receive Free Updates Via Email

Copyright © 2022 Checking in With Chelsea • All Rights Reserved