How To Patch a Hole and Replace
Boards in Your Hardwood Floor

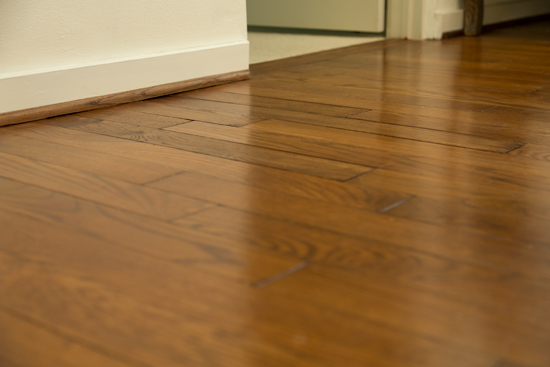
Can I please stress to you that replacing a few boards of flooring, whether vinyl planks or tongue and groove hardwood, is NOT hard?! Sure it may be a little inconvenient and looks worse before it looks better, but it can be done! And of course I’m here to show you how!
But first a little backstory! My house was built in 1941 and previously had a giant ‘package unit’ for the HVAC system. So the ductwork ran under the house in the crawlspace and the vents came up in the floor. Well, when we got a new system 2.5 years ago, the HVAC contractor, my dad and I decided to do it the more standard way with half the system in the attic. Therefore, creating the need to move the vents to the ceiling.
Unfortunately, that left what are essentially giant holes in my floor.? So before I could replace the hardwood boards, I needed to patch the hole in the subfloor. Regardless of your particular situation, you’ll need to remove the old boards first.
Materials
- hammer
- pry bar
- painter’s tape
- oscillating saw*
- speed square*
- wood chisel
- miter saw
- 2×4 scrap
- 1/2″ plywood scrap
- drill*
- wood screws, at least one that’s 3″ long
- caulk
- construction adhesive
- trim nailer
- sander
- wood stain*
- polyurethane*
- wood putty*
- replacement boards
Google helped me find a wholesaler in my area to buy the replacement boards. The best thing you can do is take a piece of your flooring, even if it’s a broken one you’re replacing, so you can get the best possible match. Then save any scraps leftover so you have it handy next time you need to match it for something!
In particular with hardwood, there are different thicknesses, different widths, and different species of wood that can all affect the end results!
You’ll also need to match your existing stain as best you can. For me, I knew what stain the floor refinishers had used (since I picked it out) and I also had a can of it from other projects I’ve done around the house. If you’re not sure, there are charts in the stain aisle at the home center that show various stain colors on a small piece of pine and a small piece of oak. So hopefully that gives you enough options to get a perfect match!
Remove Boards
Before you can being removing the boards you’re replacing, you need to determine where you’re going to have seams in the boards. You want to remove as little as possible, but you also want the seams to stagger enough to match the original installation. (Watch the video above for more specifics.)
It helped me to put tape on the boards I was keeping. Not only did it protect the keepers, but it also give me a visual of where to stop and where to keep going during the removal process.
Once you have it figured out, you’ll need to cut the tongue off of the boards you’re removing. I used an oscillating saw for this. Its small blade allows you to get into tight spaces without unknowingly cutting things you don’t want cut. If you have true-to-the-grain old school hardwood like me, it’s going to be thick and dense and require some oomph and stamina to cut through all of the tongues. BUT this is the hardest and longest part of the process!! So once you’re done cutting, it’s all downhill from there!
Use your pry bar to maneuver and remove your first board, and the rest should follow much easier.
Subfloor Repair
OK, your boards are removed, the area is clean. If you’re not in a situation similar to me and you don’t have to patch your subfloor first, then skip ahead to the next step.
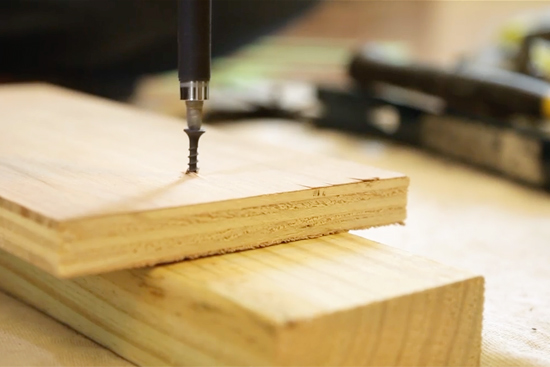
To patch a small hole in your subfloor, cut a piece of plywood (the same thickness as your subfloor) to the same size as the opening. Then cut a 2×4 5-6 inches longer. Use your screws to attach the 2×4 to the underside of the plywood, with 2-3 inches sticking out on either side.

The trick here is to attach a 3″ screw around the middle of the plywood, but don’t screw it in all the way, leave an inch or so sticking up. So when you insert the plywood into the hole, you can hold it in place with the screw.??
While you’re holding it in place, attach a screw or two on either side through your existing subfloor into the 2×4 below. You know you’ve done it right when you let go of the 3″ screw and the plywood stays in place!
Since my hole was not perfectly square, I filled in the voids around the edges of my plywood patch with painter’s caulk to get a complete seal from the outside area. And bugs. You can use any kind of caulk or sealant you have around the house.
Vapor Barrier
If you’re just repairing a small area like me, a vapor barrier isn’t an essential step. But who doesn’t have garbage bags lying around!?It’ll help keep moisture from outside creeping up into your floorboards (and house) which can cause boards to warp and floors to squeak. Since I already had construction adhesive out for the new hardwood, I used a little to glue the garbage to the subfloor.
Install New Boards
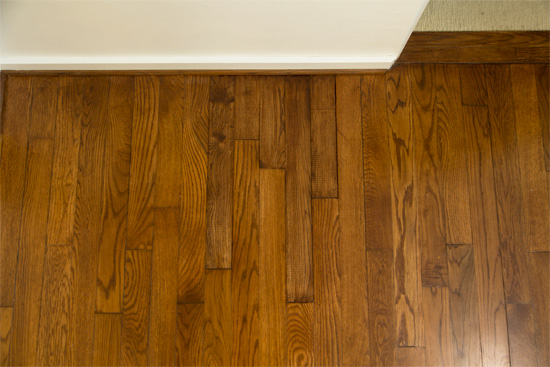
Cut all of your new boards to size and piece them in one at a time, gluing each one with construction adhesive as you go along. Start with the piece on whichever side of your opening that has the groove in the existing board. Basically you’ll slip the tongue of your new board into the groove of the old board and it will squeeze into place. It may take a little hammer-persuasion if it’s a tight fit. If so, turn one of your boards upside down on top of the board you’re installing and hammer the upside down piece. It’s called a tap block and will keep you from leaving dings in your new boards.
Keep working your way across your opening, putting tongues into grooves and applying construction adhesive! Once you get to the other side, slide any boards that may have shifted back into place. If you want, you can use small nails to tack the boards into place. I did this along the baseboard since it would be covered by the shoe molding once I was finished.
Sanding
If you’ve ever seen a professional refinish hardwood floors, you know they use a huge, heavy duty, walk-behind sander to prep the floors for stain. Here, I just used a battery-powered sander with 220-grit sandpaper. After a first pass, you can change to 400-grit to get a really fine finish. Sand in long strokes in the direction of the wood grain.
Finishing
Apply the stain using a brush or rag. Don’t worry too much about getting it on the existing boards. If they are already finished, then the stain will wipe right off. Let your stain sit on the wood as long as it needs to soak in to match your existing finish. I wiped too soon at first and had to apply stain again! Next wipe off any excess stain.
Once the stain dries according to the can’s directions, apply polyurethane. I used a satin sheen in my house. And since the original floor refinishers applied 3 coats, I did the same here, lightly sanding between each coat.
Before I got to the 3rd coat, I realized that my old floors had random spacing between some of the boards that had long been filled in with gunk, dust, etc. which had then been stained and sealed 7 years ago. So I found some wood putty in a similar stain color and filled in gaps around my new boards to help them blend in even more! (The photos in this post were taken before this final coat. I’ll try to take current pictures and update this post soon!)
Follow your polyurethane’s instructions on dry time before allowing foot traffic.

This was my first time doing this kind of thing solo. So if I can do it, you can too! And don’t forget, you can always borrow a power tool you don’t already own from a neighbor or a tool rental center at The Home Depot before you buy one for yourself!
Hope this helps you make your house a little more ‘complete’!
Thanks for Checking In! ~Chelsea
*This post contains affiliate links*


The floor looks great! We’re replacing the flooring in our camper and what a huge difference for the better. We can hardly believe how it makes us feel ! SO worth the time and effort. Your girls are very precious and cute! Hope your birthday and Mother’s Day were both lots of fun! Have fun creating memories with your wonderful family.