Checking In With Chelsea

DIY ideas, crafts, and tips for your home

subscribe and never miss a thing!

Receive Free Email Updates

  • About
  • Videos
  • Projects
    • Indoor Projects
    • Outdoor Projects
    • Craft Projects
  • House Tour
You are here: Home / Videos / Planting a Mailbox Garden

Planting a Mailbox Garden

April 1, 2016 By Chelsea Lipford Wolf Leave a Comment

Video Playback Not Supported

I love getting out in the yard and getting some dirt under my fingernails. Even though I wear gloves, dirt somehow still ends up there! Any who that’s the besides the point.

Tiffany needed some updates to her mailbox area to improve the curb appeal of her house. Her mailbox wasn’t in the best of shape and she had a weird off-center walkway from the previous homeowners.
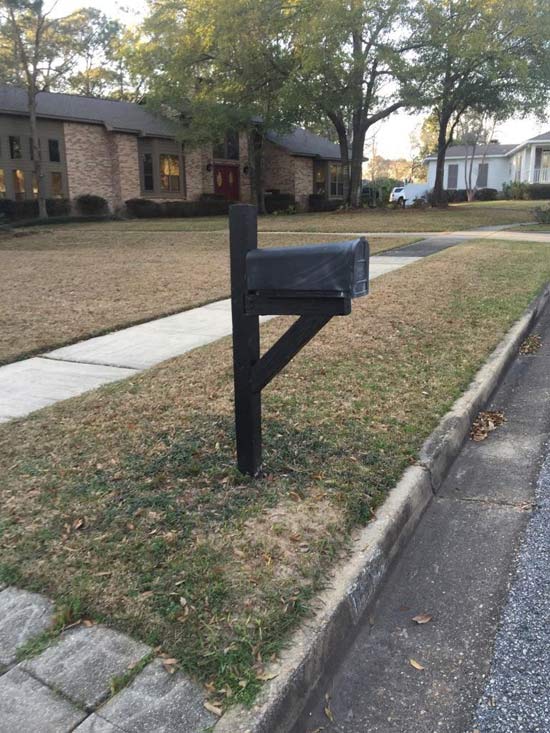
Black Mailbox and Post Before

So our first order of business was to remove the old mailbox and post and install a new one. No sense in planting pretty flowers around a rough-looking mailbox!

It turns out the post wasn’t in concrete. No wonder it had a wobble to it! We ensured her new mailbox wasn’t going anywhere with some fast-setting concrete.

While the concrete was drying, we removed the pavers that formed the walkway from the street to the sidewalk. We moved them around to find a new layout that would be pleasing to the eye.

Once that was determined, we used string to lay out what would be our garden.
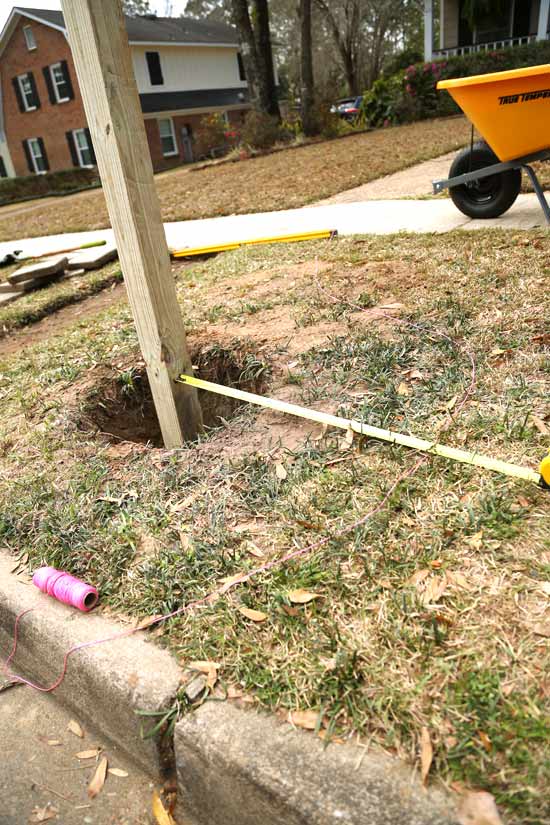
Laying Out String for Garden Area

We also used a tape measure to make sure we would have equal spacing on either side of the post.

We then used an Ames square point shovel to cut and remove the grass inside our garden layout. Tiffany was able to use the grass we removed in other parts of her yard! Score!

Once the area was clear of grass and weeds, we used a bow rake to level the dirt.

Before we planted our sun-loving flowers in the ground, we laid them around the mailbox to see how they’d look. We dug the holes for each plant with a small-head floral shovel and hand trowel.

When you’re picking out flowers or plants for a garden around your mailbox, look for drought-tolerant varieties that require 6+ hours of sunlight a day. Trust me, you’re not going to want to drag the hose or watering can to the mailbox every-other-day during the high-heat days of summer just to keep your flowers in shape!

We used some Gerbera daisies (my favorite!), a rose bush, Snapdragons, a few small Moss Roses, and other colorful flowers to fill the area. And since Tiffany’s new mailbox had a built-in planter on the back, we got to add even more color to this space!

And with the pavers in their new spot (centered on the existing sidewalk), we spread mulch around the flowers and pavers to create a beautiful, cohesive space! Mulch is great to keep the soil around the flowers moist as well as deter weeds from rooting themselves in your new flower bed!

Our True Temper wheelbarrow came in handy to move extra dirt from the area and easily dump it in some low spots around Tiffany’s yard as well as move our plants and mulch to our work area before we got started.

The newly planted area is not so overwhelming that it takes away from the house itself, but it certainly improves the overall welcomeness and curb appeal of Tiffany’s home!

Colorful Mailbox Garden

It’ll look even better once the grass starts growing again and turns green! But until then, Tiffany will have something pretty to look at when she checks her mail in the afternoon.

Chelsea and Tiffany with Completed Mailbox Garden

Thanks for Checking In! ~ Chelsea

Subscribe for Free Updates!

Stay up-to-date on Chelsea's latest projects, tips, useful resources and more.

Previous Post
Going Dutch, Door Style
Next Post
Mossy May Monogram

Related Content

Chelsea Lipford Wolf on Deck with Small Bug-Repellent Container GardenEasy Way to Keep Mosquitos AwayChelsea Killing Weeds without Chemicals on Concrete Sidewalk Red Brick StepsHow I Kill Weeds Without ChemicalsSunshine Ligustrums in Their Happy PlaceCurb Appeal Update 2018Cherry Picked by Chelsea Acurite Rain GaugeCherry-Picked: AcuRite Rain Gauge

Please Leave a Comment Cancel reply

Your email address will not be published. Required fields are marked *

Welcome!

I’m Chelsea. DIY
enthusiast who loves
sharing my victories
and mishaps!
Learn more
here.

CHECK IN WITH CHELSEA ON INSTAGRAM

Lookie! It’s a shelf for your bookies! 🤣Build Lookie! It’s a shelf for your bookies! 🤣Building a shelf unit custom for ANY space in your home is so simple and can be done over and over again to add much needed storage aka sanity! The kids were running all over the house at bedtime trying to find a book to read because we had them stashed in baskets and shelves in several different rooms. So I took advantage of this space in the hall next to a closet to create a central location for their books and some of mine too! Plus it adds a little character to an otherwise blah space!🙌🏻
.
.
A full how to video is on checkinginwithchelsea.com! Book nerds can be DIY nerds too!🤓
.
.
#booknerdsunite #diyskills #beginnerdiy #bookshelfie #halldecor #storagesolutions #storageideas #bookstorage #bookstorageideas
5 months in and she’s at the top of my favorites 5 months in and she’s at the top of my favorites list!🥰
.
.
Couldn’t resist using this audio.😅
Using my grandmother’s cookie press to make 🎄 Using my grandmother’s cookie press to make 🎄cookies I used to make as a kid in our brand new kitchen. My heart could burst!😭 I hope you are enjoying the preparation for the main event 😇and bring love and joy to your home, no matter what it looks like.❤️💚
.
.
#christmascookies #christmastrees #familytraditions #christmasbreak #newkitchen #kitchendecor #kitchendesign #madewithlove
3D art install in my girls’ girly bedroom!🦋😍Love this $13 pack of butterflies that comes with everything you need to fill a large wall! And it only takes 30 minutes!🙌🏻 Putting the link to the butterflies in my bio! (https://amzn.to/3VmfZsB)
.
.
First step is to layout the flow of your fluttering butterflies with the large and medium sizes from the pack, leaving room for the small ones. Then fill in spaces with the small size and pat yourself on the back! So easy!
The whole Wolfpack has been staying at my parents’ house on the river for the past week while our hardwood floors are being refinished. Since the kids had the whole week off of school it has really felt like a vacation! Complete with a sunny Sunday boat ride after Mass!🥰🚤☀️Enjoy the rest of your weekend! 😘
.
.
#generationalliving #3generations❤️ #4kidlife #grandparentlife #boatday #riverside #riverlifestyle #fowlriver #alabamalifestyle #alabamablogger #nofilterneeded
Dad and I got our tickets to the gun show!💥 . . Dad and I got our tickets to the gun show!💥
.
.
@todayshomeowner @visitmobileal #exploreyourhometown #hometownpride #mobilealabama #battleship #ussalabama #visitmobile
Load More... Follow on Instagram

Indoor Projects Outdoor Projects Craft Projects
Facebook Pagelike Widget
  • Contact
  • FAQs
  • Advertise with Chelsea
  • Media
  • Today’s Homeowner

Search This Site

Receive Free Updates Via Email

Copyright © 2023 Checking in With Chelsea • All Rights Reserved