How to Keep Grass from Growing Under a Fence

I think you’ll find after watching this month’s episode you can apply this idea somewhere in your yard. Whether you want to or not is a different story! Ha!
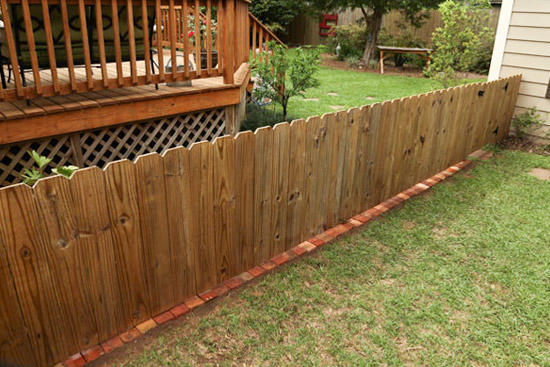
Ever since I’ve been mowing around this fence I’ve wished for an easier way to navigate around the 4x4s on the back side. It’s a lot of picking up the mower and moving it into place to mow as much of the grass as possible. Then there’s the front side. To get a close mow, I’m practically scraping the fence with the mower tire each week.
Enter leftover bricks!
Materials
- square-point shovel
- string
- 4′ level
- stakes
- tape measure*
- rubber mallet*
- bricks or pavers
Bricks were the perfect size for my application. When they’re lined up with the 4×4 posts on the back, there’s still some sticking out on the front. But the real trick in getting this solution to work is to make the bricks level with the ground, not the top of the grass.
Measure, Mark, Dig
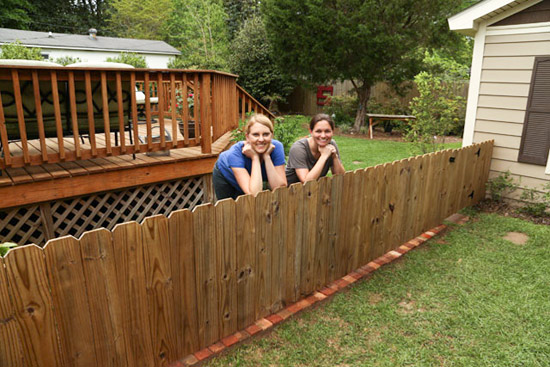
So Shelby and I started by measuring and marking our digging lines on both front and back of the fence. We used wooden stakes and string. We then used square point shovels to dig out a couple inches of dirt the entire length of the fence.
Once most of the dirt was removed, we checked the depth and that it was level. Use a 2-foot or 4-foot level to check for level in several spots.
Lay Bricks
Then we moved on to laying the bricks in our trench. Shelby slid them under the fence while we both lined them up with the brick next to it and used a rubber mallet to set it in the dirt and keep it level with the surrounding bricks.
Slowly, but surely, we set brick after brick and we were done! We used some of the removed dirt from our 5-gallon buckets to backfill along the bricks.
Mow with Ease
Of course the whole reason for this project was to make mowing easier. So we had to try it out right away. And since Shelby had never mowed before, it was easy to convince her to use my electric start mower from Lawn-Boy. And with the rear wheel self-propel, she just mowed right over the whole backyard!
**This video is sponsored by Lawn-Boy. However, all opinions are 100% and my own. And I only work with companies I use and trust.
But the good news? The brick border was perfect for solving my not-so-big problems around this small fence! I also love that if grass does grow between the bricks, it can now be sprayed without affecting the surrounding grass or plants. That’s like a three-fer solution, right?
Another great place to use something like this would be next to a retaining wall, tree ring, or anywhere you can’t get a tight mow! And you don’t have to use bricks. You can use other hardscape pavers as well.
Here’s to healthy, weed-free grass this summer!

Hope you have a great June! And don’t forget to “Check In” between episodes on my blog for other projects I’m working on around my house. And leave a comment below so I know you were here!
Thanks for Checking In! ~ Chelsea
*This post may contain affiliate links*


I would suggest laying black grass and weed cover first…you are going to have grass grow between bricks…great idea and looks good. Thanks Pat
I have a chain link fence that I always have to weed whack. I can never get all the grass. I’d like to put something under it so the grass won’t grow there. I don’t want to use anything to kill the grass because my dog eats grass. I saw a plastic thing that I can lay under the fence and it clicks together at the posts and runs the whole length of the fencing. Any ideas?
What a great idea! Landscape fabric would help keep weeds and grass from infiltrating. Also, a layer of sand or fine gravel under the brick would help with drainage – and help keep the bricks nice and level.
All good ideas! Thanks James! ~Chelsea
Thanks. The wall I want to line with brick is concrete block but using brick in this way will work. I will use the sand and the black cover too.
Great idea! It would help keep animals out.
Hello! I love this video thank you. I was also wondering what you sprayed on the fence and brick to waterproof and protect them. What product do you use?
Ruth-I used Thompson’s Waterseal Multisurface Waterproofer. Here’s an affiliate link for you: https://amzn.to/2Mqi468 ~Chelsea
I might try this on my wooden privacy fence because my dog keeps trying to dig holes. Do you think we should mortar them together?
Mortar would take longer but would help prevent weeds and grass from coming up between the bricks. You could also use landscape timbers instead! ~Chelsea
I thank you for sharing an informative article about keeping grass from growing under a fence. Your tips are helpful in saving my time and effort in mowing the grass regularly. You also included the materials needed for the project. The content is well-detailed about the topic. Thanks also for sharing a video related to it. You may not know it, but it can be beneficial for those who are fond of landscaping like me. Thanks much!