How to Transform Frames from the Thrift Store
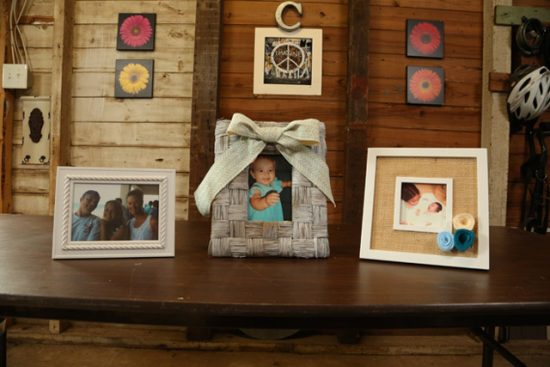
I’ve got 3 different ways to makeover inexpensive, but ugly, picture frames you might find at the thrift store! Paint, hot glue, and inexpensive molding can help you create beautiful masterpieces in an afternoon!
It’s May, folks! Also known as the best month of the year because it’s my birth month! Woot! (It’s on the 14th for those of you wondering…)
Mother’s Day is also in May, so maybe this project will help you with your mom’s gift this year. It’s cheap and easy in case you’re a little behind on your shopping!
My guest this month is a local radio DJ that I loved listening to on my drive to high school. Shelby does a great job on the morning show on our country station 95KSJ.
She had some picture frames she picked up at a local thrift store that were past their prime. And since she’s pretty crafty she knew something could be done with them. And at $1 and $2 a pop, they were hardly an investment!
So we got to work, one frame at a time.
Burlap and Felt Flowers
Before:

After:

Materials:
- white spray paint*
- hot glue gun*
- burlap
- putty knife*
- felt sheets
- marker
- scissors
- picture hanger*
- hammer*
The orange and yellow flowers were an easy target for a fresh coat of white spray paint. But instead of just leaving it white, we added some texture by gluing burlap over the broad middle section.
Since the frame was going to be a gift for Shelby’s sister, we added a picture hanger to the top center of the frame in case her sister would want to hang it on a wall. Versatility is the name of the gift game!
Once that was in place, we added a pop of color with 3 different pieces of felt. To create these flowers, first trace a round object on the felt. We used a quart paint can and a plastic cup. I’ve used this same technique before with a giant coffee can and an old CD. It all depends on how big or small you want your final flowers to be.
After you have your circular objects traced, cut out the circles just inside your marker line. Then starting from the outside cut about an inch-wide spiral until you reach the middle of the previous circle. Here’s a picture from when I made a fall monogram wreath to give you an idea.

We made 1 larger flower with the dark teal felt, then made 2 smaller flowers in the cream and light blue felt. We glued the larger one in the middle on one corner of the frame with the other 2 on either side with hot glue.
Love, love the results. Hard to believe it’s the same frame! I think this one might be my favorite.
White-Washed with Ribbon
This one wasn’t quite as offensive right off the shelf, but it did have some of the weave that needed to be repaired.
Before:
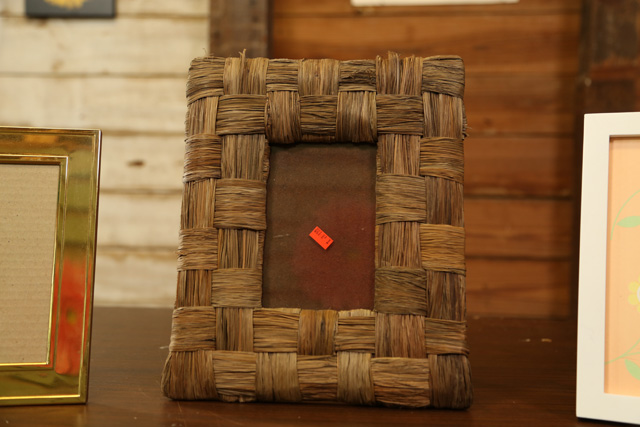
Of course we took it a step or two further.
After:

Materials:
We started this frame’s makeover by gluing down the loose parts of the weave. And after masking the glass that was built-in, for lack of a better term, we lightly sprayed this frame with the same satin spray paint as we used on the first frame. And I say lightly because we didn’t want it to be solid white. We were going for a white-washed look to let some of the natural color of the weave come through.
Before we added a bow to the front, we added a picture hanger to the back of this frame as well. Then we tied and glued a bow from a wide ribbon to the front/top/center of the frame. The coloring of the ribbon really complimented the white wash of the frame and added some subtle color too!
We also added a dab of glue to the “tails” of each side of the ribbon to keep them from falling into the middle and covering the picture we put in the frame later.
Now this one might be my favorite!
Rope Molding Frame
Before:

After:
Materials:
- dish soap and rag
- thin rope molding*
- tape measure*(my personal fav!)
- pencil
- miter box*
- hand saw
- all-purpose adhesive*
- spray paint*
While the brass look has come back in style and I personally like brass and gold accessories, this particular frame was lacking current style.
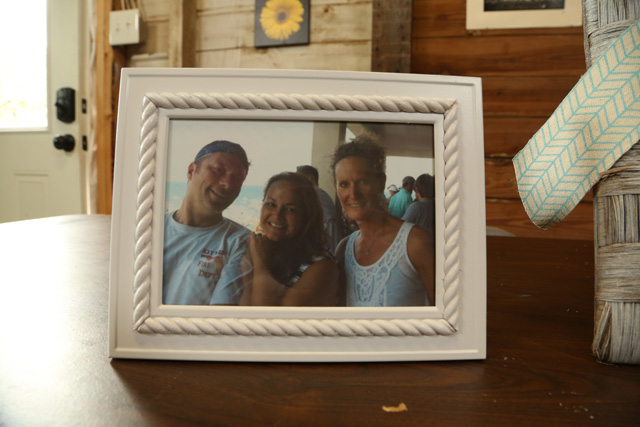
But before we took to my favorite go-to makeover tool, spray paint, we added some oomph with rope molding from the craft store. It’s a lot thinner than the rope molding you’d find at the home center, which was best for this frame since it wasn’t very big.
Of course to ensure a good bond with our all-purpose adhesive and the frame, we cleaned it first using a degreasing dish soap and wet rag. I almost wanted to leave it alone after we cleaned it because it looked better already!
But we powered on measuring and cutting our rope molding to fit around the glass. It’s a 5×7 frame and our measurements ended up being just that, 5 inches by 7 inches. We used the hand saw and miter box to cut 45 degree angles since the material was so thin. You can use a powered miter saw if you’ve got it!
Once the molding was cut to size, we checked that the ends met up with each other before gluing it in place. Make sure you pick up a glue or adhesive that is made to bond with metal and wood. There are many options available at both the craft store and home center.
We whipped out the same spray paint once more to apply several thin coats over the rope molding and frame to give it a consistent look. And while it dried we attached another picture hanger to this frame too.
OK, can this one be my favorite too? It’s so hard to decide!
With all of our picture frames complete and dry, Shelby added an even more personal touch to her gifts with pictures for each recipient!
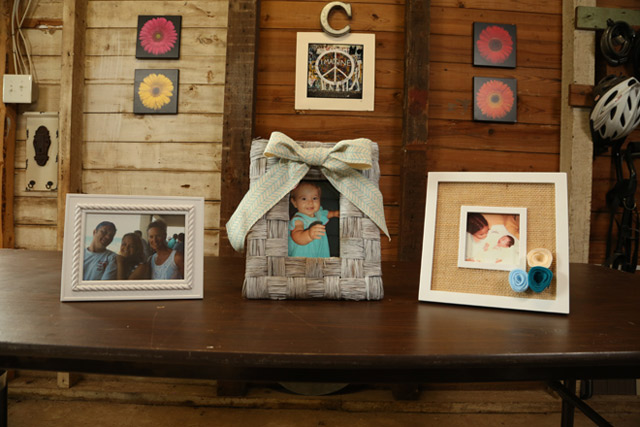
All of the frames look totally different. And this is one project I’m jealous I can’t keep! Guess I’ll have to hit up the thrift store soon for some more frames for myself!
I hope this project serves as a little inspiration to get you thinking about how to upgrade and makeover either items you see in a store or frames you already have around your own house!
Share which frame makeover is your favorite below! And if you have any questions about any of the frame projects, post them too! I love to hear from you!
Thanks for Checking In! ~ Chelsea
*This post contains affiliate links*



Please Leave a Comment