Use Fabric Dye to Customize Drop Cloth Curtains
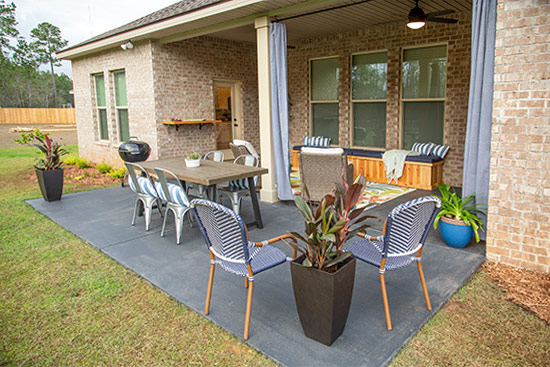
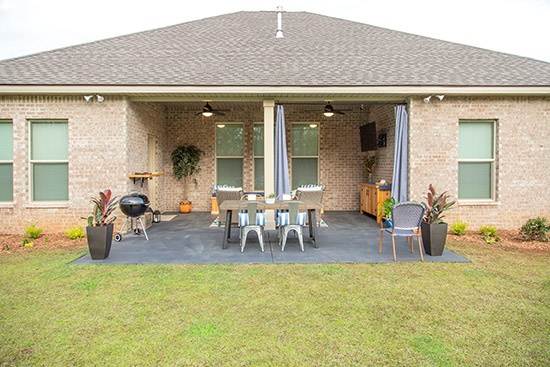
Store-bought drop cloths are big and inexpensive. Add some fabric dye and you’ve got custom curtains perfect for hanging inside or outside on your patio!

Materials
- 6ftx9ft drop cloth*
- (1) Rit liquid fabric dye-Denim*
- (3) Rit liquid fabric dye-Navy Blue*
- table salt
- dish soap
- bathtub or kiddy pool
- gloves
- curtain rod
- mounting brackets*
- curtain rings*
Rit has color formulas for just about any color under the sun! Select your desired color and they tell you how many bottles of each color you’ll need!
Why Drop Cloths
Drop cloths are relatively inexpensive when compared to curtain panels of the same size. And that’s important since they’ll be outside in the weather they will likely need to be replaced every few years.
But I love that they are the exact right size for the opening on the patio we’re working on without any sewing from me! And since they’re durable and washable, it’ll be easy to keep them clean.
Prepare Your Curtains
You’ll want to use hot, hot water for all steps in this process! I used buckets to pour water onto my curtains. But if you’re doing this in a bathtub, you can eliminate the buckets!
After the curtains are thoroughly wet, remove them and set aside. (On second thought, the buckets would come in handy for this step whether you’re working in a bathtub or not!)
Mixing up the dye with other amendments before adding the curtains back in is essential to the dye being even and not splotchy when you’re done.
Mix Up Dye
The dye directions call for adding dish soap and salt (vinegar for wool or nylon) to the water along with the dye to promote level dying. This helps drive the dye into your fabric’s fibers instead of keeping to itself in the dye bath.
Since I am using 2 different colors of dye, I’m mixing them in a separate container before adding to the water with the salt and soap. This ensures the dyes are adequately mixed for even color.
Once the dye and amendments are mixed well in the bath, you can add your curtains back in! The first 10 minutes are the most important in getting even color, so you’ll want to turn on some good music or a podcast and stir continuously!
To get a deeper color, leave in your curtains for up to an hour. Keep in mind they will lighten up once they’re washed and dried. I left mine in for about 45 minutes and wish I had left them in longer. After the initial 10 minutes, you don’t need to stir continuously, but be sure to stir every few minutes.
Rinse, Wash and Dry
After you got the dye how you want it, remove from the bath and ring out excess dye water. Rinse the curtains before washing them in your washing machine with warm water and regular laundry detergent.
Dry them on low heat and iron or steam any wrinkles!
Curtain Rod and Brackets
The outdoor space these were made to hang in has a beam on the ceiling. So I ordered special brackets* so I could center them on the beam and hang them upside down.

I just used a regular curtain rod that extends for this big opening and matching curtain rings.
The Today’s Homeowner episode with this patio’s full transformation airs the week of April 20th! Click here to find what station it airs on in your town!
Thanks for Checking In! ~Chelsea
*This post may contain affiliate links.*


I love what you do and that patio is a dream come true .But have to say most that you and your dad are special to me as it reminds me of my dad and me .I am 66 years old now but those special moments come back to me every time I see your show .I love that you try to save people money on renovations and teaching them means they can teach others .
I always love things such as this. Do you or your Dad know anything about renewing concrete? My front porch is splotchy and was wondering what I could do beside painting it.
Theresa have you been stalking us?? 🙂 We JUST did a front porch that was splotchy for an upcoming episode of Today’s Homeowner! We used Quikrete’s Re-cap. It goes on about 1/8 inch thick. We’ve also used it previously in this episode (around the 16 minute mark): https://todayshomeowner.com/video/from-plain-patio-to-relaxing-retreat/ Good luck! ~Chelsea
I’m getting ready to dye my drop cloths too. Same size, 6′ x 9′. How much dye did you use to get that nice color? And did you use the powder or liquid formula? Thank you so much!
Hey there! The video at the top of the post (you have to click for it to play) answers all of your questions! I used 4 bottles of liquid dye for 2 dropcloths! ~Chelsea
I just went out and purchased 1 drop cloth to see if it will work. I absolutely love it! This is for a deck that has a partial roof over it. It’s covering 2 sides 6′ out from the house and the width is 12′. However, my deck is high off the ground; the wind is catching the cloth. I’m planning on putting a tie half way down and attaching it to the post on the corner which would only hold one side of each “curtain” down. Do you have a suggestion for weights? They would have to be pretty heavy and how would I attach them?
Thank you for your fabulous ideas and your show.
Hey! I’ve only ever used drapery weights which go inside a hem or seam. You could use heavy washers and sew them on like a button. Or even use a multi-surface glue and glue them on. When I was looking for a link to send you I found these magnetic weights that don’t require glue or sewing! Might be something to try!! I’m intrigued for sure: https://amzn.to/37bPX2W ~Chelsea