Accented Living Room
It’s been a long while since our living room has gotten any love. Back in January of this year I posted a to-do list of everything I’d like to accomplish in there. And then I found out I was pregnant and the living room lost all of my attention.
Now that the nursery is complete and the baby is here, it’s time our front room returned to the home improvement docket.
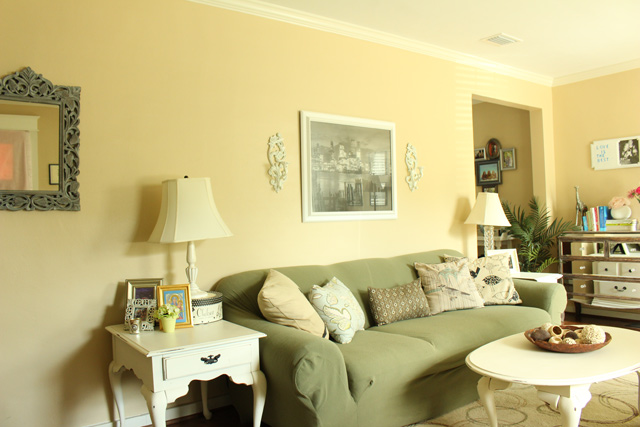
One of the easiest ways to change the look of any room is with paint. And it’s been on the list to do so in this room. But I never thought of doing anything else to the walls until my friend Sheena over at Bean in Love suggested we both stencil a wall in our respective homes.
And the wall behind our couch seemed perfect for the task. But before I could pick out and use a stencil, I wanted to update the base color. And that means I first had to do everyone’s favorite part of any paint project-the prep!
Since I was only painting the one wall, I had to mask off the 2 adjacent walls at the corners.

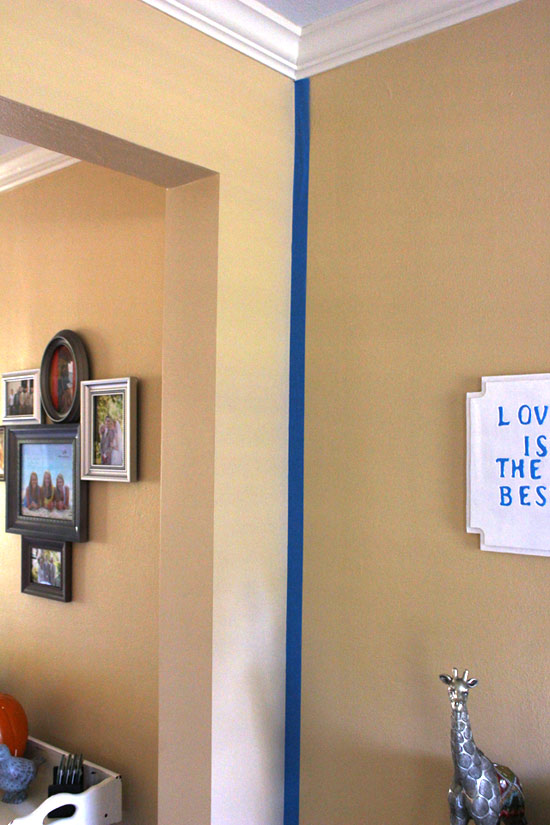
Then I taped a crisp line along the baseboard while also securing some plastic to protect the hardwood and rug.

After removing everything hanging on the wall, I filled the nail holes using some spackling.

I’ve never used this particular stuff before but I must say I liked it a lot! It dried in less than a hour but was thicker and heartier, so to speak, than the lightweight spackling options.
After that there wasn’t anything special about rolling paint on this wall. I used Benjamin Moore’s Color of the Year for 2016, Simply White, as my base color.

I waited overnight before moving on to the stencil. You don’t have to wait quite that long, but make sure the paint is adequately dry!
Stenciling is a thrifty and fairly easy way to get the look of wallpaper without actually wallpapering. It feels like less of a commitment too. You can just paint over it when you’re ready to redecorate!
Sheena and I both separately picked out the same design from Cutting Edge Stencils. I guess great minds think alike! We went with their “Beads Allover“. (This post is sponsored by Cutting Edge Stencils.)
Before you start stenciling, I highly recommend watching a few of the videos on Cutting Edge’s website. They’re super informative and will help you eliminate some guesswork and errors.
They mention using painter’s tape to secure the stencil to the wall while you roll the paint. Fortunately, Sheena stenciled her wall before me and gave me a heads up on using what I’ve always called “teacher’s tack” on our textured walls. Glad I had some already!

I put it on 7 or 8 different spots on the back of the plastic stencil to hold it in place.

Another tip if you’re planning on stenciling any time soon, get one of these handy clip-on levels! Just make sure it’s flush with the edge of the stencil each time you line it up. I got neglectful and had to redo almost an entire stencil’s worth because of it. Tsk tsk.

Now unlike painting a wall, you don’t want to load up the roller with as much paint as possible. But you do want to load the paint on as evenly as possible. The stencil makers recommend using a dense foam roller with rounded edges and a styrofoam plate as your tray.

I didn’t have any styrofoam plates in the pantry, so I used the biggest paper plate I had leftover from Mary Helen’s Baptism party. At first it was hard to get the roller to roll right, but once I got the hang of it I didn’t have any trouble.
Once the paint is loaded evenly on the roller, you’ll want to off-roll some of the paint onto a paper towel. If your roller has too much paint, it can drip and run underneath the stencil giving you a less-than-perfect finished product.

Speaking of a perfect finished product. The stencil makers pretty much say not to expect one. But to get the best results, don’t do it on a textured wall (which I have), your bottom paint and stencil paint should be flat (which mine weren’t), and don’t over load the roller. I think I did pretty good on that last one as hard as it was not too fill it up to reduce the amount of time!

By the way, I used Behr’s Dolphin Fin for my beads’ color. Not to be confused with the color of a shark fin…
Once the first repeat of the stencil was painted, I lifted the stencil and relocated it right below what I just finished. This is considered an overlay stencil, so I overlapped the last row of beads, checked for level and stuck it to the wall.

After painting that, the next stencil area ran into the baseboard. And thats why it’s important to tape along your baseboard when stenciling an entire wall. You’ll be painting right up against it.

At first I was intimidated by the stencil not being perfectly flush anymore. It seems like there is more room for error like that. But taking it slowly and not trying to cover too much area at once made it less stressful. I rolled straight down in columns, covering two columns of beads at once.

Then roll to the baseboard as best as the roller will allow. For the most part, the roller could paint half of the bottom bead. That’s when I got out the stencil brush (seen a few pictures up next to my paper plate) and dabbed it on the stencil while holding the stencil in place with my hand.

You’ll want to follow the same off-loading protocol with the stencil brush as I did with the roller to reduce paint running under the stencil. A few dabs or swirls on the paper towel was sufficient.
Then it was time to do my second column of stencil. It went all the way to the ceiling and looked like this.

I followed the same idea I used for the bottom of the wall, holding the upper flap of stencil with my spare hand while rolling.
Then I whipped out the “top stencil” that comes with all stencils from this particular company.

It’s smaller and more manageable. Plus it can go right up against the crown molding or ceiling without looking all goofy and having excess that you have to hold out of the way. Since I had my pattern established along the ceiling by now, I took the top stencil and did the entire length of the wall.

Once you’ve got down how to line up and level the stencil for each repeat, the process is easy! Still time-consuming, but not an expert-level project by any means. Here’s a close-up of how the overlapping nature of this stencil works.

It also has 3 of the big middle beads on the right side to help line up the stencil repeat along that edge too.

The only other semi-tricky thing I encountered was the outlet near the center of my wall. I tacked up the stencil like normal.

The outlet cover was already off from me painting the white on the wall. So I just rolled one side of the outlet at a time and it was fine!

I completed the stenciling over a period of a couple of days with lots of starts and stops. So if you don’t have a huge chunk of time at once, it’s easy to pick up where you left off.
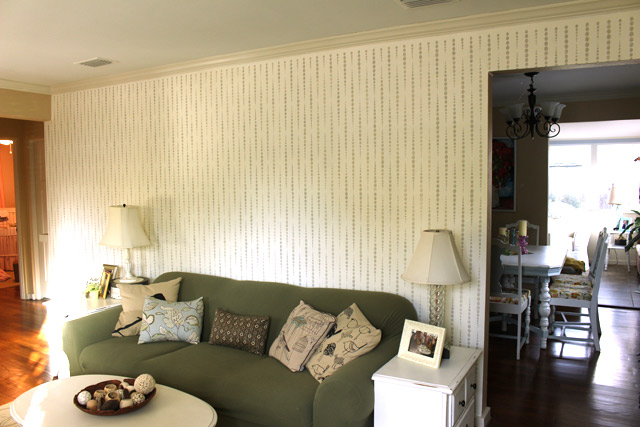
I wasn’t terribly diligent about making sure the paint was even on my roller. So if you look closely there is a kind of gradient in the gray paint. I really like the look, so it was a happy accident!

And since it’s not recommended to stencil textured walls and I have textured walls, here’s a close up of what the paint bleed can look like.

Now that the whole wall is complete, it’s really not something I notice. The bigger runs and bleeds I was able to wipe up right away with a baby wipe (now that I have plenty on hand!). And besides any family or friends who read this post, no one walking through our living room would even notice! I know my husband certainly won’t! 😉
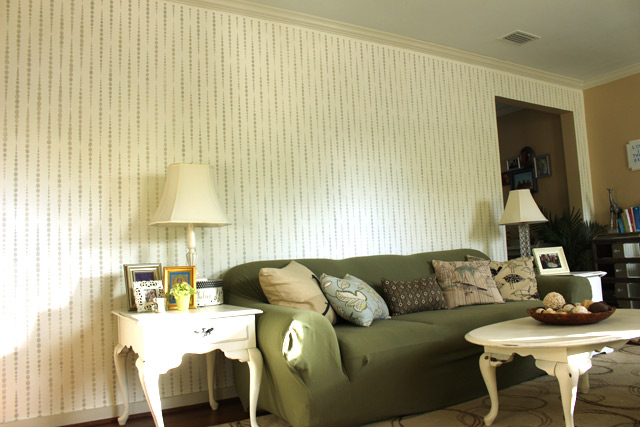
Now I just need to have an electrician over to install these lovely sconces (in brushed nickel) I received as a birthday present back in May…And maybe find a big piece of art Santa can give me for Christmas this year to hang over the sofa. Speaking of which, I also wanted to get a new sofa…maybe next year!
Thanks for Checking In! ~ Chelsea

2 Comments
Sheena
Whoa Chelsea! It looks so good! I love seeing it on a white wall!
Mary Penney
Love the wall. Interesting pattern, they have come a long way in 20 years. Might try this in the bedroom. Are you available for emergency phone calls?
Someday would like to send you a pic of the master? closet and get some ideas. Closet was built by a bunch of drunken sailors and it is just unworkable. Arrrg!
Your baby is darling. Just wondering how often you get to hold her when grandpa Danny is around!