Ruffling the Nest
Projects are winding down in the nursery and so is this pregnancy! Can’t believe in about 2 weeks we’ll get to meet our little girl!
After painting the walls, adding gold to the ceiling, hanging crown molding, updating an old dresser, framing the windows, touching up stain on the floor, creating a poofy mobile, laying out and hanging the gallery wall, and making curtains without sewing, there’s not much else that could possibly be done in this small space! Except make a skirt for the crib and possibly make and hang shelves above the changing table/dresser. 🙂
Those shelves can always come after her arrival, but the crib skirt is ironed, sewn, and hanging in its perfectly ruffled way.

I had purchased 4 sets of twin sheets just to be able to use the flat sheets as curtains in the nursery. Each set was $20, making my curtains an $80 project. Not bad for getting 4 of the exact curtains I was looking for. But it still left me with the fitted sheets from the sets and pillowcases. What to do, what to do…
After a little measuring and some online research, it was obvious the fitted sheets could easily be used to create a one-of-a-kind DIY bed skirt for the crib. And that’s what I did.
To start, I eliminated the darts on the sheet that go on each corner of the mattress by cutting just outside the seam.
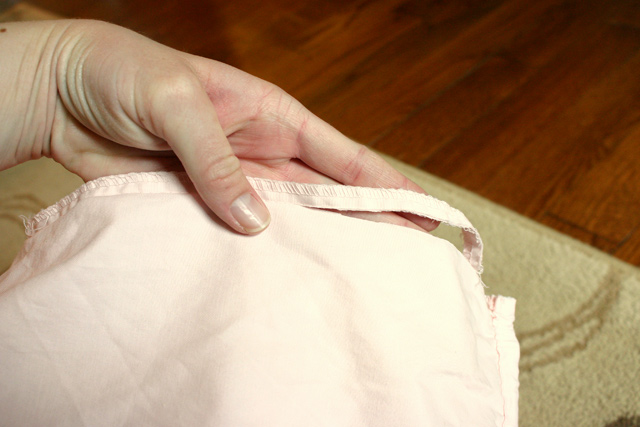
This also cut through the elastic, allowing the sheet to lay much flatter. At this point, I ironed the entire thing, paying special attention to the edges to get rid of any tendencies the edges had to bunch up from being elasticized for so long.
Since I did not capture a picture of the entire sheet after cutting and ironing, I created this minimally-skilled Photoshop version of how the sheet laid out.

The mattress base of my crib measured 50.5 inches long. And it’s suggested to start with 2.5 times the length of fabric if you’re creating ruffles, which I was. BUT, from edge to edge on the longest part of my fitted sheet, there was only 100 inches. In my twisted math, I figured that was close enough. So what if it wasn’t quite as ruffly in the end.
So to start the longest side, or “front”, of my skirt, I needed to cut the flap off of one of the long sides to give me a full length edge that will become the hemmed bottom of this skirt panel.
To make it easy to get a straight edge that long, I lined it up along my living room rug, with the extra flap in question hanging off.

Once that was cut, I measured and marked at 25.5 inches from where I just cut to get the height of the skirt, plus 2 inches for the ruffle and hem allowance. (From the bottom of the mattress to the floor is 23.5 inches.)
Instead of cutting the entire 100 inch length at the 25.5 inch height, I folded the fabric carefully so it was only 50 inches wide. (Or folded it like a hamburger as I learned in 1st grade.) Then folded it the other way so the edge lined up with my 25.5 inch mark and my fabric was 50″ x 12.75″. I meticulously pinned the short edges to keep it lined up properly before laying it along my rug straight edge and cutting it to size.

All that is not necessary. I just get anxious trying to cut a straight line over such a long distance.

With my “fabric” cut to size now, I needed to hem what would end up being the bottom of this front panel. To do so, I folded a 1/2 inch and ironed it the entire length.

Then I folded it again and ironed it down to create a finished hem.
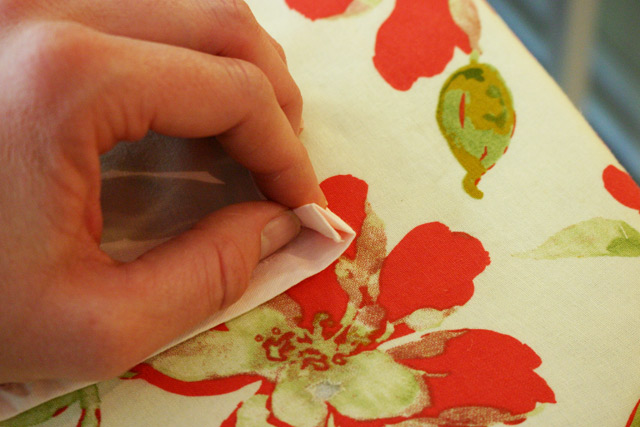
The nice thing about using a sheet for this is the sides of this panel are already hemmed!
Once the bottom hem is ironed, take it to the sewing machine for a simple straight stitch. You can also use iron-on no-sew tape if the sewing machine is not your friend.
Now the fun, intimidating part, creating the ruffle! This is much easier with a sewing machine, but I guess if you’re determined, you could do it by hand. The ruffle will be sewn on the 100″ length opposite the hem you just finished.
Adjust the tension on your machine as low as it will go and set your stitch as long as it will go. The tension on my machine is adjusted with a wheel on the top while the stitch length is controlled by a button on the face of the machine. For me, tension=0 and length=5.0. Look it up in your manual if you don’t know how to do it off the bat.
Pull 4-5 inches of your top thread and bobbin thread before you start stitching. That’s what you’ll use to create the ruffles. Also, don’t backstitch at the beginning or end of each run. You’ll want to stitch the entire length of the fabric about a 1/4 inch down. Leave 4-5 inches of top and bobbin thread when cutting at the end of the run.
Then stitch the entire length again, following the same guidelines-no backstitching & leaving a few inches of thread on each end-about a 1/4 inch down from your first stitch.
After all that’s said and done. This is what you should have.
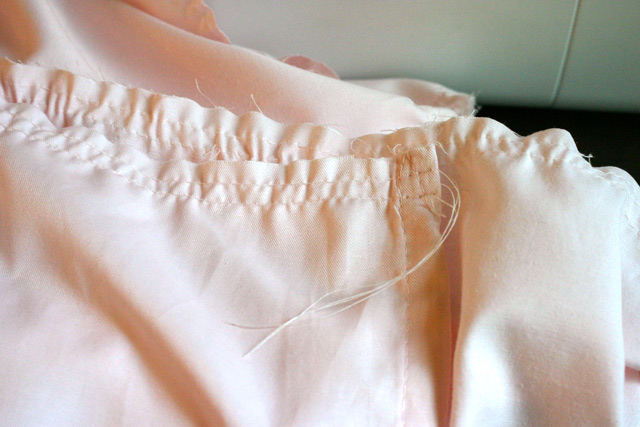
And these magic thread tails that will create the ruffle.
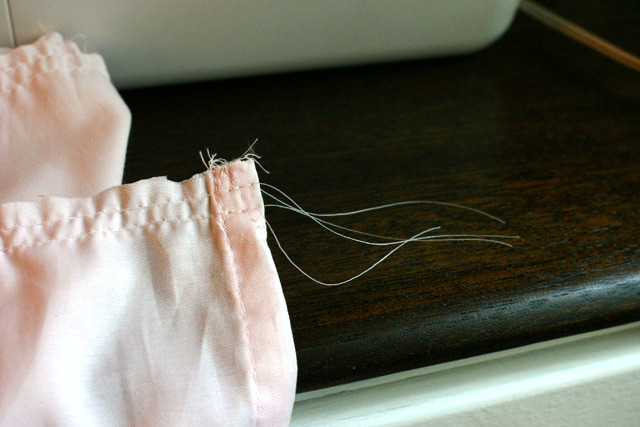
Separate the bobbin thread from the top threads. Gently pull on the bobbin threads to gather the fabric. I noticed getting it started was the hardest part. But after that it was smooth sailing. Don’t yank at any point, though. Once you’ve gathered a few inches, push the gather down the thread away from the end you’re pulling from while holding the bobbin threads. This helps spread the ruffle as you go, but also reduces the tautness on the thread and makes it easier to keep pulling. Repeat this “gather redistribution” every few inches.
You’ll notice the thread getting harder to pull and that’s your signal to adjust the gather. Keep pulling and adjusting until you’ve gathered half of the fabric. Then switch to the other end and start gathering from there. This just helps reduce the chances of breaking a thread and having to start ALL over. And that’s the dreaded part of creating ruffles-breaking a thread and having to start over. But that’s also why I stitched 2 rows before gathering. If one breaks, you still have one left. Of the 6 strings I pulled to create a 3-sided bed skirt, I only broke 1. And I knew it was going to happen since I got a little aggressive and kept pulling when the going got tough! Oops!
Also, keep your measuring tape handy. You’ll want to check the overall length of your ruffled top as you go. In this case, you don’t want to ruffle it down to less than 50.5 inches. Once you have the ruffle to right length, tie a knot with your threads to keep it from coming out and cut the excess thread.
After I ruffled the longest of my skirt panels, I took out another fitted sheet to get the fabric for the 2 side panels. The finished panels would need to be 26.5″ wide by 23.5″ tall. So I needed 2 pieces that were at least 53″ x 25.5″. I followed the same strategy of cutting the corners to get a flat sheet. But this time I cut the side “wings” by folding them over and doing the “pull and drag”. That’s where you pull the fabric tight and drag your scissors along the folded edge to cut it.

The lovely dashed black line illustrates what was cut off to give you a better idea.

Again in order to kill 2 birds with one stone, I carefully pinned the 2 finished edges together, essentially folding the remaining fabric in half. Then I measured and marked 25.5″ from the finished ends to get the height. With my trusty scissors in hand, I used my rug as a straight edge to cut along the 25.5″ marks I made.
I was left with 2 pieces that were roughly 76″ wide and 25.5″ tall. As I mentioned earlier, it’s recommended to have 2.5 times the fabric width you want when you’re making ruffles. In my case, I needed the finished piece to be 26.5″ wide, so that’s 66.25″. So I figured what’s 10 more inches when it comes to fluffy pink ruffles? And I left them that width. But hemming the unfinished edges on each panel eats up 2 inches, so it’s really not that much extra. Right? 😉
Using the previously-elasticized edge of these 2 panels as the bottom hem, I only had to hem the right and left edges of each before ruffling. Once that was done just like I hemmed the bottom of the longer panel, I ruffled each of these panels too.
And unfortunately I was too caught up in my joy of ruffling for the first time, I did not get a picture of the completed ruffles before they were added to the skirt base.
Speaking of base, I used 2 scrap pieces of fitted sheet to create the 52.5 x 28.5 inches I needed. I just pinned them so the outer edges were the right size. Those measurements are the size of the crib mattress platform, plus 2 inches.

Then I quickly sewed a line on each edge of the overlap. It was actually fun since it didn’t matter what it looked like. I might have gotten out of hand with the freestyle sewing, but you’d never be able to tell!
Lastly it came time to sew my 3 panels to the base before it could be hung on the crib. All this requires is pinning one panel at a time to the base, right-side to right-side, and sewing a straight stitch. I pinned one panel, stitched it, and then checked everything before moving on to the next panel.
You know the saying measuring twice, cut once? I always like to measure twice and sew once. So check the height of your ruffled panels as you pin them to make sure they’re going to hit the floor where you want them to. For me, from the stitch to the bottom of the panel, I wanted 23.5 inches. Also, your stitch should be below the stitches made to create the ruffle. Otherwise you’ll be seeing it in the finished product!
Another thing to keep in mind when pinning the panels to the base, they shouldn’t go from edge to edge of the base or you won’t have that gap needed for the corners once it’s flipped right-side out. I’d say leave about .75″ to 1″ from the edge when pinning a side panel on the corner shared with the front panel. Leave the same space from that corner when pinning the front panel. This is where that extra 2 inches on each length of the base fabric comes in handy. Repeat until all 3 panels are attached to the base.
If my directions are adequate, your crib skirt should now be completed!

You can use the same directions, minus the exact measurements, to create a skirt for an adult-sized bed too! But I bet it won’t be quite as pink! 🙂

I know if you can sew a somewhat straight line, you could tackle a skirt like this one. Because trust me, that’s about all I can do is sew a straight line. It always seems to be more trouble and headache to figure out the measurements, where and what to cut, etc. than the actual feeding of the fabric under the needle!

This project only cost me about $3 for the right color thread since I had the sheets on hand. In fact, it makes the $80 I originally spent for the sheet sets even better. Now I’ve gotten 4 curtains AND a crib skirt out of it. Of course there’s still 2 fitted sheets and 4 pillowcases left, so who knows what else I could get for my money!
But for now the sewing machine is tucked away and I’m anxious to get back to more projects that require a drill or saw or wood. Any suggestions on projects you’d like to see are always welcome in the comments below!
Thanks for Checking In! ~ Chelsea


2 Comments
Catherine
I’m using this tutorial (and cross-comparing ideas with a few others) to make a crib skirt this weekend! We are snowed in, so it’s a great time to tackle a project like this. Thanks for writing it all those years ago!
Chelsea Lipford Wolf
Love it! Hope it turned out for you Catherine! ~Chelsea