Checking In With Chelsea

DIY ideas, crafts, and tips for your home

subscribe and never miss a thing!

Receive Free Email Updates

  • About
  • Videos
  • Projects
    • Indoor Projects
    • Outdoor Projects
    • Craft Projects
  • House Tour
You are here: Home / Craft Projects / Quick Dresser Updates on a Budget

Quick Dresser Updates on a Budget

August 6, 2015 By Chelsea Lipford Wolf Leave a Comment

Like a lot of people nowadays, Brandon and I decided to forego the standard nursery changing table. Instead, we’re using a dresser with a changing pad on top. Then we’ll be able to use the dresser for storage and clothes as our first born ages and outgrows the nursery.

And even better…we got the dresser for free!

cherry wood stained dresser with brass drawer pull hardware

It’s actually the dresser my parents bought as part of an entire bedroom suit for me when they were expecting their second child. So I guess you could say it’s an antique. 🙂

But I can’t just leave it as is! I wanted to change it up subtly, without involving the usual paint brush. And that’s when a light bulb went off. I remembered some pink and white striped wallpaper, also from my childhood bedroom, that I found in my parents’ attic close to a year ago.

pink and white striped wallpaper rolls in box

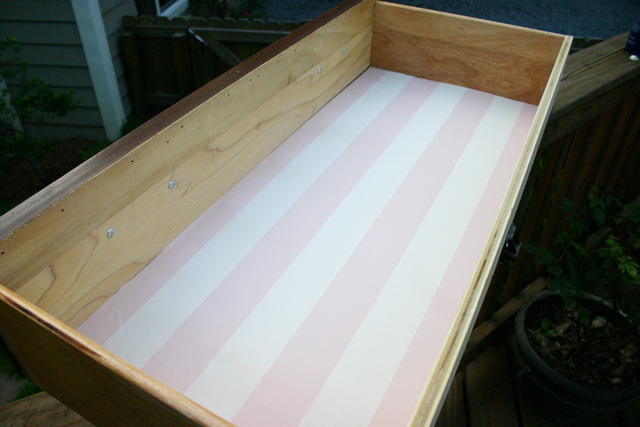
Not in the most pristine condition, given that it’s about 24 years old, but perfectly perfect for lining dresser drawers!

Nursery Dresser Drawer Before Wallpaper

So I got to work measuring the bottom of the drawers. Since there are 3 drawers of the same size, I measured once for all 3 using a yard stick.

using yardstick to measure dresser drawer

Then I used the yardstick to measure and mark on the wallpaper itself.

Marking Length of Drawer on Wallpaper

I lined up the yardstick with the marks and started running my X-acto knife along it. But that didn’t last very long since I kept cutting into the yardstick itself!

using x-acto knife to cut wallpaper along yardstick

So I switched over to scissors which worked out great. I was able to keep the lines pretty straight by taking it slowly and cutting only a little at a time.

You may also notice that the wallpaper is wrinkly from being in a semi-rolled state for many, many, many years. After I cut a piece of the paper, I set some heavy books on top to encourage it to flatten out. I cut my other 2 pieces of the same size and set them under the books for a few minutes while I cut the wallpaper to size for the two small top drawers.

Then I took one drawer and one piece of wallpaper at a time outside for the messy part.

Spray Adhesive for Dresser Drawer Liner

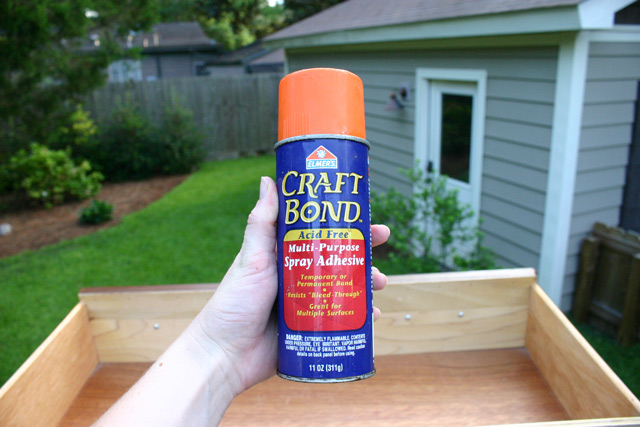
Spray adhesive seems to have more fumes than spray paint, so definitely don’t spray indoors! I don’t even like to spray it in my workshop if I can avoid it.

I turned the face of the drawer away from me before spraying to reduce any overspray getting on the “pretty side”.

spray adhesive elmer's drawer bottom liner

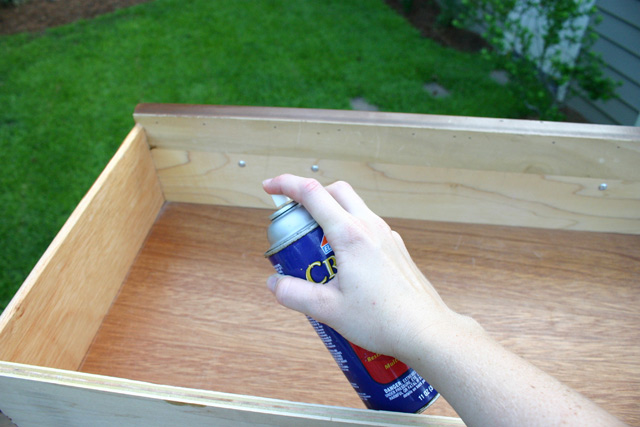
Spraying the bottom really well and don’t worry too much about getting it on other parts of the inside of the drawer. It’ll dry clear!

Carefully line up one corner of the wallpaper with the drawer bottom and roll it onto the drawer, smoothing it as you go. Just like you would put a screen protector on a cell phone…if you’re into that sort of thing!

Once I had one drawer done, I transferred my heavy books into the drawer to keep the wallpaper intact while the glue dried. And I moved on to the next drawer. Repeat that a few more times and all of the drawers had new lining!

Wallpaper Drawer Liner After Spray Adhesive

I switched up the direction of the stripes for the two small drawers for a fun change.

white and pink stripe wallpaper drawer liner

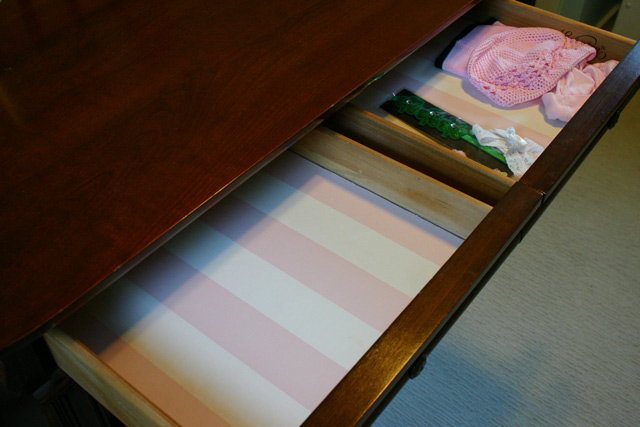
It didn’t take long to start filling up the drawers and making the new liner disappear! With a few new outfits from an excited aunt, grandma, and great-grandma and a TON of hand-me-downs from a lovely couple we met at our parish, one drawer is completely slammed. And the other 2 large drawers are almost there!

pink baby girl clothes in dresser drawer

What a blessing to already have so much for our baby girl! Can’t wait to see her in all of them!

Naturally I couldn’t stop there!

Since this dresser is over 20 years old, I thought my girl deserved some new hardware to freshen up the front. I’m sure she’ll appreciate it once she’s out of the womb. 😉

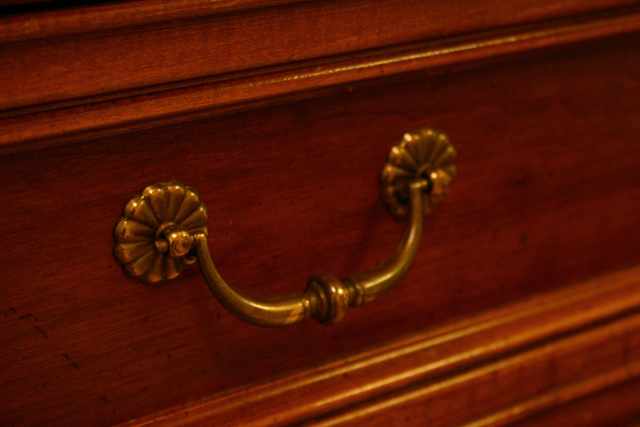
The old stuff wasn’t in bad shape, but it blended in and wasn’t shiny anymore.

Dresser With Original Hardware in Nursery

Original Drawer Pull on Dresser

I removed all of the old hardware and put them in a plastic bag. I saw somewhere that it’s a good idea to save the original hardware in case you want to sell it someday. That really only applies to actual antiques, but who knows? This could be considered an antique someday, no?

When I removed a few of the old pulls, I noticed a ring in the wood. I guess they were tightened too much at some point and dug into the finish.

Mark on Drawer from Old Hardware

But since I wanted this to be a “quick” update, I didn’t bother with it. There are only 2 spots that are noticeable if you’re looking for it. Most of the other ones just needed to be wiped with a damp rag.

Once the new hardware arrived on my doorstep, I got to work installing them. It looked instantly brighter and fresher!

Old Drawer Pull with New Drawer Pull

The top drawers had standard one-screw knobs, so they got something a little different…and pink.

Pink Glass Knob on Dresser

Love the classy, glamorous vibe the pink glass adds!

nursery dresser with brass hardware drawer pulls pink glass knob

Until we get the changing pad for the top, that’s all we’ve got for our dresser/changing table! Easy, peasy updates that can be done on a budget!

Dresser After New Hardware Install

Thanks for Checking In! ~Chelsea

Subscribe for Free Updates!

Stay up-to-date on Chelsea's latest projects, tips, useful resources and more.

Previous Post
How Not to Hang Crown Molding
Next Post
Chelsea’s Choice: Shiny Faucet Freebie

Related Content

Completed Hand Painted Pennant Flag Banner Kid BedroomDIY Pennant Banner for Kids RoomCompleted Large Lighted Two and Zero NumbersDIY Lighted Marquee NumbersBrick Retaining Wall How to Waterproof and PaintWaterproofing Vertical Masonry WallSitting on Back Steps After Finally Sealing BricksStripping Paint from Bricks

Please Leave a Comment Cancel reply

Your email address will not be published. Required fields are marked *

Welcome!

I’m Chelsea. DIY
enthusiast who loves
sharing my victories
and mishaps!
Learn more
here.

CHECK IN WITH CHELSEA ON INSTAGRAM

9 years!✨Brandon and I will be celebrating 9 yea 9 years!✨Brandon and I will be celebrating 9 years of marriage this week. And how perfect we were invited to a wedding tonight walking distance from our home.🥰Sometimes reality is better than the movies and this weekend is one of those times. Enjoy, friends!☀️
What else do you use paper plates for besides eati What else do you use paper plates for besides eating?? Spray paint onto a paper plate and dab a small paint brush to do spot touch ups! Life hack when you’re working on a project but don’t need to paint the whole surface!👏🏻
.
.
#lifehack #diyhacks #spraypainting #painttips #paintprep #paintpro #shutters #craftsman #1940style
Didn’t mean for this to be #ASMR but here we are Didn’t mean for this to be #ASMR but here we are!🤷🏼‍♀️ I bought this orchid 15 months ago to use the flowers in our hair for my sister’s wedding. I’ve already repotted it once and it’s bloomed 3-4 times! Time to do it again with a pretty new pot that matches our new kitchen cabinets!🤩
.
.
Steps to repot an orchid:
1-large pot without drainage holes
2-plastic pot slightly smaller with holes
3-trim if needed so plastic pot is at or below outside pot
4-add layer of orchid specific potting mix (it looks like bark!)
5-add orchid, fill in around roots with more bark- don’t forget to add some mix under the leaves!
6-to water, soak bark and fill up outside pot, rinse the leaves too!
7-let sit for 5-10 minutes, then drain and dry the outside of your pot.
8-set in place and enjoy!🌷
New laundry, who dis? Our laundry room was a BLANK New laundry, who dis? Our laundry room was a BLANK slate after the kitchen renovation left it reconfigured too. So Dad and I tackled simple projects that make this space functional and of course visually pleasing too!👏🏻The full project airs this weekend on @todayshomeowner!
.
.
I love that the cabinets and hardware match what we have in the kitchen since the spaces are right next to each other! Synergy!
.
.
What do you love about your laundry room?
So funny the number of people who told us they loo So funny the number of people who told us they looked at our house when it was on the market but didn’t buy. Guess we’re the only suckers🤣🤣We’ve brought her a long way since closing day though! 👏🏻😍🤩
.
.
#ranchrevival #ranchreno #1950shouse #beforeandafter #housereno #pinkgirlroom #girlsbedroom #diningroomdecor #familydining
Exploring new cities is fun but there’s no place Exploring new cities is fun but there’s no place like my hometown! Come visit!💜💛
.
.
#mobilealabama #visitmobile #mardigras #travelbloggervibes #southerncharm
Load More... Follow on Instagram

Indoor Projects Outdoor Projects Craft Projects
Facebook Pagelike Widget
  • Contact
  • FAQs
  • Advertise with Chelsea
  • Media
  • Today’s Homeowner

Search This Site

Receive Free Updates Via Email

Copyright © 2023 Checking in With Chelsea • All Rights Reserved