Checking In With Chelsea

DIY ideas, crafts, and tips for your home

subscribe and never miss a thing!

Receive Free Email Updates

  • About
  • Videos
  • Projects
    • Indoor Projects
    • Outdoor Projects
    • Craft Projects
  • House Tour
You are here: Home / Craft Projects / How to Create an Easy Cross on Canvas

How to Create an Easy Cross on Canvas

October 26, 2015 By Chelsea Lipford Wolf Leave a Comment

DIY Shimmery, Gold Cross on Canvas that Pops!

When I was putting together items to hang as part of the nursery gallery wall, I picked up some small 4×6 canvases with an idea to create my own art with some paint and gold leaf. It ended up being a super easy and quick project with pretty results!
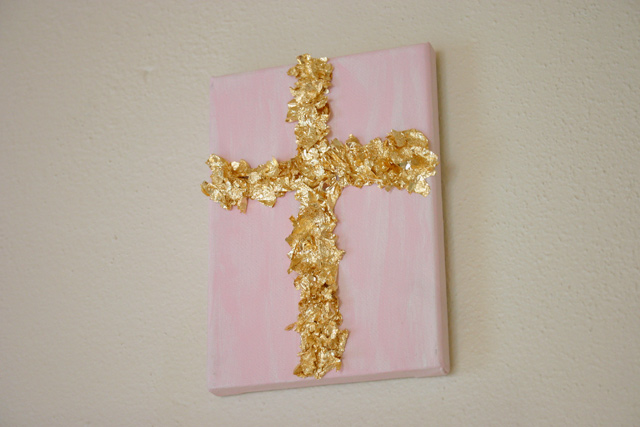
pink canvas with gold leaf cross hanging on wall

Materials

  • gold leaf paper
  • 5×7 canvas
  • acrylic paint
  • white glue*
  • foam brush*

The most expensive part of the project was of course the gold leaf paper, but I didn’t use all 25 sheets. So part of the cost of it can roll over into whatever future project I end up using it on.
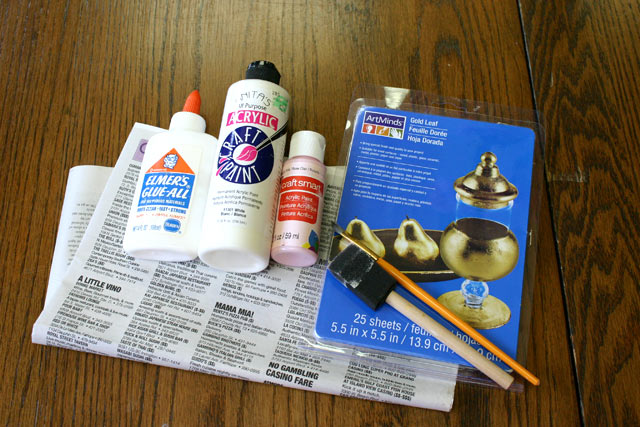
Materials used to create gold leaf cross on canvas

Paint Canvas

You’ll want to paint the canvas before applying the gold leaf so you don’t have any white showing under the gold leaf once it’s all said and done.

streaky pink acrylic paint on small canvas

I was going for “abstract” art, so I wanted my paint to be streaky, not solid. I painted one coat, but still wanted a little more coverage. Luckily this acrylic paint dries quickly and I was able to paint the second coat without waiting too long.

Then it was time to add the shimmery cross.

Add Gold Leaf

I originally made a cross with glue on my canvas before painting to make my finished cross 3D. Turns out it was totally unnecessary. So save yourself a step and just draw your shape with a pencil after the paint has dried.

This gold leaf is made to apply to household objects like a vase or lamp or decorative fruit like on the package.
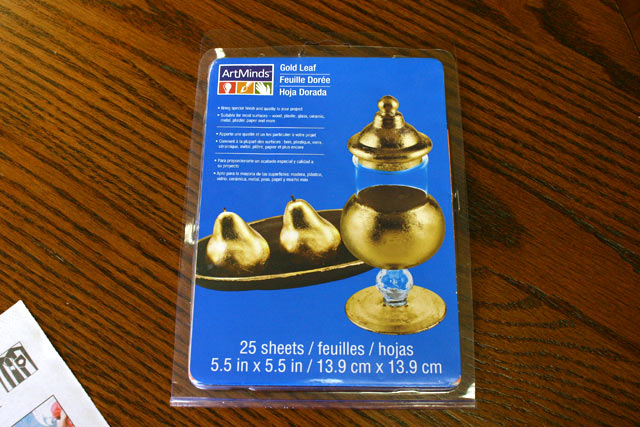
gold leaf sheets in package

So it has very specific instructions on the special kind of glue to use and how to handle the gold leaf without touching it with your fingers. Ignore those if you want the crinkly look I was going for and use your hands!

Apply glue to a small portion of your cross at a time.
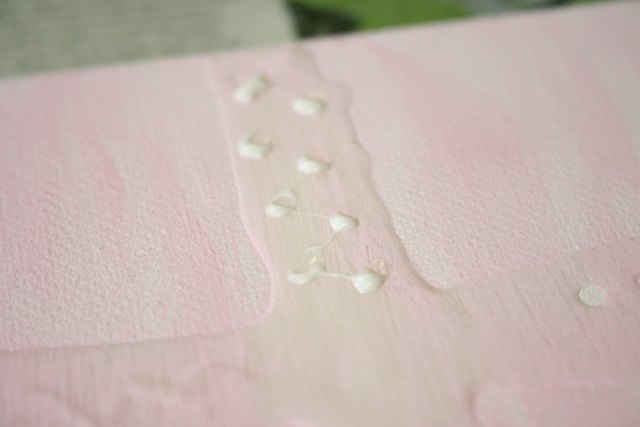
Dots of Glue Along Cross on Canvas

Then tear off small pieces of gold leaf and stick it on the glue. Don’t lay it flat on the glue, but pinch it in the middle like you would tissue paper in a gift bag.
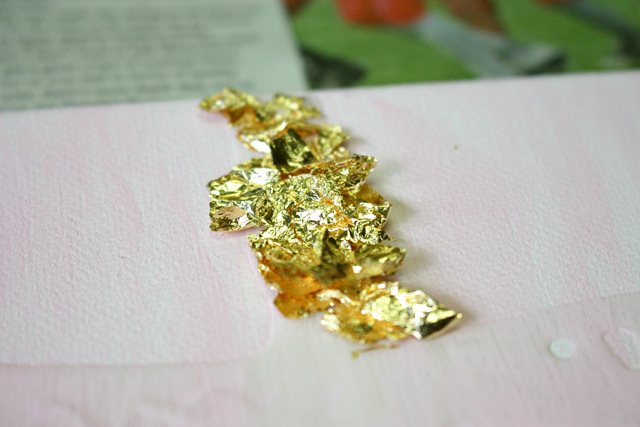
gold leaf being applied on canvas

Slowly work your way down and around the cross, using small pieces of gold leaf. Also make sure you’re applying the gold leaf on the outside of your outlined cross so the pencil marks can’t be seen.
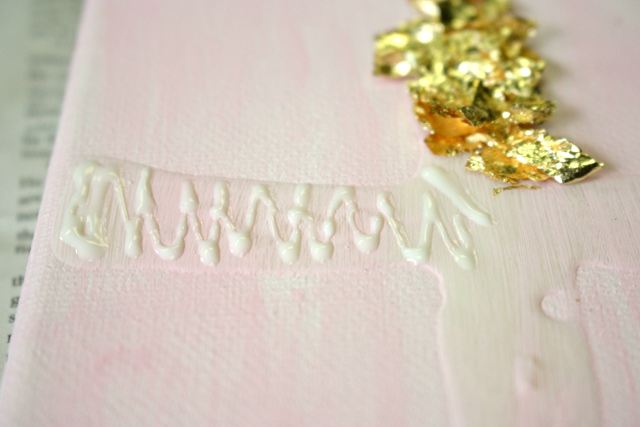
zigzag of white school glue

Another tip is to keep your fingers dry. Wipe any glue off before tearing off more gold leaf or it will just dissolve on contact.

Half of Cross Covered in Gold Leaf

There were a few spots where I put the gold leaf too far apart and I could see the canvas between. So I put a small drop of glue and basically placed some more of the gold leaf on top of the other pieces to create a nice, full cross.
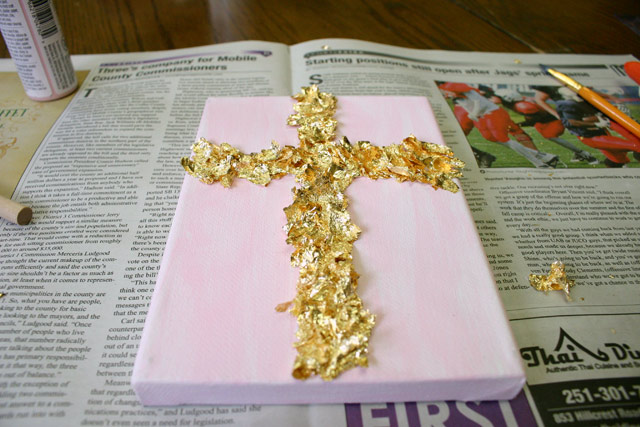
Gold Leaf Cross on Canvas Complete

Hang on Wall

Once that was done, all it took was 2 small wire nails to hang it on the wall!
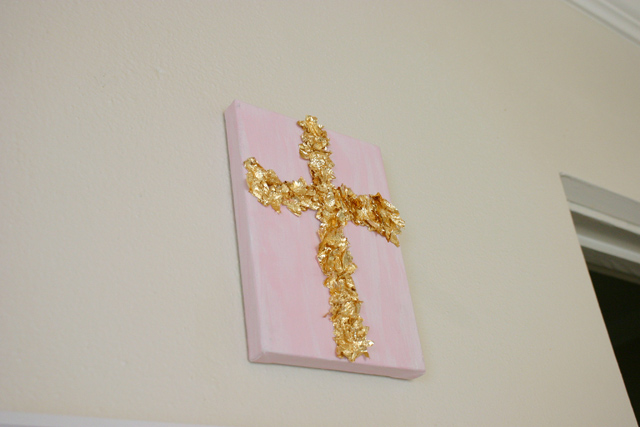
Completed Gold Leaf Cross on Wall

The gold leaf compliments the gold on the Sacred Heart icon that hangs next to it well, too!

Completed Gold Leaf Cross Canvas

Total project probably took less than an hour including paint drying time. So if I ever want to make another one, it can definitely be done during one of Mary Helen’s naps! That is if I’m not taking a nap myself!

Thanks for Checking In! ~ Chelsea

*This post may contain affiliate links.*

Subscribe for Free Updates!

Stay up-to-date on Chelsea's latest projects, tips, useful resources and more.

Previous Post
Welcome to the World!
Next Post
Chelsea’s Choice: Sense-able Keyless Security

Related Content

Completed Hand Painted Pennant Flag Banner Kid BedroomDIY Pennant Banner for Kids RoomCompleted Girls Bedroom Makeover Pink PanelingPink Girls’ Shared Bedroom EvolutionCompleted Large Lighted Two and Zero NumbersDIY Lighted Marquee NumbersMeasure Kids Height KeepsakeDIY Kid Height Keepsake

Please Leave a Comment Cancel reply

Your email address will not be published. Required fields are marked *

Welcome!

I’m Chelsea. DIY
enthusiast who loves
sharing my victories
and mishaps!
Learn more
here.

CHECK IN WITH CHELSEA ON INSTAGRAM

What else do you use paper plates for besides eati What else do you use paper plates for besides eating?? Spray paint onto a paper plate and dab a small paint brush to do spot touch ups! Life hack when you’re working on a project but don’t need to paint the whole surface!👏🏻
.
.
#lifehack #diyhacks #spraypainting #painttips #paintprep #paintpro #shutters #craftsman #1940style
Didn’t mean for this to be #ASMR but here we are Didn’t mean for this to be #ASMR but here we are!🤷🏼‍♀️ I bought this orchid 15 months ago to use the flowers in our hair for my sister’s wedding. I’ve already repotted it once and it’s bloomed 3-4 times! Time to do it again with a pretty new pot that matches our new kitchen cabinets!🤩
.
.
Steps to repot an orchid:
1-large pot without drainage holes
2-plastic pot slightly smaller with holes
3-trim if needed so plastic pot is at or below outside pot
4-add layer of orchid specific potting mix (it looks like bark!)
5-add orchid, fill in around roots with more bark- don’t forget to add some mix under the leaves!
6-to water, soak bark and fill up outside pot, rinse the leaves too!
7-let sit for 5-10 minutes, then drain and dry the outside of your pot.
8-set in place and enjoy!🌷
New laundry, who dis? Our laundry room was a BLANK New laundry, who dis? Our laundry room was a BLANK slate after the kitchen renovation left it reconfigured too. So Dad and I tackled simple projects that make this space functional and of course visually pleasing too!👏🏻The full project airs this weekend on @todayshomeowner!
.
.
I love that the cabinets and hardware match what we have in the kitchen since the spaces are right next to each other! Synergy!
.
.
What do you love about your laundry room?
So funny the number of people who told us they loo So funny the number of people who told us they looked at our house when it was on the market but didn’t buy. Guess we’re the only suckers🤣🤣We’ve brought her a long way since closing day though! 👏🏻😍🤩
.
.
#ranchrevival #ranchreno #1950shouse #beforeandafter #housereno #pinkgirlroom #girlsbedroom #diningroomdecor #familydining
Exploring new cities is fun but there’s no place Exploring new cities is fun but there’s no place like my hometown! Come visit!💜💛
.
.
#mobilealabama #visitmobile #mardigras #travelbloggervibes #southerncharm
Lookie! It’s a shelf for your bookies! 🤣Build Lookie! It’s a shelf for your bookies! 🤣Building a shelf unit custom for ANY space in your home is so simple and can be done over and over again to add much needed storage aka sanity! The kids were running all over the house at bedtime trying to find a book to read because we had them stashed in baskets and shelves in several different rooms. So I took advantage of this space in the hall next to a closet to create a central location for their books and some of mine too! Plus it adds a little character to an otherwise blah space!🙌🏻
.
.
A full how to video is on checkinginwithchelsea.com! Book nerds can be DIY nerds too!🤓
.
.
#booknerdsunite #diyskills #beginnerdiy #bookshelfie #halldecor #storagesolutions #storageideas #bookstorage #bookstorageideas
Load More... Follow on Instagram

Indoor Projects Outdoor Projects Craft Projects
Facebook Pagelike Widget
  • Contact
  • FAQs
  • Advertise with Chelsea
  • Media
  • Today’s Homeowner

Search This Site

Receive Free Updates Via Email

Copyright © 2023 Checking in With Chelsea • All Rights Reserved