
Easy DIY Closet Shelves
You can easily create your own custom closet shelves by simply cutting, gluing and nailing 1x12s and 1x2s together. This how-to video will show you the step-by-step!
Materials
- (2) 1x12s*
- (1) 1×2*
- miter saw*
- nail gun*
- speed square*
- small level*
- caulk/caulk gun
- latex paint
- foam roller*
I’ve included affiliate links for all items and tools I used to build this project. I will earn a small commission without any increase to you. I hope it makes it easier for you to get what you need to complete your project! Store pickup is life!🙌🏻

Cut Wood to Size
This is one of the simplest ways to build shelves for a closet. Using pre-primed 1x12s, cut 2 pieces to the height you want your shelf unit. For me, I already had one vertical piece in the closet from an existing configuration. So I matched my cut to that, 78.5 inches.
Then I decided I wanted 5 shelves, equally spaced. And to keep things square, they would be 11.5 inches wide (which is the actual width of a 1×12 board). So I cut 5 pieces 11.5 inches long.

For boards this wide, it helps to mark your measurement, then use a speed square to extend that measurement to a spot where it’s easy to line up with your saw blade.

To support the shelves in the closet, I also cut (5) 1x2s to the same length.
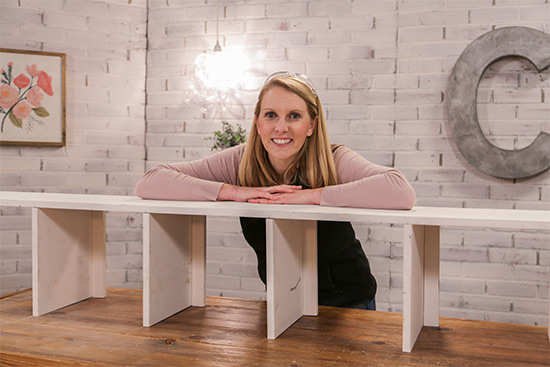
Glue and Nail to Assemble
If you want to keep your shelves equally spaced apart, divide your overall length (78.5) by the number of spaces you’ll have. Since I’m creating 5 shelves, I’ll actually have 6 spaces since the bottom shelf will have space underneath it and above it. So my shelves are roughly 13 inches apart.
I marked 13 inches on the skinny edge of my vertical piece on both sides. Then set the shelf boards on their side, setting my vertical piece on top. (It’s easiest to keep everything lined up and straight if you build the unit on its side.)
Then I took one shelf at a time, added some wood glue, lined it up on my mark (I eyeballed it so that the mark was center of my shelf board), and then nailed it, just once, on the side I was working on.
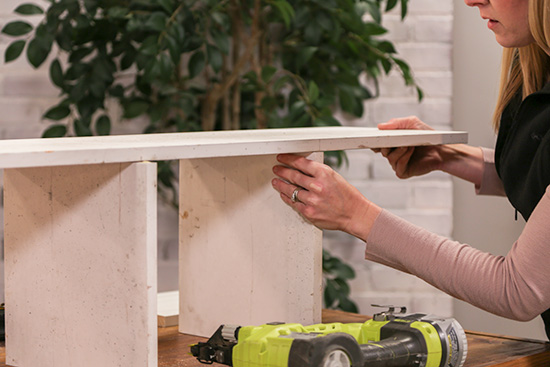
Next you can keep working one shelf at a time on the same side. Or I alternated by going to the other side, lining up the same shelf board on the mark and nailing it on that side as well. I added a 3rd nail in the middle after the edges were secured.

(Here’s your reminder to watch the video above since that will give you a good visual of this particular process!)
Repeat the process until all of your shelf boards are nailed in place!
You’re ready to add your 1×2 cleats. They go under your shelf boards, between the verticals. (Imagine it sitting upright and the shelf sits on top of the cleat. The cleat will be on the wall side of your shelf unit.)
Add wood glue to each cleat and nail it from the outside of the vertical pieces and down through the shelf board into the cleat.
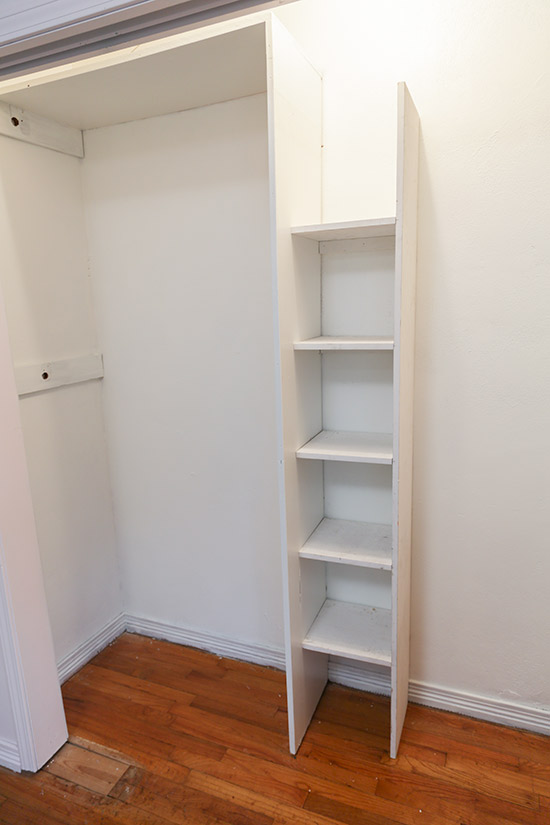
Now it’s time to install in your closet!
Installation Time
You’ll need a small level for this part so you don’t have leaning shelves.😃This is designed to sit on the floor, so set it there. Working one shelf at a time, maneuver your shelf until it is level and nail the cleat to the wall.

While the level is still in place, I also nailed my shelves from the outside of the existing vertical piece to connect them. But if you’re building a totally new shelf unit, you can skip that step!

Since these shelves are so narrow, it is very likely you will not have a stud behind the cleats at all. But because it sits on the floor and has support on each side with the vertical pieces, I don’t think it is of concern once it’s all nailed and caulked in place. It doesn’t hurt to check for a stud, though, and then drive one nail in each cleat at that spot.
Finishing Steps
Didn’t get your shelves perfectly tight? Never fear…that’s what caulk is for! Dad has a saying, “Caulk and paint make a carpenter what he/she ain’t!” And ain’t that the truth! You can cover up a multitude of sins with caulk.😆
So the final step is to caulk all seams and joints. Even caulk where the vertical pieces meet your closet wall on the outsides. After it dries, a fresh coat of paint will make it look like your shelves have always been a part of your closet!

Thanks for Checking In! ~Chelsea
*This post contains affiliate links.*
5 Comments
Jeneane Hamilton
What a great idea to customize a closet! I enjoy all your videos, and the easy-to-follow instruction guides. Thanks, Chelsea… God bless!
Chelsea Lipford Wolf
Thank you Jeneane! ~Chelsea
Jayne
Just wondering if (how) I could connect something like this to the top of a cabinet to create a bookcase ?
Chelsea Lipford Wolf
Yes! It seems like a good solution! ~Chelsea
Alanna
What type of nail gun did you use ? The link says its no longer available ?