DIY Wall Sconce Installation
How to Install a Light Fixture without Wiring

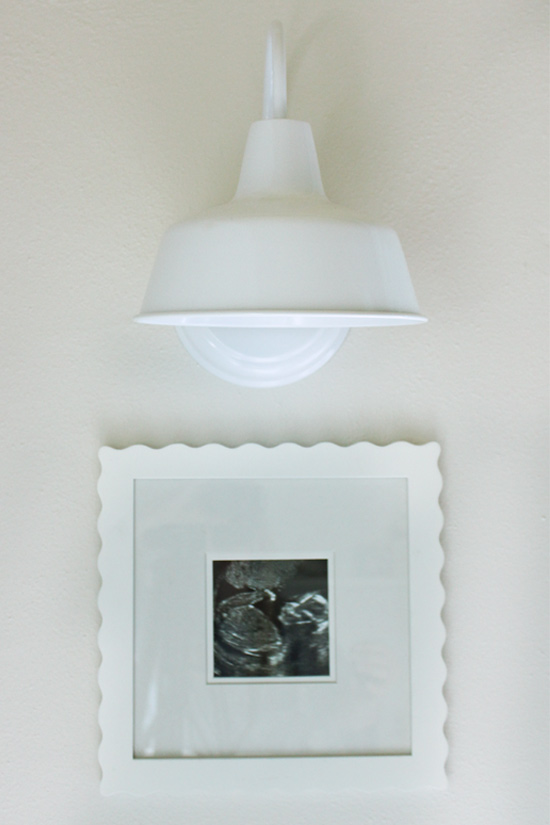
I mentioned in my last post on our kids’ room update, that I’d be back with a how-to post on installing their sweet wall sconces above their beds. The steps I took are specific to the fixture we used, but maybe a step in the process will work for you and inspire your creative side!
And just a reminder, this is the light fixture we purchased.*
Remove Wires
The first step was to remove the electrical components from the fixture. It was easier than I had planned for and I can still use it as a real light fixture in the future if I want! I simply unscrewed the small screw holding the lightbulb socket in place. The wires were attached to it so as I pulled the socket out, I also pulled out the wiring that went through to the other side.

Attach Puck Light
This is the real trick here, using battery-powered lights inside the light fixtures. (I first learned of this ‘magic light trick’ from Brooke at Nesting with Grace!) To attach them where we wouldn’t see them, I used some inexpensive, thin wire I got from the craft store several years ago. For my fixture, it simply looped through the socket screw hole.

Then I took my battery-powered lights* apart and there were 2 holes in the back plate.

I fed the wire through and tightened the plate to the light fixture.

All you have to do is attach the light itself to the plate and it’s ready to light up! It comes with a remote or you can push the light itself to turn it on and off.

Create Blocking
I glued 2 pieces of scrap wood together to equal the depth of the hanging cavity of our light, about 1-3/4 inches. I cut them to the same length as the diameter of the fixture.

But to make them really snug in the cavity, I cut 45 degree angles on 3 edges on each side so they would sink a little further.

You can see here how the angles help the blocking fill the cavity side-to-side while also sitting flush on the bottom. I didn’t want to have a gap around the fixture once it was up on the wall, so I needed it to not only hang on the blocking but fit snugly as one piece.

After dry-fitting the blocking, I added a small piece of 3M Command Strip to keep the light attached. I put it on the part of the blocking that would be on top once the fixture was hung on the wall. And for my fixture, it made since for it to also be on the part of the blocking near the bottom of the ‘bowl’ since it was larger and flatter.

Once the blocking was in place, I attached another full piece of Command Strip to the back to hang it on the wall.

Then you just peel off the backing on the adhesive, attach it to the wall and hold for a few seconds while the adhesive takes hold.

Now with the push of a button, I can turn on both lights above my kids’ beds for story time and turn them off for bed time! So far it’s working great. I’m curious to see how long the batteries last, but it should be for quite some time since we only use them for about 20 minutes a day.
What rooms in your house could you use a little lighting magic? Share in the comments!
Thanks for Checking In! ~Chelsea
*This post contains affiliate links*


7 Comments
sissy
it is amazing what you can do with led lights these days .I may have to try this in my new shed I am buying to give me a little light inside .It is just to store 2 ride on mowers so does not need electricity to it for now
Vicky Miller
OMG….. I use these pug lights all the time just about everywhere. I love them and needless to say I have to stock up on batteries. I’ve already purchased 4 sets. I love the ones that have the remote. I’m definitely gonna do this trick, probably some in different places. The remote is wonderful. I can already envision where I’m gonna put them. I have some old lamps that would work great and it’s fairly simple. THANKS SO MUCH FOR THE IDEA !!!!!!
Chelsea Lipford Wolf
We’re still using these every night to read bedtime stories to the kids! Definitely still recommend! 🙂 ~Chelsea
Jessica
What kind of mounting plate originally came with the lamps? I do not have the ability to make a wood filler block to put in the fixture. Could command strips be added directly onto the original mounting hardware? Thank you
Chelsea Lipford Wolf
Hi Jessica! These particular sconces are attached to their mounting hardware with a big bolt. If you want to use the included mounting bracket, you would need to drill a large hole in your wall for the bolt or cut the size of the bolt in order to secure the sconce to the mounting bracket. Hope that makes enough sense to inform your decision! ~Chelsea
Heather
I was looking for a renter friendly solution to hanging my own magic lights, and lo and behold you beat me to it! 🙂 Nice job! Does the command strip hold pretty tightly to the wood?
Chelsea Lipford Wolf
Yes, ours was pretty snug to the wall! ~Chelsea