4 Ways to Update Your Living Room on a Budget
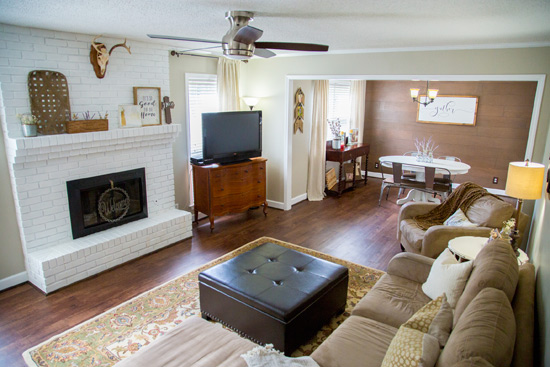 One of my most favorite things about updating my home or any house is that often the simplest or least-expensive things can make the biggest difference in the look and feel of the space. And that rings true in the case of this living and dining room Dad and I updated on a recent episode of Today’s Homeowner, which you can watch online now.
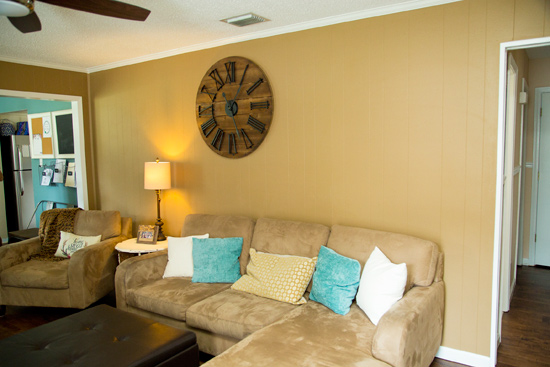
Here’s what the living room looked like before:
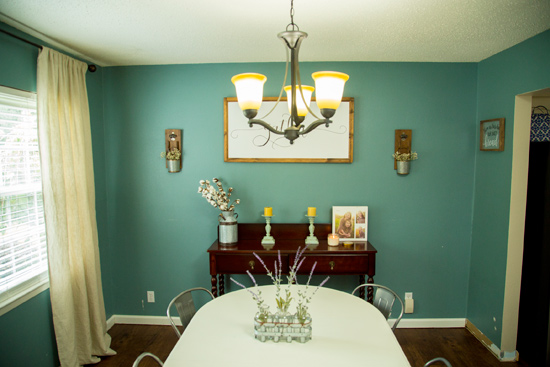
And here’s the dining room:
We basically did 4 things that you can do to update just about any room in your house-living room, dining room, bedroom, or kitchen. And doing only 1 or 2 of them will make a big impact on the room but not on your wallet!
Add Molding and Trim
I’ll put this tip first because it’s the most expensive option. Adding crown molding at the ceiling, cased molding around door openings or updating baseboards to a beefier style can be done together or separate to create a nicer, fancier, and more polished look. Think your room looks fine without crown molding? Add crown molding and you’ll totally look like the hearts-for-eyes emoji!? It just takes everything up a notch.
Fill Wood Paneling
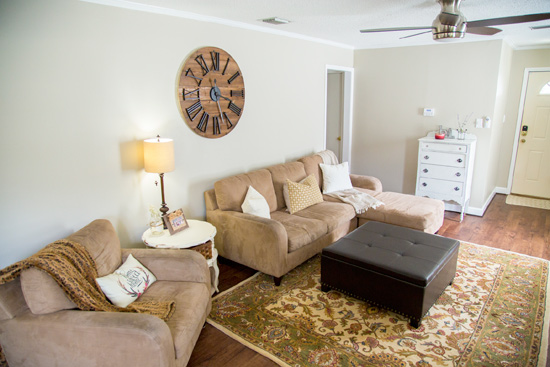
Lauren and Chris, the homeowners here, had an unfortunate case of wood paneling covered in a wall texture. Like why?? We’re almost positive the previous owner (a house flipper) added the texture to help conceal the wood paneling. But it didn’t work…
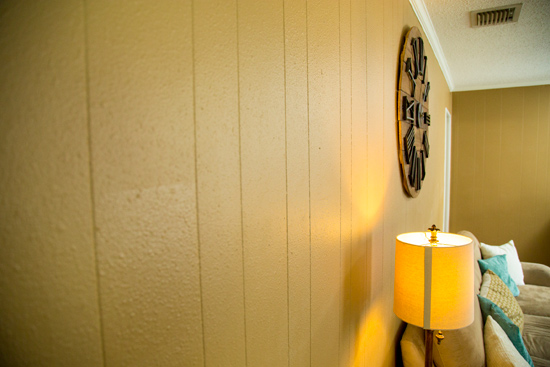
So our first step was to use a piece of 80-grit sandpaper on a sanding pole and sand the entire wall. Well, we actually used many pieces of sandpaper… It really helped with knocking down the texture! Then we filled the paneling grooves with drywall compound. (You can watch a how-to video over on todayshomeowner.com for more information.)
What we like to do is add some of the 20-minute powder* (or “fast mud”) to the premixed, regular joint compound*. Put some in a drywall mud tray* and mix, don’t add the powder to the bucket of joint compound! This helps accelerate the drying time. I wouldn’t recommend using straight 20 minute mud unless you’re really good at spreading drywall mud. It dries faster but is much harder to sand when it’s dry. So adding some to regular mud is a good compromise.
After you’ve applied the drywall mud to the grooves and sanded, you’ll definitely need to paint it all. So that’s the next room-transformation-on-a-budget tip.
Paint the Walls
A middle-of-the-road paint brand will set you back about $25 for a gallon of paint. Depending on the paint coverage, many rooms only require one can of paint. So that’s $25 to change the biggest surface in your room-your walls! Take this house, for instance. The teal in the dining room made the space feel small and closed off. And the caramel brown in the living room felt dated. But painting both rooms with a lighter, creamy tan tied the rooms together and made the whole space more cohesive! A change of color can breathe new life into your house.
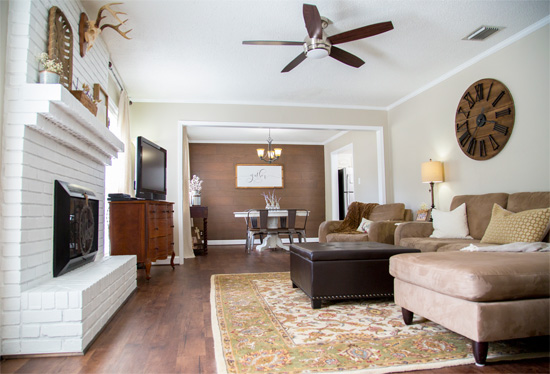
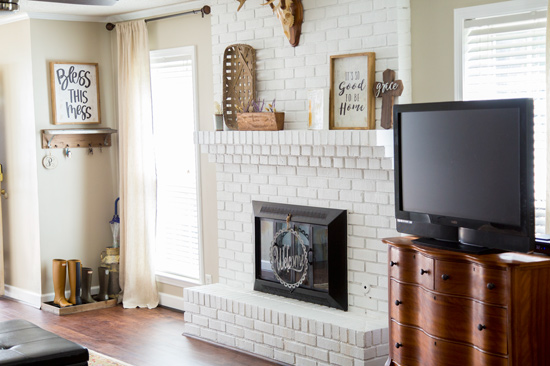
After painting the walls in this room the homeowner Lauren decided she wanted to paint the brick fireplace too. The creamy white really pops off the tan walls and looks so much more modern than it did before!
Wood Plank Accent Wall
Ok, so maybe you recently painted your walls but your room is still missing something? Install an accent wall!
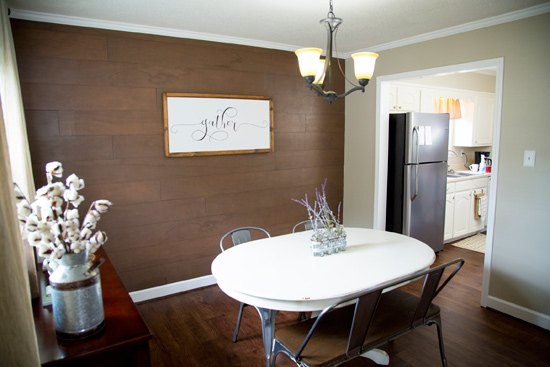
For this one, we cut planks out of smooth, stain-grade plywood and attached it to the wall with a nail gun. In fact, we installed it right over the teal paint color.
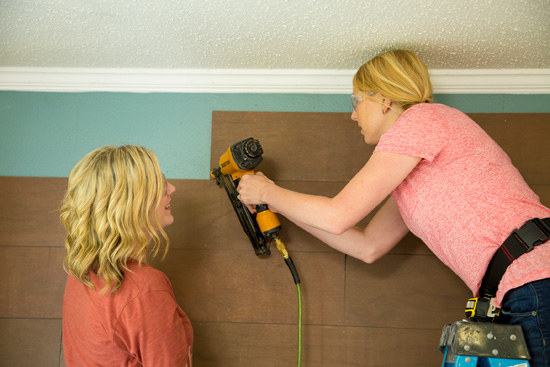
We stained the planks before hanging them using Varathane’s Briarsmoke stain*. But if you have darker walls in your room, you could paint the planks a light color for contrast. Or painting the wood accent wall the same as your wall color could provide a more subtle accent. You can watch my video on installing a similar wall by clicking here.
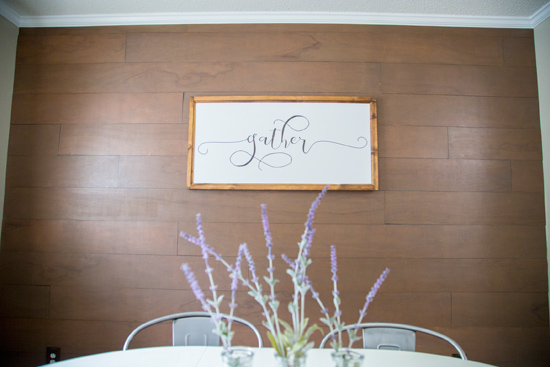
So you can see, a handful of small changes in this room made a BIG difference. I’d dare to say this room got its swagger back!

Don’t forget to watch the full episode on this room’s transformation!
Thanks for Checking In! ~Chelsea
*This post contains affiliate links for your convenience.*



That looked very good. I liked the “gather” sign. Good tips.
very nice updates……looks great! Merry Christmas to all!
Paint, Trims and paneling can transform a place and make it look rich and interesting. Nice to see Dad and daughter working on projects. Chelsea, thanks for sharing.
very nice, I like it all, I’ve got paneling in my house & would love to paint it but would have to hire someone to help me since it’s just me.
Maybe you can bribe some neighbors with pizza and beer to come help you out! A classic paint party! ~Chelsea
I LOVE this post Chelsea! Such great ideas and I have never considered filling in the paneling grooves <– brilliant! Sharing!
Thanks, Lora! I don’t know if it’s easier, per se, than replacing it with drywall. But it’s certainly more cost effective!