Checking In With Chelsea

DIY ideas, crafts, and tips for your home

subscribe and never miss a thing!

Receive Free Email Updates

  • About
  • Videos
  • Projects
    • Indoor Projects
    • Outdoor Projects
    • Craft Projects
  • House Tour

DIY Marble End Table Makeover

Indoor Projects •  June 20, 2016

A few months ago, I was picking up a file cabinet from our local Habitat for Humanity ReStore for an episode project. (If you don’t know what that is, you should check to see if there is one in your area for great furniture and building material finds!) While there I saw this round end table for $7!
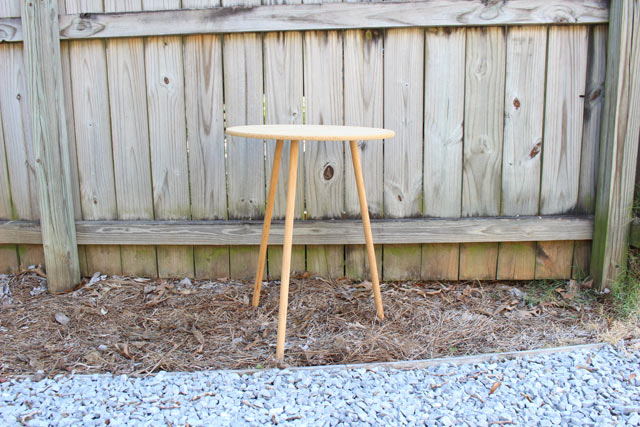
Thrift Store End Table Before Makeover

So I took it home with me too! I later found an exact match at a local Goodwill for $5. Could have saved $2!

It had nice, wooden legs, but the top of the table was very unfinished. It almost looked like it could have been cork.
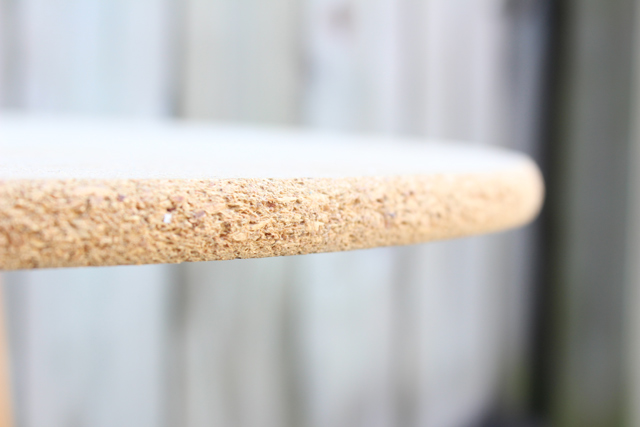
Open Grain Edge of Table Before

I knew I could refinish it and make it look great. It was just a matter of coming up with the right something. Then I found some marble contact paper on the web-giant Amazon. (Here’s a link to what I purchased if you’re interested.)

And ta-da!

end table with faux marble contact paper on top

The hardest part was cutting the paper in a strip for the side, but even that wasn’t so bad. Here’s what I did.

First I started by rolling out the contact paper and turning the table upside down on top of it. I placed it in the middle of the paper so I would have 2 factory edges to work with when it came time to cut strips for the edge of the table. The paper doesn’t unroll very smoothly since it’s kind of thick, but don’t worry about the wrinkles. They’ll come out!
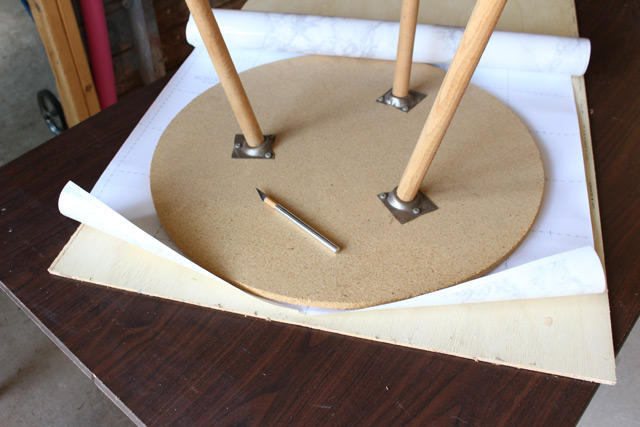
Laying Out Table to Cut Contact Paper

Then I used a knife to cut out the table top. At first I used my X-acto knife, but quickly switched to a sharp box knife that worked even better. You could also trace the table top with a pencil and cut it out using scissors. I thought using the knife would yield better results, but since I didn’t do it the other way I really have no way of knowing for sure!

After removing the paper backing, I applied the circle to the top of the table. Here are some of the wrinkles I mentioned not worrying about…

Wrinkle in Top of Marble Table

Before I smoothed out those wrinkles, I applied the strip on the edge. I measured the width and length and then marked that on the edge of the contact paper using a yard stick as a straight edge.

Marking to Cut Edge Band of Table

I used old-fashioned scissors to cut it out. Fortunately my table was small enough that I was able to use one continuous strip. If yours is larger or you’ve got a shorter roll of paper, just cut 2 or more strips of the same width. You can always turn the table to hide the seams!

To apply the strip, after removing the paper backing, I lined it up at the top before smoothing it down and then around the whole table. The contact paper can be unstuck and reapplied if needed. Of course the more you do it the less sticky it will be!

After my “new” table was covered in marble, I used a drywall knife to smooth out the wrinkles and make sure everything was stuck to the table nicely. You can also use a fine fingernail file to smooth out any strings on the edges.
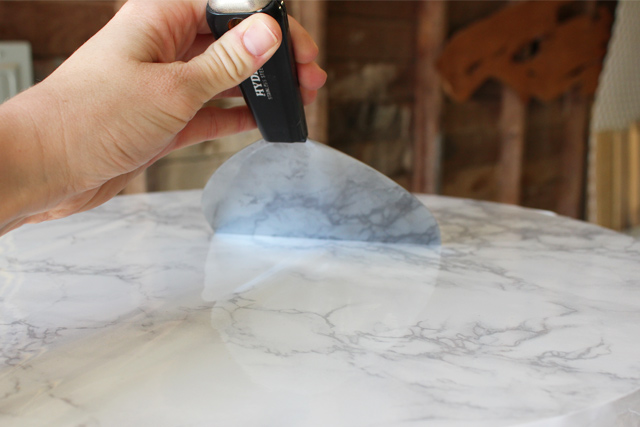
Smoothing Wrinkles with Drywall Knife

Since the legs were in good shape and I liked the color, I didn’t do anything but wipe them down.
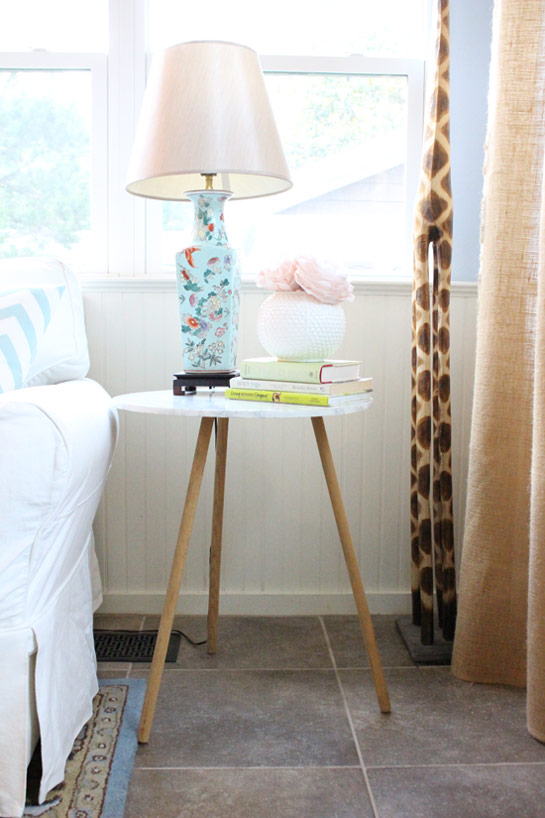
Faux Marble End Table Makeover

The shine of the marble paper is genuine-looking. I also thought it’d be great for shelves in a bookcase, whether built-in or stand-alone.

Marble Table Top and Edge

Some people have even covered their countertops in this stuff. Now that’s something I’d have to see in person to even consider!

end table with faux marble contact paper on top

Happy Father’s Day to all the dads and dad figures out there! Thanks for Checking In! ~ Chelsea

*This post contains affiliate links*

Subscribe for Free Updates!

Stay up-to-date on Chelsea's latest projects, tips, useful resources and more.

Previous Post
Featured on Today’s Homeowner: Summer!
Next Post
Summertime Flower Power

Related Content

Today's Homeowner Episode with Tips for Creating a Room with Many PurposesDouble-Duty Homeschool PlayroomMake a Dresser into Closet for Dress Up ClothesCloset for Dress-Up ClothesUpdate Dining Room on a BudgetSimple Dining Room ImprovementsSmall Updates in Dining Room 2018Small Dining Room Updates 2018

Comments

  1. Maria says

    July 23, 2016 at 5:10 am

    Great idea Chelsea. Just discovered your site. Will be visiting again.

    Reply

Please Leave a Comment Cancel reply

Your email address will not be published. Required fields are marked *

Welcome!

I’m Chelsea. DIY
enthusiast who loves
sharing my victories
and mishaps!
Learn more
here.

CHECK IN WITH CHELSEA ON INSTAGRAM

Even though there won’t be any parades this year Even though there won’t be any parades this year and @toomeysmardigras was heartbreakingly empty (when it should be bustling and busting at the seams), we will still carry on the Mardi Gras spirit and represent the birthplace of MG in America in this house! We stocked up on decorations, moonpies and apparel for the kiddos this weekend. Now bring on the king cake!👑🎂💜💛
.
.
Have you ever had a moon pie or king cake?! Some of my favorite local sweets! Mmmhmmm! Happy Sunday!✨
.
.
#mardigrasiscoming #mardigras2021 #anotherholidayruinedbycovid #covidsucks #partyon #pardigras #mobilealabama #westartedit #decoratetheseasons #celebratelifeeveryday #godblessamerica
Something I never thought I’d do? Measure shoes Something I never thought I’d do? Measure shoes on TV.🤷🏼‍♀️Yet here we are...a quick behind the scenes of the shoe rack I built for an episode of @todayshomeowner is in my stories if you want to check it out! You can see the TV circus in action.🎪🤪
.
.
#reallifeandstyle #behindthescenes🎬 #behindthescene #shoerackdesign #dayjobproblems #rollcamera #ladybuilder #diy #customclosets
Merry 5th Day of Christmas from my sweet and wild Merry 5th Day of Christmas from my sweet and wild Wolfpack!🎄🥰 I hope your Christmas Day was filled with your favorite people and things.
We had the best weekend getting in the Christmas s We had the best weekend getting in the Christmas spirit!🎄Hope you’re feeling the magic of Christmas at least a little bit too!✨
Thanks, Josh, for helping me build a column today! Thanks, Josh, for helping me build a column today!😍We’re on day 3 in my dad’s hometown helping to #buildlafayettelanding, a community service project he dreamed up to build up the community after Hurricane Michael devastated the area in 2018.
.
.
A lot more work to do before we wrap Thursday afternoon!🛠
Have you ever used spackling in a unique way? A ho Have you ever used spackling in a unique way? A homeowner I worked with recently used a stencil and spackling on her foyer wall to add some subtle interest! It was so fun! I love this neat contest that sparks creativity. Tag a friend who you think could win this contest with their ideas! It closes Feb 1st!
Load More... Follow on Instagram
Indoor Projects Outdoor Projects Craft Projects

Popular Posts

Frosted Windows in Blue Tiled Bathroom

How To Install Beautiful Privacy Window Film

posted in Indoor Projects

Completed Lattice Trellis to Cover HVAC Unit

Hide Your AC Unit with a Trellis

posted in Outdoor Projects

Dining Room View from Living Room Ready to Sell

How to Sell Your House Fast and Cheap

posted in Indoor Projects, Outdoor Projects

1950s Ranch Brick Home on Corner Lot Pristine Condition

Our Ranch Revival Introduction and Before Tour

posted in Indoor Projects, Outdoor Projects

Chelsea Lipford Wolf on Deck with Small Bug-Repellent Container Garden

Easy Way to Keep Mosquitos Away

posted in Outdoor Projects

Facebook Pagelike Widget
  • Contact
  • FAQs
  • Advertise with Chelsea
  • Media
  • Today’s Homeowner

Search This Site

Receive Free Updates Via Email

Copyright © 2021 Checking in With Chelsea • All Rights Reserved • Site Design by Archer Creative