Checking In With Chelsea

DIY ideas, crafts, and tips for your home

subscribe and never miss a thing!

Receive Free Email Updates

  • About
  • Videos
  • Projects
    • Indoor Projects
    • Outdoor Projects
    • Craft Projects
  • House Tour
You are here: Home / Outdoor Projects / DIY Carpenter Bee Trap

DIY Carpenter Bee Trap

April 3, 2015 By Chelsea Lipford Wolf 10 Comments

Spring has sprung in Mobile, Alabama! So of course the bugs are out and about too! In particular, there has been an increase in the big, black furry carpenter bees around our office.
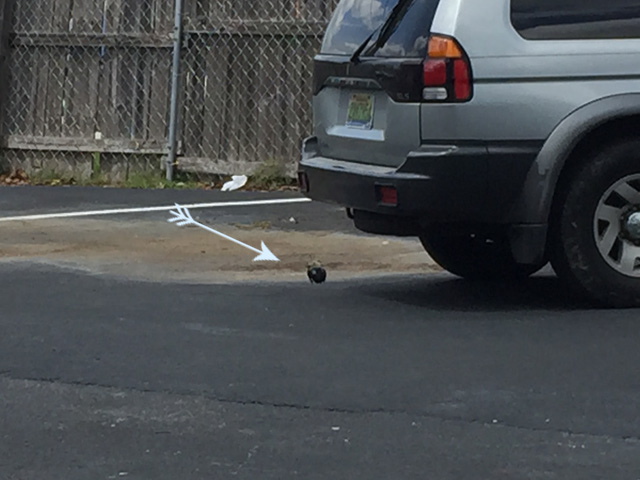
Carpenter Bee in Flight

And since we keep lumber leftover from various projects racked outside, we needed to do something to contain these drilling creatures! So I built a Carpenter Bee Trap.

rack of lumber with carpenter bee trap hanging from roof

I had seen one for $18.99 at a local hardware store. But it’s a simple design and could be homemade cheaper. (But if you’d rather but yours, here’s a similar one I found on Amazon.*)

I did a little research on the ole Google to make sure I was making it right. The holes drilled on the body of the trap are at an angle so sunlight doesn’t get in. Then you put a clear bottle on the bottom. The bees fly in the hole, see the light in the bottle, then fly into the bottle where they are then trapped. Or more like they don’t leave because that’s where the light is.

After picking up a fresh piece of cedar and a soda from the home center, I was able to get to work. I used cedar instead of the many options on our lumber rack to hopefully attract the bees easier since it’s different from the wood on the rack. Plus it should hold up fairly well outside.

Here are the materials you’ll need to make one for your house:

  • 1×6 cedar
  • tape measure
  • miter, hand or circular saw
  • 1 1/4 inch screws
  • pilot drill bit
  • drill
  • 1/2 inch AND 1 1/4 inch drill bits
  • screw eye and hook
  • clear plastic bottle with cap

You’ll need to cut (4) pieces at 8 inches from the cedar, (2) pieces at 7 inches, and (1) piece at 6 1/2 inches.
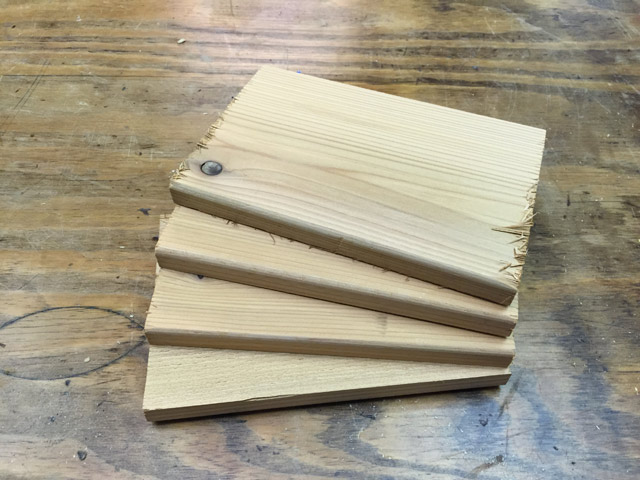
cedar planks sitting on workbench

Then you’re ready for assembly. This is how it’s pieced together:
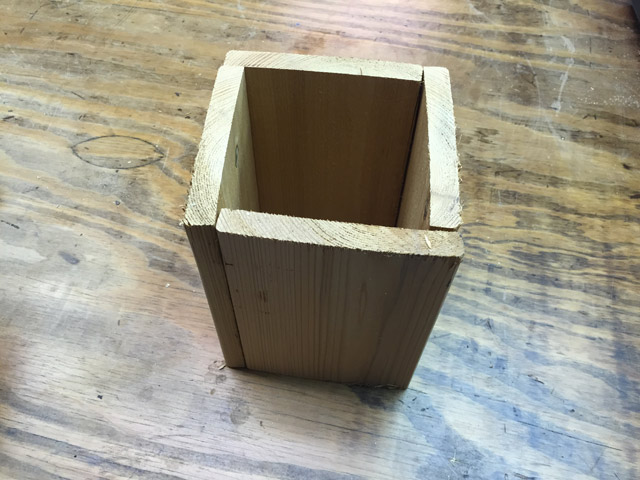
Cedar Put Together for Assembly

But turn it on its side to make it easier to pre-drill and screw the pieces together.

pilot drill bit drilling into cedar carpenter bee trap assembly

I put 2 screws on each side. Make sure you go through the side of the piece underneath!
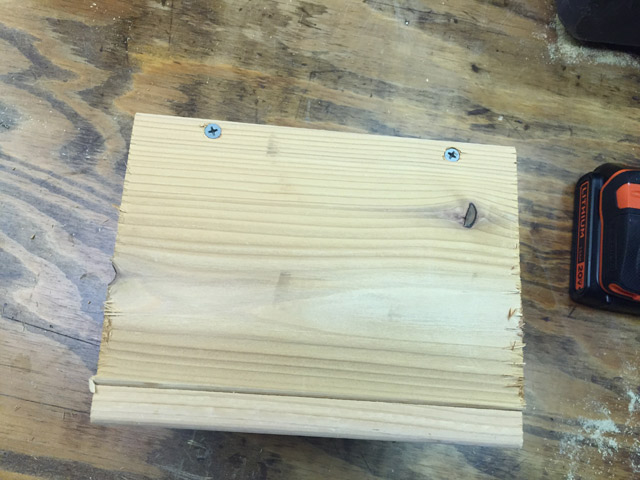
One Side of Assembly Complete

I wanted the trap to have a “roof” that overlapped the sides, but the (2) 7 inches pieces were too wide. So I stacked them on the chop saw and cut some of the width.
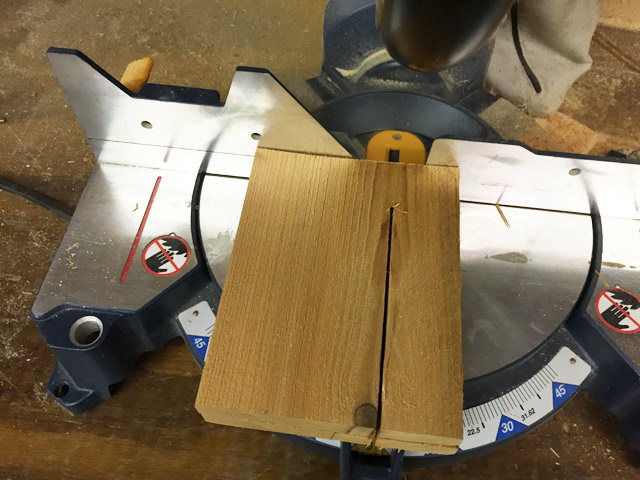
Cutting 7 Inch Pieces to Width

Then I placed them on top of the assembled sides and attached them with a few screws.
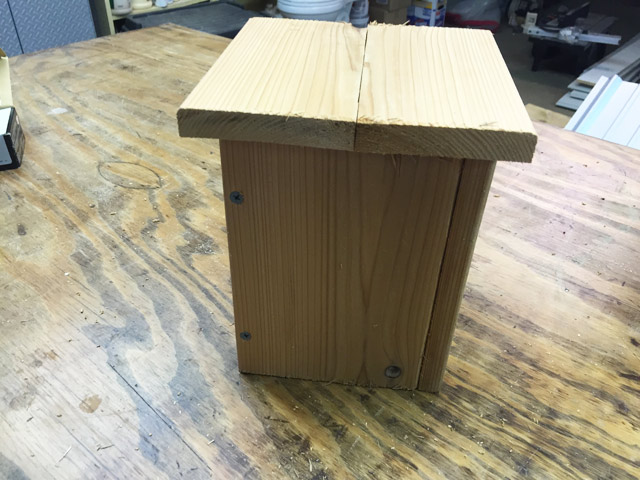
Roof Pieces of Carpenter Bee Trap in Place

Flip it over and attach the 6 1/2 inch piece to the bottom using the same screws. It won’t cover the entire surface, but it will cover the hole.

Bottom Piece of Carpenter Bee Trap In Place

While you have it upside down, use the 1 1/4 inch drill bit to drill a hole in the center of the bottom. This is an approximate size since it depends on the size of your plastic bottle cap. Hopefully you can scrounge up a drill bit a little shorter than the one I was forced to use…
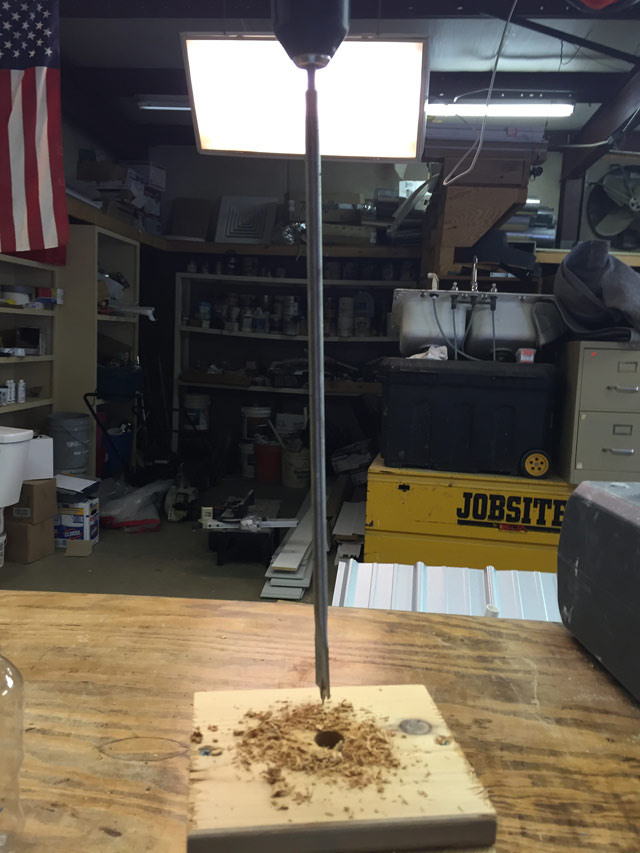
Ridiculously Long Drill Bit

You would think having a construction company and a home improvement TV show in your office would mean you’d have access to plenty of tools in the shop…but when all the crews are out on jobs, you’re stuck with the rusty leftovers. But whatever works!

Switch to your 1/2 inch drill bit. Drill in the cap of your plastic bottle cap. Be careful not to drill the threads!
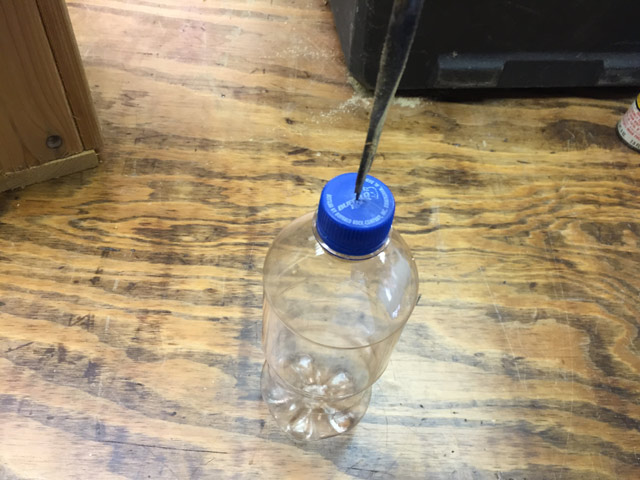
plastic soda bottle drill bit in lid

Then turn your trap on it’s side and drill a hole about 2 inches from the top with the 1/2 inch bit on 3 of the sides. Drill them at a 45 degree angle to eliminate the amount of the sunlight that can get through once it’s hanging.
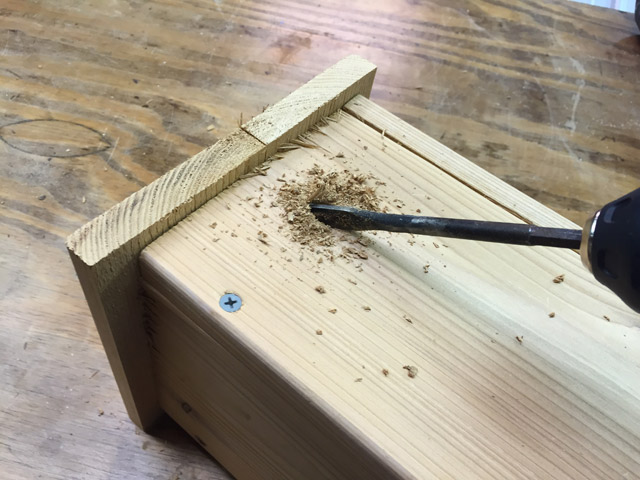
drilling 1/2 inch hole in cedar carpenter bee trap

Next attach your hook to the top. Mine screwed in snuggly between the two roof pieces. The home center I got the eye and hook from did not have them small enough in stainless steel or galvanized. So the zinc version will have to do!
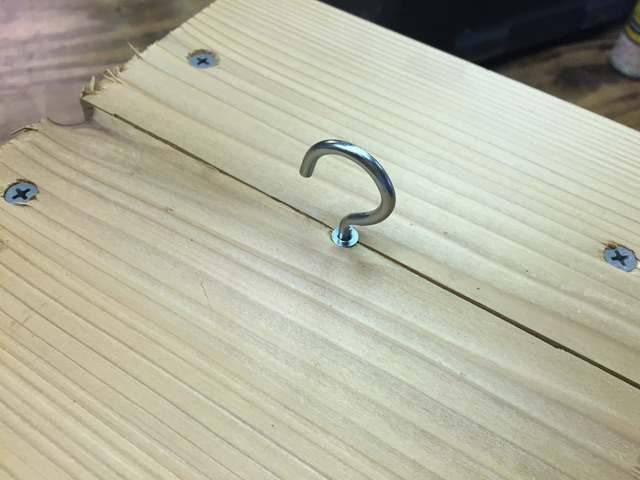
Screw Hook Between 2 Roof Pieces

Last step is to squeeze the bottle cap into the hole on the bottom and screw the bottle on. Then attach the screw eye near your most-frequented carpenter bee location. Hang your new trap and you’re ready to catch them all!
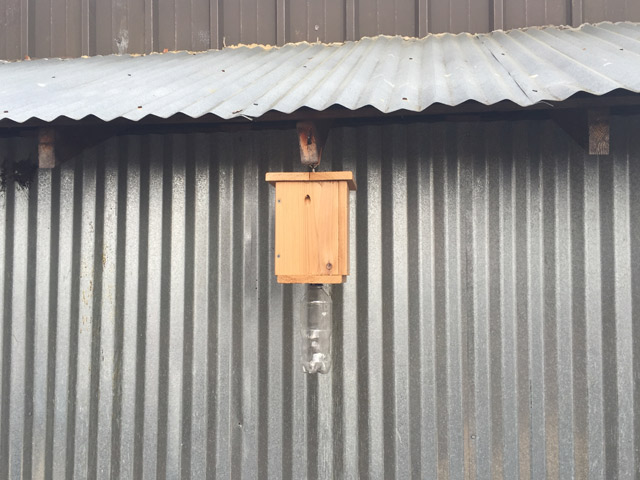
diy homemade carpenter bee trap hanging near metal siding

Once you’ve caught a few, you can change out the bottle for a new one and catch some more! Check out our article on How to Deal with Carpenter Bees to find out more.
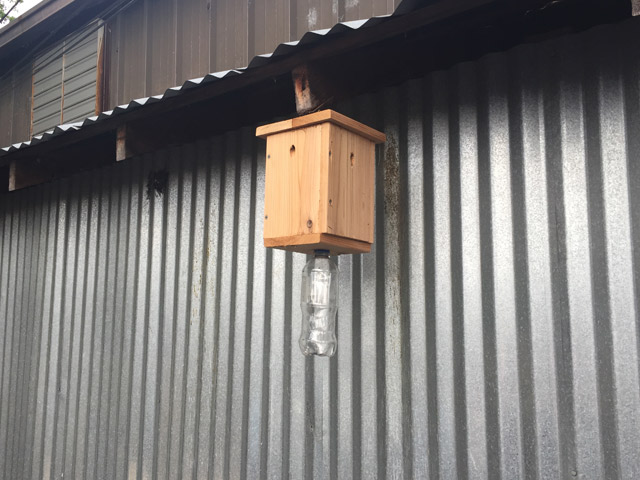
Hanging Carpenter Bee Trap

God bless you and your family on this holiest of holidays, Easter! Jesus is Risen!

Thanks for Checking In! ~ Chelsea

*This post contains affiliate links*

Subscribe for Free Updates!

Stay up-to-date on Chelsea's latest projects, tips, useful resources and more.

Previous Post
Front Porch Paintin’
Next Post
Spring Spruce Up

Related Content

Completed Hand Painted Pennant Flag Banner Kid BedroomDIY Pennant Banner for Kids RoomCompleted Large Lighted Two and Zero NumbersDIY Lighted Marquee NumbersBrick Retaining Wall How to Waterproof and PaintWaterproofing Vertical Masonry WallSitting on Back Steps After Finally Sealing BricksStripping Paint from Bricks

Comments

  1. Karen Chestnutt says

    April 8, 2015 at 10:13 am

    What about carpenter ants? Know a good way to get rid of them?

    Reply
  2. Jack says

    April 29, 2015 at 7:58 pm

    Great idea I will try it.

    Reply
  3. Jamie says

    April 19, 2016 at 3:33 pm

    Has this idea worked so far?

    Reply
    • Chelsea Lipford Wolf says

      April 20, 2016 at 1:00 pm

      It captured a few bees last year before someone took down the trap! Might have to make another one if the bees return this season. ~ Chelsea

      Reply
  4. Tim Muldoon says

    March 9, 2017 at 1:08 pm

    Does it have to be cedar? Will any wood work? Thanks.

    Reply
    • Chelsea Lipford Wolf says

      March 9, 2017 at 8:05 pm

      Any wood should work! ~Chelsea

      Reply
  5. Mark Cruce says

    May 2, 2017 at 2:28 pm

    I declared all out war on the carpenter bees this spring. I bought a trap from Lowes for $20. I also made some out of 4×4’s. I drilled a 1″ hole in the bottom up to 4″ into the 7″ wood. I drilled 1/2″ holes on the sides at 45 degree angles. I screwed a plastic coke bottle into the bottom hole. No cap needed. I hung all of these traps up. I also used Carpenter Bee spray into the already existing holes. And then I had fun knocking the bees down with my tennis racket and stomped on them on the ground for a confirmed kill. At this time 5/2/17, I have seen no more bees.

    Reply
    • Chelsea Lipford Wolf says

      May 2, 2017 at 2:47 pm

      Glad to hear it, Mark! And I love the idea and simplicity of using a 4×4 instead to create a trap! I’ll have to do that next time. ~Chelsea

      Reply
  6. Mary Jane says

    July 25, 2017 at 10:20 am

    Does damp wood attract the bees?

    Reply
    • Chelsea Lipford Wolf says

      July 26, 2017 at 6:40 am

      Hi Mary Jane, that’s a little outside my wheelhouse, but it seems like wood that’s damp would be easier for the bees to drill into. Therefore, they might gravitate towards it. ~Chelsea

      Reply

Please Leave a Comment Cancel reply

Your email address will not be published. Required fields are marked *

Welcome!

I’m Chelsea. DIY
enthusiast who loves
sharing my victories
and mishaps!
Learn more
here.

CHECK IN WITH CHELSEA ON INSTAGRAM

Lookie! It’s a shelf for your bookies! 🤣Build Lookie! It’s a shelf for your bookies! 🤣Building a shelf unit custom for ANY space in your home is so simple and can be done over and over again to add much needed storage aka sanity! The kids were running all over the house at bedtime trying to find a book to read because we had them stashed in baskets and shelves in several different rooms. So I took advantage of this space in the hall next to a closet to create a central location for their books and some of mine too! Plus it adds a little character to an otherwise blah space!🙌🏻
.
.
A full how to video is on checkinginwithchelsea.com! Book nerds can be DIY nerds too!🤓
.
.
#booknerdsunite #diyskills #beginnerdiy #bookshelfie #halldecor #storagesolutions #storageideas #bookstorage #bookstorageideas
5 months in and she’s at the top of my favorites 5 months in and she’s at the top of my favorites list!🥰
.
.
Couldn’t resist using this audio.😅
Using my grandmother’s cookie press to make 🎄 Using my grandmother’s cookie press to make 🎄cookies I used to make as a kid in our brand new kitchen. My heart could burst!😭 I hope you are enjoying the preparation for the main event 😇and bring love and joy to your home, no matter what it looks like.❤️💚
.
.
#christmascookies #christmastrees #familytraditions #christmasbreak #newkitchen #kitchendecor #kitchendesign #madewithlove
3D art install in my girls’ girly bedroom!🦋😍Love this $13 pack of butterflies that comes with everything you need to fill a large wall! And it only takes 30 minutes!🙌🏻 Putting the link to the butterflies in my bio! (https://amzn.to/3VmfZsB)
.
.
First step is to layout the flow of your fluttering butterflies with the large and medium sizes from the pack, leaving room for the small ones. Then fill in spaces with the small size and pat yourself on the back! So easy!
The whole Wolfpack has been staying at my parents’ house on the river for the past week while our hardwood floors are being refinished. Since the kids had the whole week off of school it has really felt like a vacation! Complete with a sunny Sunday boat ride after Mass!🥰🚤☀️Enjoy the rest of your weekend! 😘
.
.
#generationalliving #3generations❤️ #4kidlife #grandparentlife #boatday #riverside #riverlifestyle #fowlriver #alabamalifestyle #alabamablogger #nofilterneeded
Dad and I got our tickets to the gun show!💥 . . Dad and I got our tickets to the gun show!💥
.
.
@todayshomeowner @visitmobileal #exploreyourhometown #hometownpride #mobilealabama #battleship #ussalabama #visitmobile
Load More... Follow on Instagram

Indoor Projects Outdoor Projects Craft Projects
Facebook Pagelike Widget
  • Contact
  • FAQs
  • Advertise with Chelsea
  • Media
  • Today’s Homeowner

Search This Site

Receive Free Updates Via Email

Copyright © 2023 Checking in With Chelsea • All Rights Reserved