Checking In With Chelsea

DIY ideas, crafts, and tips for your home

subscribe and never miss a thing!

Receive Free Email Updates

  • About
  • Videos
  • Projects
    • Indoor Projects
    • Outdoor Projects
    • Craft Projects
  • House Tour
You are here: Home / Videos / Rattan Frame for Oval Mirror

Rattan Frame for Oval Mirror

November 1, 2022 By Chelsea Lipford Wolf Leave a Comment

Video Playback Not Supported

Dress up a simple oval bathroom mirror with wicker cord to look like a rattan masterpiece for under $100.

What to Buy

  • (2) 20″x30″ foam boards
  • oval mirror*
  • white tape*
  • brown spray paint*
  • small utility knife*
  • wicker rattan cord*
  • multi-surface glue*
  • tiny clamps*
  • clear mounting tape*

When I was originally planning our hall bathroom remodel, I wanted to add wood or rattan mirrors to break up the faux marble wall and chrome sconces. But everything I found was so expensive! So instead I purchased inexpensive plain mirrors with the intent of DIY-ing a frame eventually.

Well, eventually is here…17 months later…🤷🏼‍♀️

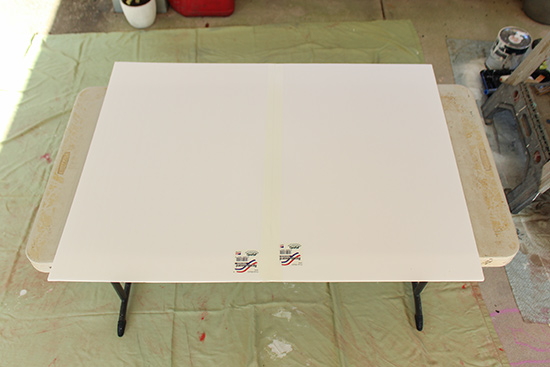
Prep Foam Board Base

The base of this mirror frame is cheap foam board. Yes it’s a little flimsy. But once it’s up on the mirror, you’ll never know! Determine the best layout for your boards to cover your mirror and tape them together with white duct tape. For the mirror I used, it was best to butt the boards together on the long side.

Tape 2 Foam Boards Together

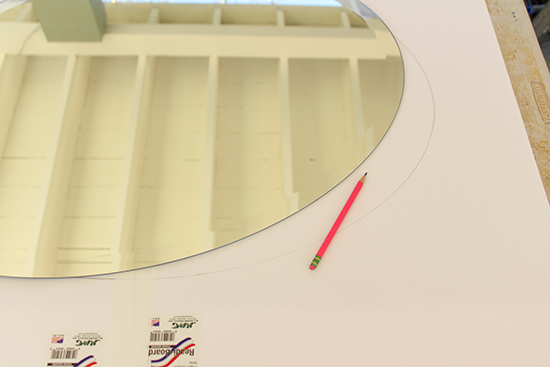
I wanted my rattan frame to only be as wide as my mirror. So I laid the mirror on top of the foam board and traced it. But you could also make your frame wider than the mirror itself if you have more space to fill on your wall.

Trace Oval Mirror Onto Foam Board

Set the oval mirror aside and use your tape measure to mark 1.5 inches inside your traced line all the way around.

Measure and Mark 1.5 Inches Inside Traced Line

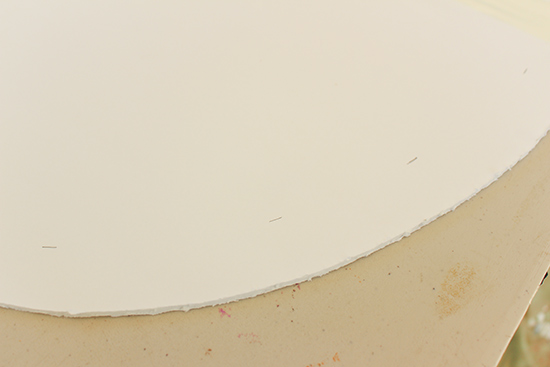
Then connect those marks to create your cut lines.

Using a VERY sharp and new blade, slowly score the foam board along your lines. I found it helpful to score the first layer of foam and then go back and saw to get through the remaining layers. Do not rush this part or you’ll have a shaggy mirror frame.

Can you tell which side I used a fresh blade on and which side used an old one? Yeah.

Foam Board Frame Base Cut with New Blade and Old Dull Blade

(It’ll get covered so it’s not the end of the world.)

Once your frame is cut out, head outside to spray paint the best side with brown spray paint. I used ‘Nutmeg’. Make sure to coat the small inside and outside edge too.

Let it dry.

Glue and Wrap Base

Now you’re ready to wrap your frame base. This step is a little tedious. But with a drop cloth, it makes a great project to mindlessly work on while watching a show after dinner.

Start at the bottom of your rattan mirror frame and add glue to the back. Line up your wicker cord and wrap it around your frame a few times. Then use a small clamp or chip clip to hold it in place while the glue dries. You can continue wrapping the cord. Keep the sides of each wrap touching each other to cover as much of the frame base as possible.

Add glue along the small inside and outside edges to help hold everything in place as you go.

You’ll need to repeatedly feed your bundle of cord through the frame. I liked to feed it through and loosely wrap it 3-4 times. Then go back and tighten up the wrapping where it’s supposed to be. The cord gets twisted as you go. So every so often you’ll need to pause to untwist the cord or it’ll get unmanageable. You can clamp the last spot you wrapped while untwisting if you need both hands.

Keep going until your entire foam frame base is wrapped. Add a big dollop of glue on the back when it’s completely wrapped and clamp the cord in place.

Mount Frame on Mirror

Once the glue is dry, it’s time to mount the frame to your mirror. Use clear mounting tape. It comes with adhesive on both sides and since it’s clear, it won’t be noticeable in your mirror’s reflection.

Stick the tape to the back of your frame in several places and then carefully place on your mirror. The tape linked above comes with 48 squares, so you could practically cover the whole back in sticky tape. That should get the job done!😅 (I only used 4, though!)

Wicker Cord Oval Mirror Frame

The wood look of this frame adds warmth to our otherwise stark bathroom wall.

Closeup DIY Rattan Mirror Frame Wrap

And adding warmth to any space is never a bad idea! You can adapt this idea and make a frame as big as you need by adding more foam boards. I just love the way this rattan oval mirror turned out!

Cheerful Kid Bathroom Decor DIY Mirror

Thanks for Checking In! ~Chelsea

*This post contains affiliate links. I will earn a small commission from your purchase without increasing the price for you!*

Subscribe for Free Updates!

Stay up-to-date on Chelsea's latest projects, tips, useful resources and more.

Previous Post
DIY Velvet Channel Tufted Headboard
Next Post
DIY Roman Shade for Any Window

Related Content

Completed Hand Painted Pennant Flag Banner Kid BedroomDIY Pennant Banner for Kids RoomCompleted Girls Bedroom Makeover Pink PanelingPink Girls’ Shared Bedroom EvolutionCompleted Large Lighted Two and Zero NumbersDIY Lighted Marquee NumbersCompleted Updates in Modern Master BathroomHow to Make a Pink Tub Look Cool

Please Leave a Comment Cancel reply

Your email address will not be published. Required fields are marked *

Welcome!

I’m Chelsea. DIY
enthusiast who loves
sharing my victories
and mishaps!
Learn more
here.

CHECK IN WITH CHELSEA ON INSTAGRAM

What else do you use paper plates for besides eati What else do you use paper plates for besides eating?? Spray paint onto a paper plate and dab a small paint brush to do spot touch ups! Life hack when you’re working on a project but don’t need to paint the whole surface!👏🏻
.
.
#lifehack #diyhacks #spraypainting #painttips #paintprep #paintpro #shutters #craftsman #1940style
Didn’t mean for this to be #ASMR but here we are Didn’t mean for this to be #ASMR but here we are!🤷🏼‍♀️ I bought this orchid 15 months ago to use the flowers in our hair for my sister’s wedding. I’ve already repotted it once and it’s bloomed 3-4 times! Time to do it again with a pretty new pot that matches our new kitchen cabinets!🤩
.
.
Steps to repot an orchid:
1-large pot without drainage holes
2-plastic pot slightly smaller with holes
3-trim if needed so plastic pot is at or below outside pot
4-add layer of orchid specific potting mix (it looks like bark!)
5-add orchid, fill in around roots with more bark- don’t forget to add some mix under the leaves!
6-to water, soak bark and fill up outside pot, rinse the leaves too!
7-let sit for 5-10 minutes, then drain and dry the outside of your pot.
8-set in place and enjoy!🌷
New laundry, who dis? Our laundry room was a BLANK New laundry, who dis? Our laundry room was a BLANK slate after the kitchen renovation left it reconfigured too. So Dad and I tackled simple projects that make this space functional and of course visually pleasing too!👏🏻The full project airs this weekend on @todayshomeowner!
.
.
I love that the cabinets and hardware match what we have in the kitchen since the spaces are right next to each other! Synergy!
.
.
What do you love about your laundry room?
So funny the number of people who told us they loo So funny the number of people who told us they looked at our house when it was on the market but didn’t buy. Guess we’re the only suckers🤣🤣We’ve brought her a long way since closing day though! 👏🏻😍🤩
.
.
#ranchrevival #ranchreno #1950shouse #beforeandafter #housereno #pinkgirlroom #girlsbedroom #diningroomdecor #familydining
Exploring new cities is fun but there’s no place Exploring new cities is fun but there’s no place like my hometown! Come visit!💜💛
.
.
#mobilealabama #visitmobile #mardigras #travelbloggervibes #southerncharm
Lookie! It’s a shelf for your bookies! 🤣Build Lookie! It’s a shelf for your bookies! 🤣Building a shelf unit custom for ANY space in your home is so simple and can be done over and over again to add much needed storage aka sanity! The kids were running all over the house at bedtime trying to find a book to read because we had them stashed in baskets and shelves in several different rooms. So I took advantage of this space in the hall next to a closet to create a central location for their books and some of mine too! Plus it adds a little character to an otherwise blah space!🙌🏻
.
.
A full how to video is on checkinginwithchelsea.com! Book nerds can be DIY nerds too!🤓
.
.
#booknerdsunite #diyskills #beginnerdiy #bookshelfie #halldecor #storagesolutions #storageideas #bookstorage #bookstorageideas
Load More... Follow on Instagram

Indoor Projects Outdoor Projects Craft Projects
Facebook Pagelike Widget
  • Contact
  • FAQs
  • Advertise with Chelsea
  • Media
  • Today’s Homeowner

Search This Site

Receive Free Updates Via Email

Copyright © 2023 Checking in With Chelsea • All Rights Reserved