Checking In With Chelsea

DIY ideas, crafts, and tips for your home

subscribe and never miss a thing!

Receive Free Email Updates

  • About
  • Videos
  • Projects
    • Indoor Projects
    • Outdoor Projects
    • Craft Projects
  • House Tour
You are here: Home / Videos / Planter Box for Porch Rails

Planter Box for Porch Rails

June 1, 2017 By Chelsea Lipford Wolf 4 Comments

Video Playback Not Supported

Beginner DIY Porch Planter Box
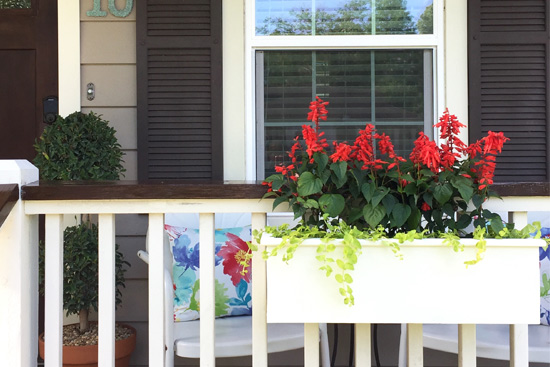
Planter Box Mounted on White Porch Rails
If you’ve been following my blog the past few weeks, you might be picking up on how much I love flowers and plants. Especially this time of year when everything is in full bloom!? So it shouldn’t come as a shock that I wanted to build something to hold MORE flowers!

I built a planter box like this a few years ago for Black+Decker’s blog, but this time I wanted to improve upon it.

Materials

This is definitely a beginner DIY project, so gather your materials and get to work!

  • (1) 1×2*
  • (1) 1×8*
  • tape measure*(my personal favorite)
  • miter saw* or circular saw*
  • wood glue*
  • drill/driver*
  • hammer*
  • small finish nails*
  • 1-5/8″ exterior screws*
  • 2″ exterior screws*
  • plastic planter*
  • sandpaper
  • primer/paint/paint brush
  • level*
  • potting soil
  • flowers

Cut Everything to Size

You’ll see in the video above, I used my miter saw at 45 degrees to get a ‘mitered’ edge. If you don’t have a miter saw or don’t want to cut 45s, you can also just cut it straight. Though, that will change the measurements slightly.

Once you have the 1x8s cut to size, use the same measurements to cut the 1×2. Cut an additional 1×2 to the inside length of your planter box. This will be the support that holds the plastic planter in place.

Assemble with Screws

Then use the 1-5/8″ exterior screws to assemble the 1×8 box. Attach the 1×2 trim pieces on top with the small finish nails.

To ‘finish’ my planter box, I decided to paint it to match my hand rail spindles. So first I sanded it all and primed it with exterior primer. Then followed that up with a little more sanding and a coat of my white exterior paint.

The planter box I had here previously was treated with a clear coat like you’d use on a wood deck. Just to give you another idea in case you don’t like the painted look!

Plant Flowers

While the paint dried, I got to work planting my flowers. I used some red salvias and green ‘creeping Jenny’ vines. I love the variation in height and color! It adds so much more than just planting one type of flower.

Mark and Hang

After the plants were planted and the paint was dry, I hung the wooden planter box on my handrails by first marking where the spindles were inside my box. Then I drove the 2″ screws through the box on the ground so just a tiny bit poked through the back. Then I held it in place on the spindles and finished driving one screw on the end before putting my level in place. When it was level I finished driving the rest of the screws.
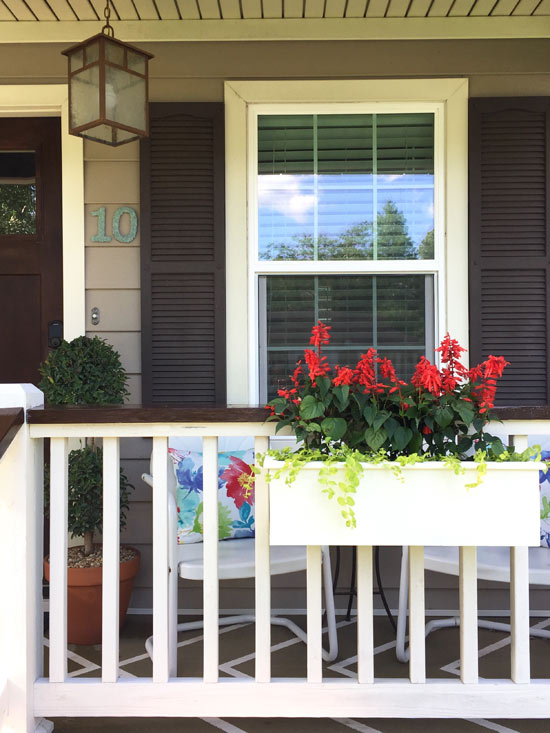
Red Salvias and Creeping Jenny in Window Planter Box on White Porch Handrails

Now all I have to do is water my fresh blooms every few days and enjoy the fresh pop of color on my front porch! What kind of plants are you planting and enjoying this season? Share in the comments below, please!

Thanks for Checking In! ~Chelsea

*This post contains affiliate links*

Subscribe for Free Updates!

Stay up-to-date on Chelsea's latest projects, tips, useful resources and more.

Previous Post
How To Help Your Grass Grow This Summer
Next Post
DIY Framed Display for Antiques

Related Content

Completed Hand Painted Pennant Flag Banner Kid BedroomDIY Pennant Banner for Kids RoomCompleted Large Lighted Two and Zero NumbersDIY Lighted Marquee NumbersBrick Retaining Wall How to Waterproof and PaintWaterproofing Vertical Masonry WallSitting on Back Steps After Finally Sealing BricksStripping Paint from Bricks

Comments

  1. Susan L. Hollis says

    August 21, 2017 at 8:24 pm

    I love your style, in all you do, lady!

    Reply
    • Chelsea Lipford Wolf says

      August 22, 2017 at 1:33 pm

      Thank you, Susan!☺️ That’s very kind of you to say! ~Chelsea

      Reply
  2. Satish chandra says

    November 16, 2017 at 7:46 am

    Nice planter box, i can also put in 2 to 3 round plastic pots in place of one rectangle box. Since my balcony railings is steel, i will have to use clamps to hang them i guess. Any suggestions?

    Reply
    • Chelsea Lipford Wolf says

      November 20, 2017 at 12:35 pm

      I’m sorry I don’t have any experience with metal railings! ~Chelsea

      Reply

Please Leave a Comment Cancel reply

Your email address will not be published. Required fields are marked *

Welcome!

I’m Chelsea. DIY
enthusiast who loves
sharing my victories
and mishaps!
Learn more
here.

CHECK IN WITH CHELSEA ON INSTAGRAM

Ask me how I know😑Whether you’re doing a smal Ask me how I know😑Whether you’re doing a small patch or a whole room, this drywall sanding hack will keep the dust at bay and keep the rest of your house looking good😎
.
.
#drywall #diyhack #tipsandtricks
A Spring Break to remember! Thanks to CeeCee and P A Spring Break to remember! Thanks to CeeCee and Pop Daddy for bringing the Wolfpack along on vacation! A long travel day ahead of us but it’s always worth it to spend time with family and get some r&r.☀️😴 Happy weekend!
9 years!✨Brandon and I will be celebrating 9 yea 9 years!✨Brandon and I will be celebrating 9 years of marriage this week. And how perfect we were invited to a wedding tonight walking distance from our home.🥰Sometimes reality is better than the movies and this weekend is one of those times. Enjoy, friends!☀️
What else do you use paper plates for besides eati What else do you use paper plates for besides eating?? Spray paint onto a paper plate and dab a small paint brush to do spot touch ups! Life hack when you’re working on a project but don’t need to paint the whole surface!👏🏻
.
.
#lifehack #diyhacks #spraypainting #painttips #paintprep #paintpro #shutters #craftsman #1940style
Didn’t mean for this to be #ASMR but here we are Didn’t mean for this to be #ASMR but here we are!🤷🏼‍♀️ I bought this orchid 15 months ago to use the flowers in our hair for my sister’s wedding. I’ve already repotted it once and it’s bloomed 3-4 times! Time to do it again with a pretty new pot that matches our new kitchen cabinets!🤩
.
.
Steps to repot an orchid:
1-large pot without drainage holes
2-plastic pot slightly smaller with holes
3-trim if needed so plastic pot is at or below outside pot
4-add layer of orchid specific potting mix (it looks like bark!)
5-add orchid, fill in around roots with more bark- don’t forget to add some mix under the leaves!
6-to water, soak bark and fill up outside pot, rinse the leaves too!
7-let sit for 5-10 minutes, then drain and dry the outside of your pot.
8-set in place and enjoy!🌷
New laundry, who dis? Our laundry room was a BLANK New laundry, who dis? Our laundry room was a BLANK slate after the kitchen renovation left it reconfigured too. So Dad and I tackled simple projects that make this space functional and of course visually pleasing too!👏🏻The full project airs this weekend on @todayshomeowner!
.
.
I love that the cabinets and hardware match what we have in the kitchen since the spaces are right next to each other! Synergy!
.
.
What do you love about your laundry room?
Load More... Follow on Instagram

Indoor Projects Outdoor Projects Craft Projects
Facebook Pagelike Widget
  • Contact
  • FAQs
  • Advertise with Chelsea
  • Media
  • Today’s Homeowner

Search This Site

Receive Free Updates Via Email

Copyright © 2023 Checking in With Chelsea • All Rights Reserved