Updating a Bathtub on a Budget
With the weather heating up outside, I thought it’d be a great time to head inside and do some improvements in the bathroom. And the best part about the 3 small projects Jolyn and I tackle this month is they can be done at the same time or on separate occasions. Whatever your budget and time allows!
To get started we wanted to upgrade the tub faucet and spout. They were showing some wear and tear and were difficult to turn on and off. Before removing the old fixture, we headed outside to shut off the entire water supply to the house. (Use a water shut-off tool or other wrench to turn your water meter a 1/4 turn to the off position.) Then we removed the handles and realized the valve stem coming out of the wall would not work with the new tub faucet Jolyn picked out from Moen. Not an obstacle we couldn’t overcome, though!
You see, different manufacturers have different valve stems. The old one we pulled out was star-shaped, whereas the Moen stem was like a ‘D’. It’s like trying to use a Phillips screwdriver in a flat head screw. It just doesn’t fit! But in order to change out the valve stems for our new faucet, we had to replace the valve body inside the wall. Luckily, there was a small access to the back of the tub faucet through the wall in the adjacent closet.
It’s good to know your limits, and soldering a valve body is not in my wheelhouse. So this is something we wanted a professional plumber to tackle. And that’s something to consider if you’re wanting to change out your tub fixture too since it’ll add to your overall project’s expense. You can always buy a faucet from the same manufacturer as your existing fixture and you should be good to go.
After the plumber finished his work inside the wall, Jolyn and I were able to “handle” the handles on the outside. We used plumber’s putty around the stem sticking out of the wall to make a watertight seal when we attached the hot and cold knobs with a screwdriver.
We also applied a small amount of putty around the copper pipe for the tub spout. But before we attached the spout, we also added some thread seal tape (commonly referred to as Teflon tape) to the threads on the end of the copper pipe. The tape should be threaded in the same direction as the spout. That way when you’re tightening the spout, it’ll tighten the tape too and get the watertight seal we’re all seeking from our bathtub!
With that project complete, we couldn’t wait to test it out! We turned the water to the house on and turned those knobs! With confirmation that there weren’t any leaks, we turned the house’s water supply back off so we could take care of the next thing on Jolyn’s “Need to Update” List-the shower head!
Their white shower head had a few leaks at the connections, a duct tape repair that wasn’t holding anymore, and a spray pattern that wasn’t original to the shower head. It also didn’t match our shiny, new tub faucet.
So we found a shower head that not only solved our non-matching finish and leak issues, but also was an upgrade with 6 spray patterns and, my favorite, a magnetic dock.
All we needed was a wrench to remove the old shower head. We didn’t even need it for the new one! Before we installed the new one, though, we just had to test out the magnetic power. And it’s pretty strong!
It took us less than 5 minutes to place the included washers and hand-tighten the 3 connections. Now Jolyn can return the hand shower back to the dock without opening her eyes! Sounds funny, but if you’ve ever gotten shampoo in your eyes while trying to re-cradle your hand shower, you’d understand!
The Magnetix technology from Moen is available in a couple of styles and finishes, but we installed the Attract with Magnetix in Chrome*.
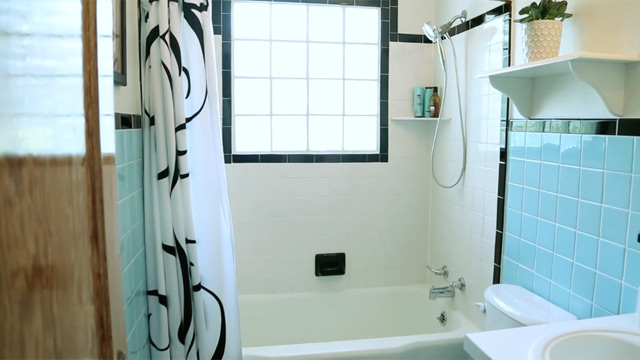
And if the bathtub didn’t look dingy and worn-out before, it certainly did now that we upgraded the fixtures attached to it! So I couldn’t leave without lending a hand.
To update the look of the tub itself, we used a refinishing kit from Homax called Tough As Tile. It comes with 2 cans of the 1-part spray epoxy, gloves, cleaning agent, and steel wool.
We also used:
- sponge
- bucket
- painter’s tape
- painter’s plastic
- respirator for organic vapor*
- safety glasses
- lacquer thinner*
- silicone caulk
- caulk gun
The epoxy finish won’t stick to the silicone caulk that surrounded the tub, so before we got to the above items, we removed the existing caulk with a razor knife and Homax’s caulk removal tool.
As with any paint job, or really any project in general, preparation is key and essential. The prep process for the tub involved cleaning it with the enclosed cleaner, rinsing, drying, scrubbing with the steel wool, rinsing, and drying. Then we repeated that whole process 2 more times! Definitely don’t skip this step (or steps) if you’re trying this at home!
Once we were satisfied with our prep job, we did a few test sprays with the can outside on a piece of cardboard. Then we headed back inside to tape off anything and everything that wasn’t the bathtub. That’s where the painter’s plastic and painter’s tape come into play. You’ll want the plastic to go higher and wider than you think you’ll need. Epoxy spray can travel a lot farther than the cans of spray paint you might be used to.
With everything taped off, we strapped on our respirators and safety glasses, closed the door to the bathroom and painted that tub!
I strongly advise doing practice sprays outside before you get started. like we did. It’s very important that the first coat is very thin. Do not try and get good coverage with the first coat. That’s why we have second coats!
Wait for 15 minutes before starting your second coat. But don’t wait more than 30 minutes. Otherwise you’ll have to wait 72 hours in order to spray the second coat. Don’t ask me why because I can say is, science.
If you’re working on this project and it’s not July (aka it’s cold outside and in your house), a little tip is to warm up your epoxy cans in a warm water bath for 15 minutes. Then shake the can vigorously before applying.
Once we had our second coat on, we let it dry for 3 days before removing the plastic and reapplying silicone caulk along the top of the tub.
And with that finishing touch, our 3 bathroom projects were complete!
If you started on a Friday evening, refinishing the tub could be a weekend project. Changing out the shower head and the tub faucet can definitely be done in less than an hour. Unless you have to call a plumber like we did!
I hope this month’s project has shown that with just a few small upgrades you can improve your home’s look and feel without breaking the bank or undertaking a down-to-the-studs renovation. If you have any questions about the products or process, feel free to comment below. Because if you’re wondering about something, I bet there are 10 other people with the same question!
Thanks for Checking In! ~ Chelsea
*This post contains affiliate links*


4 Comments
Elizabeth Bigham
I appreciate the bathroom remodel video. I’ve been thinking about trying to refinish my tub. Is the finish shiny? How long will it last? Does it peel or bubble over time? I’m enjoy your site so much. Just purchased a new condo and it needs some love. Thank you for your feedback. Love all your photos of your home.
Chelsea Lipford Wolf
Hi Elizabeth! The finish is shiny! It is not made to be a long-term solution. I’d say 3-4 years for a tub used regularly. But when you weigh costs of a pro doing it or getting a new tub, a few years seems pretty good for a few hours worth of work! Thanks for watching! (And I’m working on improving my photography skills, so hopefully my house will look even better in the future!) 🙂 ~ Chelsea
Elizabeth Bigham
This might be the thing for my little used guest bathroom. I’d be delighted to see you try one of those countertop transformations kits. Maybe you’d make me brave enough to try it. I’m passing your website on to all my diy homeowner friends. Your photography skills are just great. You are really inspiring. I’ll be checking back often! Thanks just a bunch!!
Michelle
Wha did you spray on bathtub walls to stop water, lime spots