Merry Christmas! I know I’m not alone in saying Christmas is my favorite time of year! I don’t know why it’s so magical, but twinkly lights and glittery ornaments everywhere might be part of the reason!
Another reason may be the reconnecting with friends and family you haven’t seen in a while. Even if you don’t see each other physically, receiving greeting cards from them can warm your heart. And that’s where this month’s project comes into play.
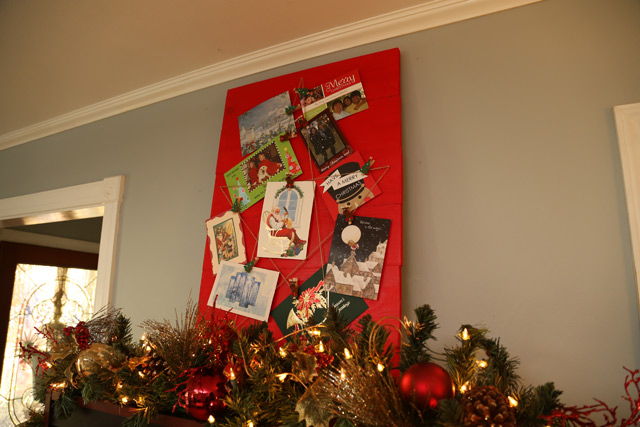
With all of those cards you receive, you need somewhere to put them so you can enjoy them and display them until you take down the tree. Behold the Christmas Star Card Holder.

It’s really easy and I’d say fairly quick to put together, too.
Here’s what you’ll need:
- (2) 6ft 1x6s
- (1) 1×2
- drill
- circular saw
- sander
- 1 1/4 inch wood screws
- safety glasses
- speed square
- tape measure
- pencil
- hi-gloss latex paint (Behr’s California Poppy)
- paint brush
- wire nails
- hammer
- string
- mini clothes pins
Our first step was to measure and mark for our cuts. We need (6) 21-inch 1×6 boards. For the supports that will go on the back, I used a 1×2 leftover from last month’s fabric panels and cut it in half (about 27 inches).
Watch the video above for an easy trick to getting straight cuts while cutting those 1x6s using the speed square.
With all of the materials cut, we switched out the saw attachment on our MATRIX for the sander attachment and lightly sanded the edges we just cut and every other side to remove any splinters.
Then lay the 1x6s on your work surface with the prettier side down. And set the 1x2s on the back about 5 inches from the side edges and centered vertically.
12 screws later our card holder was assembled!
We flipped it over and whipped out the Christmas red paint (Behr’s California Poppy) and gave the front and edges 1 coat of paint. With just one coat of paint, the grain of the wood still shines through for a rustic, natural look. Of course, if you’re more partial to a fresh, clean look wait a half hour or so and give it a second thorough coat.
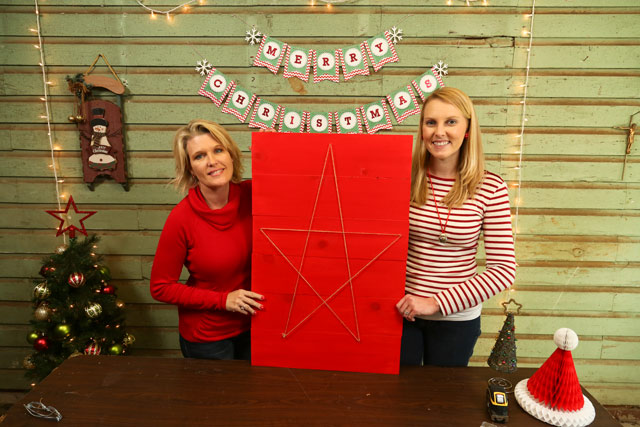
Wait until the paint is dry to the touch and then you can add the 5 nails that make the points of the star. Tie the twine to one nail and pull it around all 5 points to create a star shape, just like in elementary school. Start at the bottom left point, up to the top, bottom right, middle left, middle right, and back to the bottom left nail. Tie it off again and cut the excess string.

If you’re more of a Hanukkah celebrator, pick out a nice blue paint color and create a Star of David card holder instead!
Grab your holiday cards from this year or old ones you may have kept and clip them onto the twine. Set the holder where you’ll see it a lot! And have a MERRY CHRISTMAS and Happy New Year!
Thanks for Checking In! ~Chelsea


Please Leave a Comment