Checking In With Chelsea

DIY ideas, crafts, and tips for your home

subscribe and never miss a thing!

Receive Free Email Updates

  • About
  • Videos
  • Projects
    • Indoor Projects
    • Outdoor Projects
    • Craft Projects
  • House Tour
You are here: Home / Videos / Changing a Light Fixture into a Plug-In

Changing a Light Fixture into a Plug-In

December 1, 2017 By Chelsea Lipford Wolf 4 Comments

Video Playback Not Supported

How To Change a Light Fixture into a Plug-In Lamp
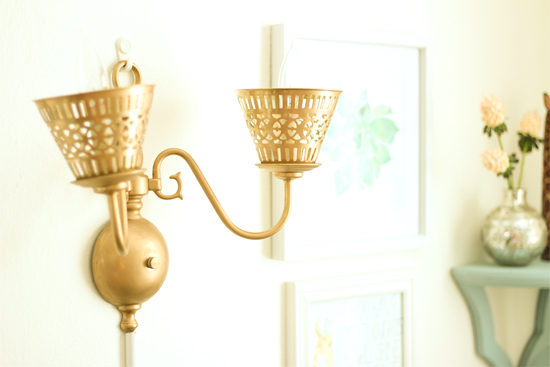
Brass Wall Sconce Wired as a Plug-In

If you’re wondering how you can hang a wall sconce light fixture without running wiring in the wall, then you’ve come to the right place! This process will also work if you have a ceiling-mounted fixture but no light switch!

This all came about when I found this beauty at our local ReStore.
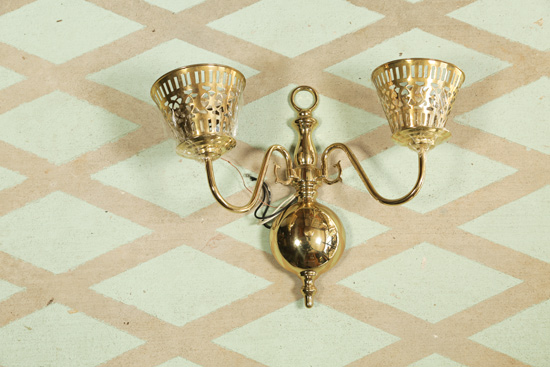
Brass Wall Sconce from ReStore

I immediately fell for the cutouts on the shade.?The color wasn’t my favorite but I knew I could change that…which was my first step!

Materials

Here’s everything I used to update the finish and the wiring:

  • hacksaw
  • mill file
  • Rub N Buff wax metallic finish in Antique Gold*
  • painter’s tape
  • lamp cord set*
  • wire nuts
  • wire strippers*
  • wall hook*
  • cord cover
  • surge protector

Change the Finish

After cutting a small section off the bottom of the fixture, I applied the gold wax. All you have to do is rub it on (with gloves on!) and then buff it to your desired sheen with a clean cloth. I found that less was more when it came to buffing.

Once I was satisfied with how it all looked, it was time to re-wire!

Re-Wire with Plug

This part is so simple! Using the wire strippers, I cut the lamp cord set to length. Yes! You can shorten the cord so you don’t have a bunch of excess by the outlet!

Then I stripped the sheathing from the wire about 3/4 of an inch down. (Watch the video above for reference.) One wire from the cord set was wrapped around the white wires from my fixture and capped with a wire nut. The other wire was connected in the same way with the black wires from my fixture. And that is that!

Hang and Install

The fixture was hung in place above my desk with the new cord coming out of the fixture where I cut that small piece off. And I plugged it into my Woods surge protector. With a push of the button, my new ‘lamp’ was lighting up our living room! And it’s great that the extra outlets on this power strip rotate when not in use. Keeps those tiny baby hands out of harm’s way!
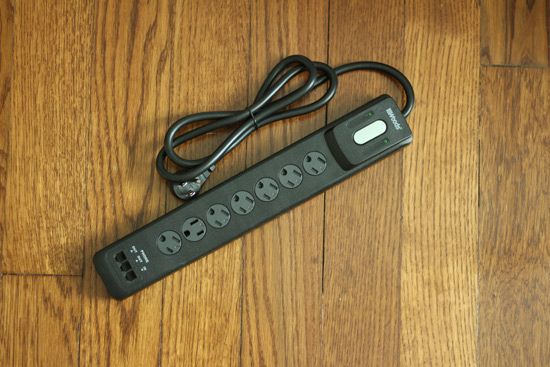
Woods Surge Protector and Power Strip with 7 Outlets

**This video was sponsored by Woods though all opinions are honest and 100% my own!

I just love the look and function of my ‘new’ light fixture!!

Brass Wall Sconce Wired as a Plug-In

Thanks for Checking In! ~Chelsea

*This post contains affiliate links*

Subscribe for Free Updates!

Stay up-to-date on Chelsea's latest projects, tips, useful resources and more.

Previous Post
Making Old Pegboard Look New
Next Post
DIY Acrylic Coffee Table

Related Content

Completed Hand Painted Pennant Flag Banner Kid BedroomDIY Pennant Banner for Kids RoomCompleted Girls Bedroom Makeover Pink PanelingPink Girls’ Shared Bedroom Evolution1950s Ranch Kitchen Before Renovation1950s Kitchen Renovation IdeasBrick Retaining Wall How to Waterproof and PaintWaterproofing Vertical Masonry Wall

Comments

  1. Satish chandra says

    December 2, 2017 at 8:42 am

    Very nice, neatly done.

    Reply
  2. Krista says

    December 5, 2017 at 4:22 pm

    Love this! I have one pretty similar sitting in my garage that I’ve been wanting to do this to but didn’t know how!

    Reply
    • Chelsea Lipford Wolf says

      December 6, 2017 at 10:00 am

      You got this Krista!??Can’t wait to see it when you’re done! ~Chelsea

      Reply
  3. Helen Seymour says

    January 19, 2018 at 9:00 am

    I had no idea it was that simple. Thank you so much……….. 🙂

    Reply

Please Leave a Comment Cancel reply

Your email address will not be published. Required fields are marked *

Welcome!

I’m Chelsea. DIY
enthusiast who loves
sharing my victories
and mishaps!
Learn more
here.

CHECK IN WITH CHELSEA ON INSTAGRAM

Ask me how I know😑Whether you’re doing a smal Ask me how I know😑Whether you’re doing a small patch or a whole room, this drywall sanding hack will keep the dust at bay and keep the rest of your house looking good😎
.
.
#drywall #diyhack #tipsandtricks
A Spring Break to remember! Thanks to CeeCee and P A Spring Break to remember! Thanks to CeeCee and Pop Daddy for bringing the Wolfpack along on vacation! A long travel day ahead of us but it’s always worth it to spend time with family and get some r&r.☀️😴 Happy weekend!
9 years!✨Brandon and I will be celebrating 9 yea 9 years!✨Brandon and I will be celebrating 9 years of marriage this week. And how perfect we were invited to a wedding tonight walking distance from our home.🥰Sometimes reality is better than the movies and this weekend is one of those times. Enjoy, friends!☀️
What else do you use paper plates for besides eati What else do you use paper plates for besides eating?? Spray paint onto a paper plate and dab a small paint brush to do spot touch ups! Life hack when you’re working on a project but don’t need to paint the whole surface!👏🏻
.
.
#lifehack #diyhacks #spraypainting #painttips #paintprep #paintpro #shutters #craftsman #1940style
Didn’t mean for this to be #ASMR but here we are Didn’t mean for this to be #ASMR but here we are!🤷🏼‍♀️ I bought this orchid 15 months ago to use the flowers in our hair for my sister’s wedding. I’ve already repotted it once and it’s bloomed 3-4 times! Time to do it again with a pretty new pot that matches our new kitchen cabinets!🤩
.
.
Steps to repot an orchid:
1-large pot without drainage holes
2-plastic pot slightly smaller with holes
3-trim if needed so plastic pot is at or below outside pot
4-add layer of orchid specific potting mix (it looks like bark!)
5-add orchid, fill in around roots with more bark- don’t forget to add some mix under the leaves!
6-to water, soak bark and fill up outside pot, rinse the leaves too!
7-let sit for 5-10 minutes, then drain and dry the outside of your pot.
8-set in place and enjoy!🌷
New laundry, who dis? Our laundry room was a BLANK New laundry, who dis? Our laundry room was a BLANK slate after the kitchen renovation left it reconfigured too. So Dad and I tackled simple projects that make this space functional and of course visually pleasing too!👏🏻The full project airs this weekend on @todayshomeowner!
.
.
I love that the cabinets and hardware match what we have in the kitchen since the spaces are right next to each other! Synergy!
.
.
What do you love about your laundry room?
Load More... Follow on Instagram

Indoor Projects Outdoor Projects Craft Projects
Facebook Pagelike Widget
  • Contact
  • FAQs
  • Advertise with Chelsea
  • Media
  • Today’s Homeowner

Search This Site

Receive Free Updates Via Email

Copyright © 2023 Checking in With Chelsea • All Rights Reserved