Checking In With Chelsea

DIY ideas, crafts, and tips for your home

subscribe and never miss a thing!

Receive Free Email Updates

  • About
  • Videos
  • Projects
    • Indoor Projects
    • Outdoor Projects
    • Craft Projects
  • House Tour

How to Build Simple Rack for Dress Up Clothes

November 1, 2020 By Chelsea Lipford Wolf 2 Comments

Video Playback Not Supported

Watch this video for directions on building a simple, yet attractive, rack for your kids’ dress up clothes and costumes!
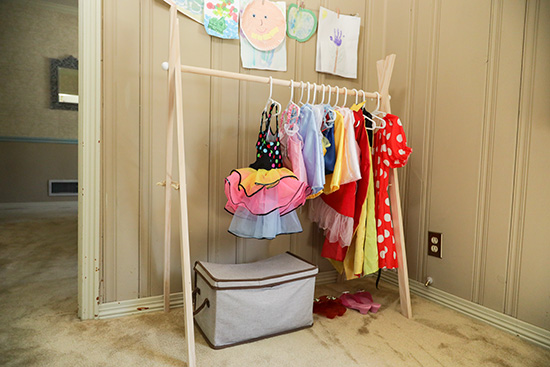
Completed Rack for Dress up Clothes and Costumes

Simple Rack Tools and Materials

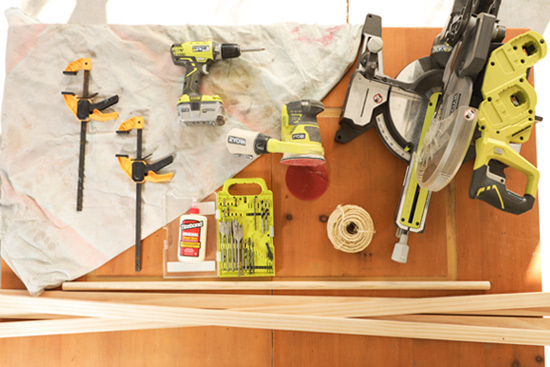
Tools and Materials to Build Clothes Rack

  • (2) 1x2x8′ pine*
  • 3/4″ wood dowel*
  • Titebond Original Wood Glue*
  • 1/4″ sisal rope*
  • drill and bits
  • miter saw*
  • clamps*
  • sander* and/or sandpaper

Cut and Sand

The first step is to cut an angle on what will be the bottom of each leg. Rotate your miter saw to 15˚ and cut 2 pieces. Then measure up 40 inches and cut another 15˚ cut parallel to the first.
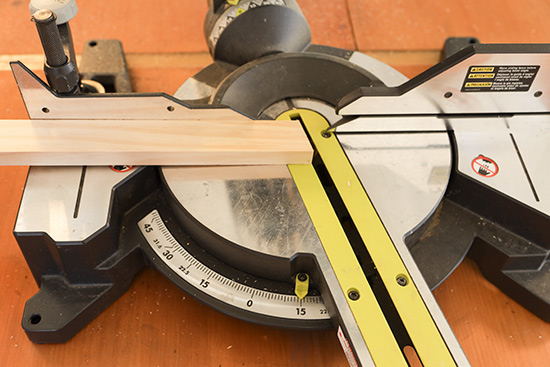
Cutting 15 Degree Angle on Miter Saw

At this point you will have 2 legs and 2 pieces of leftover 1×2. Follow the same steps above to cut the 15˚ on each end and make them the same length as the 40″ legs already cut.

Now you have 4 legs for your rack for dress up clothes. To get the hanging rod ready, turn your saw back to 0 and cut your dowel to your desired length. I went with 38″.

Before assembling, sand all of your cut pieces (5 total) with 220-grit sandpaper, either by hand or with a powered sander.
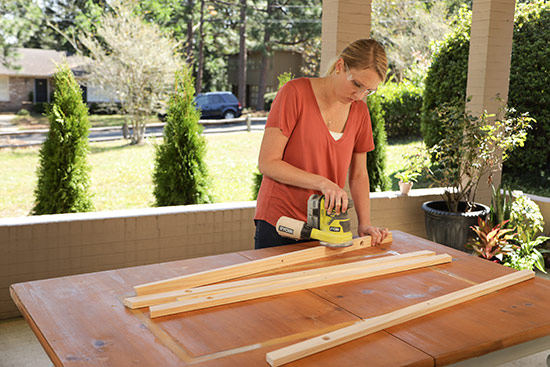
Orbital Sander with 220-Grit Sandpaper

This is essential whether you’re leaving it natural like I did or if you’re painting or staining.

Drill Holes for Assembly

To create a hole for the dowel to nest inside, I used a 7/8″ drill bit and drilled all the way through all 4 leg pieces. And to be productive, I drilled through 2 at a time.
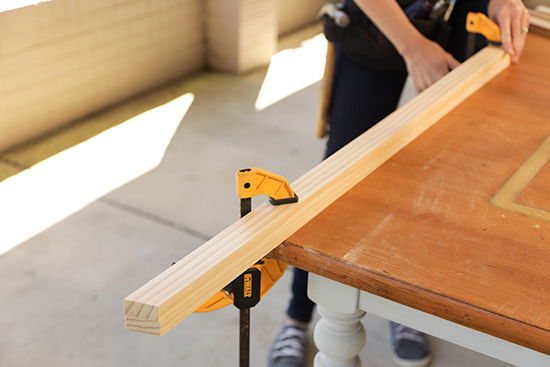
Clamping 1x2s to Table to Work Faster

Line them up and clamp to your work table. Measure and mark where your dowel will be, mine was about 8 inches from the top.
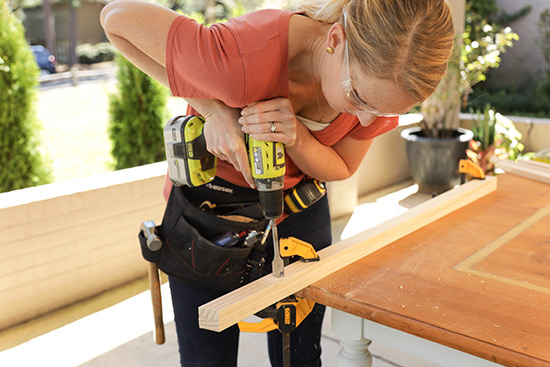
Pressure on Drill Paddle Bit

Drill the holes. Then repeat for the other 2 leg pieces.

Dowel Holes Drilled on 1x2 Legs for Clothes Rack

While we’re drilling holes, drill a small hole using a 3/8″ drill bit about 20 inches from the bottom in all 4 legs.

Now we’re ready to put it all together!

Glue and Clamp

Since I didn’t want to stain or paint my rack for dress up clothes, I didn’t have any way to conceal or hide any fasteners. So I built it without any!

But I don’t have to worry about it falling apart because I used plenty of wood glue.

*This project is sponsored by Titebond. I love working with partners that I already love and use! All opinions are 100% my own.*
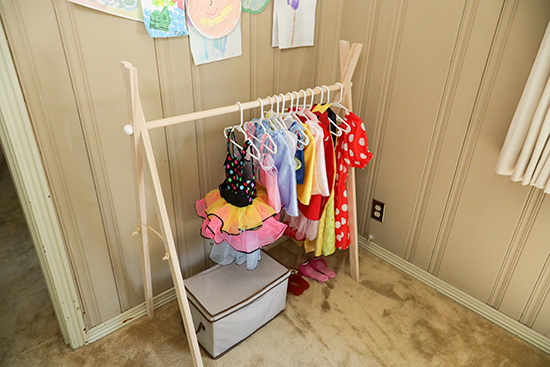
Dress Up Costume Clothes Rack for Kids

Watch the video above to see the glue in action. Apply it around the dowel hole on one leg piece and then set a second piece on top. Make sure the angles on each end are going in the correct direction so that they will sit straight and flush on the ground when finished. Also check that the dowel holes are lined up. Before clamping them together, use your tape measure to measure from the outside of the each leg at the bottom. The outside measurement should be 19″ for the angle cuts to work right.

Repeat for the other set of legs. Apply a small about of wood glue around the end of the dowel and insert into the holes on the leg. Repeat on the other side.

Don’t worry about applying too much glue. There’s no such thing! Since this wood glue is water-clean up, all you need is a damp rag to wipe up the excess. But if you miss a spot, it’s also sand-able once it dries. Which is ideal if you’re staining your rack for dress up clothes-it won’t change the color of your stain in the spots with glue.

Finishing Touches

While it’s drying you can cut and tie small pieces of rope to the lower holes in the legs. This keeps the rack’s legs from being spread too far and collapsing. It also adds a little character to the whole rack.
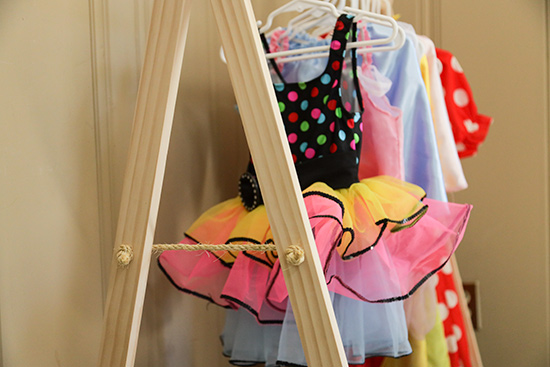
Rope Accent on Clothes Rack

I used Titebond’s multi-surface glue, Quick & Thick, to attach a 1″ craft foam ball to the outside of my dowel holes. It covers the ends of the dowels and again adds a little character and charm to the rack.
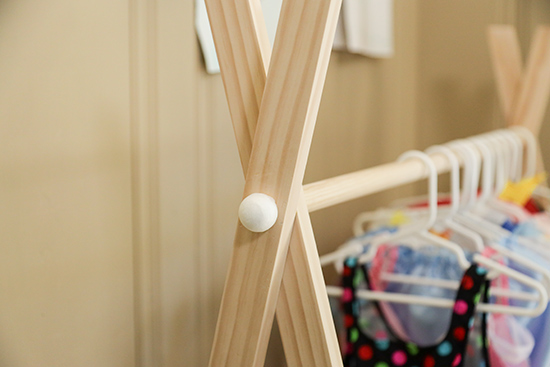
White Foam Ball Used to Cover End of Dowel

My Mossy Initial Decor and Leaning Lighted Mirror were also built using this glue!

Once the glue has had a few hours to dry, you can unclamp it and hang up those cute dress-up clothes!
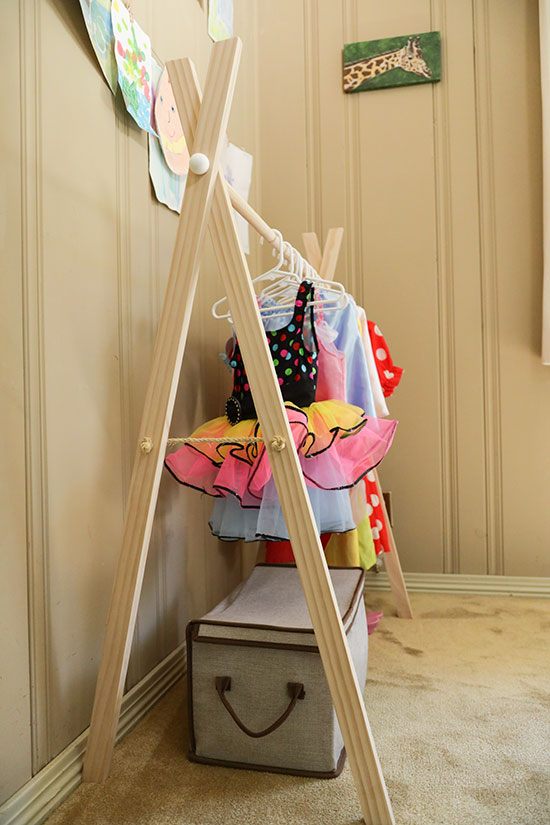
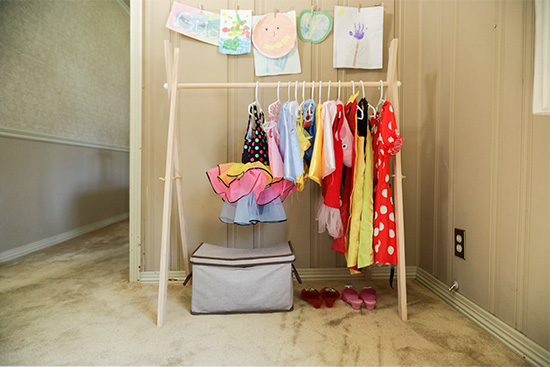
Details on DIY Rack for Dress Up Clothes

Clothes Rack for Dress Up and Costumes in Kid Playroom

Thanks for Checking In! ~Chelsea

*This post may contain affiliate links.*

Subscribe for Free Updates!

Stay up-to-date on Chelsea's latest projects, tips, useful resources and more.

Previous Post
Quick New House Video Tour
Next Post
DIY Concrete Christmas Tree Stand

Related Content

Brick Retaining Wall How to Waterproof and PaintWaterproofing Vertical Masonry WallSitting on Back Steps After Finally Sealing BricksStripping Paint from BricksSimple Board and Batten Fireplace UpdateDIY Double Batten Accent WallCompleted Wire Shelf Pantry UpgradeWire Shelf Pantry Makeover

Comments

  1. Brenda Wheeler says

    December 6, 2020 at 8:26 am

    Love the clothes rack idea. Could double as an indoor drying rack for things that can’t go in the dryer.

    Reply
    • Chelsea Lipford Wolf says

      December 14, 2020 at 1:32 pm

      Yes it could! Good idea! ~Chelsea

      Reply

Please Leave a Comment Cancel reply

Your email address will not be published. Required fields are marked *

Welcome!

I’m Chelsea. DIY
enthusiast who loves
sharing my victories
and mishaps!
Learn more
here.

CHECK IN WITH CHELSEA ON INSTAGRAM

Thank Heaven for little girls!💕The best part of Thank Heaven for little girls!💕The best part of having daughters is getting to dress them up in clothes from my baby hood.😍🥰Not sure where Clara got her dark hair but it’s a fun change to have a baby with actual hair this time around! Doesn’t she look like a little baby doll?!
.
.
#newbornlife #changingtable #babygirl #thankheavenforlittlegirls #mommasgirl #allpinkallthetime
Welcome home Baby Clara! We love you so much alrea Welcome home Baby Clara! We love you so much already!💕
.
.
#welcomehome #familyofsix #babygirl #happybirthday #3girls1boy
Monogrammed washcloths and clear hooks was an inex Monogrammed washcloths and clear hooks was an inexpensive fix to a constant headache in my kids’ bathroom!🤯 As with many organization projects, hanging it on a wall makes all of the ugly go away!👏🏻
What simple fixes have you done around your house lately?Washcloths used here➡️ https://amzn.to/3bd9Gpv
Clear hooks here➡️ goto.target.com/zaGZ5x
She’s a Brick. House. Who went through mighty mi She’s a Brick. House. Who went through mighty mighty changes to get here!👏🏻Peeling paint was our nemesis on this project, but we eliminated it with persistence and determination. 👊🏻
.
.
We took it a step further by waterproofing these bricks to PREVENT paint from peeling in the future. A fresh coat of matching house paint and it’s like it was always meant to be🥰
.
.
All the details are in my latest blog post which is linked in my profile now! I know it’s not a project on everyone’s list but save it if you have a painted brick house or retaining walls around!
.
.
#brickhouse #paintedbrick #bricksteps #homemaintenance #homerepair #diyrepair #diyhouse #diyhouseprojects #diypainting #ironhandrails #wroughtiron #wroughtironwork
Still pregnant over here🙃Just finished up these Still pregnant over here🙃Just finished up these concrete spheres and will have a video to share soon! I first discovered them visiting my sisters in Mountain Brook, AL. They seem to be used to keep people from parking in the yard along the street. But I think they are so neat just as yard decorations! What other purposes could they serve?
.
.
#rainymonday #39weekspregnant #yardwork #paintedbrick #exteriorrenovation #cedarshakes #cornerhouse #lawndecor #yarddesign #yarddecor #yarddecorations
For my 4th baby, clothes become nursery decor. Bud For my 4th baby, clothes become nursery decor. Budget-friendly and practical. But how stinking sweet?! Most of these my sisters and I wore as babes 30 years ago😳Still trying to figure out the origin of the sweet blue dress though.🤔
.
.
What have you reused or repurposed as wall decor in a nursery or other space? I just love personal touches like this!
Load More... Follow on Instagram

Indoor Projects Outdoor Projects Craft Projects
Facebook Pagelike Widget
  • Contact
  • FAQs
  • Advertise with Chelsea
  • Media
  • Today’s Homeowner

Search This Site

Receive Free Updates Via Email

Copyright © 2022 Checking in With Chelsea • All Rights Reserved