Checking In With Chelsea

DIY ideas, crafts, and tips for your home

subscribe and never miss a thing!

Receive Free Email Updates

  • About
  • Videos
  • Projects
    • Indoor Projects
    • Outdoor Projects
    • Craft Projects
  • House Tour
You are here: Home / Videos / How to Adjust and Replace Sprinkler Heads

How to Adjust and Replace Sprinkler Heads

April 5, 2022 By Chelsea Lipford Wolf Leave a Comment

Video Playback Not Supported

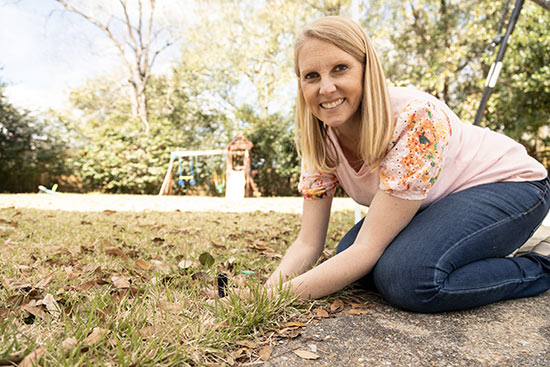
Repairing sprinklers in your yard can be an easy project you can do yourself in just a few minutes! Watch this video to see the steps to tackle to adjust or replace residential sprinkler heads.

What I Used

  • sprinkler head key*
  • rotary sprinkler*
  • pop-up adjustable spray nozzle*
  • WiFi Sprinkler Controller* (6 zones)

Adjust Rotary Sprinkler Pattern

A nice continuity I’ve discovered about sprinklers is all brands adjust mostly in the same manner. For a rotary sprinkler, that you’re likely to have for lawn areas, you’ll want to first adjust the fixed right side. Then adjust how far to the left it rotates with the sprinkler head key.

To do this, you’ll need to pry the center of the sprinkler out of the in-ground housing. Then manually turn the head to see where it stops on the right side. If it needs to be adjusted, grab the lower part of the sprinkler and turn it until the arrow on top is at the furthest point necessary.

Then (this is where the various brands will vary) you will use your sprinkler head key to increase (+) or decrease (-) the rotation. The sprinkler head will not rotate during adjustments. You will turn the hex end of the key a few times, depending on how much adjustment is needed. Then manually rotate the sprinkler head to check how far to the left it turns. Continue adjusting and checking until it stops where you want.

This is such an inexpensive and easy way to make sure your money stays in your yard and not on the street or driveway!

Replacing Pop-Up Sprinkler Heads

As if the paragraphs above don’t make this obvious, I love keeping my water just where I need it and not where I don’t. There are a few pop-up style sprinklers in our yard that are not adjustable. And so they are watering more than just the grass, aka the driveway!!

But for less than $3, you can untwist the old head and replace it with an adjustable one. So that’s what I did! You’ll need a flathead screwdriver to pry up the center of the sprinkler.

Pry Center Pop-Up Sprinkler Head to Replace

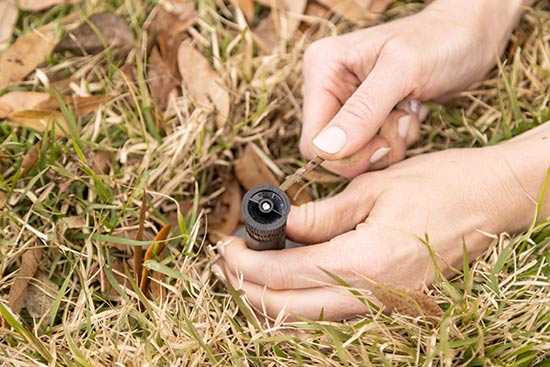
Hold tight with one hand while you unscrew the top with the other. Then twist on your new top. Because it’s adjustable, you’ll tighten it onto the sprinkler with the lower of the 2 rings. The upper ring is what you use to adjust the spray pattern.

For me, I went from a half, or 180 degree, sprinkler to a 0-360 fully adjustable head. Just like with the rotary sprinkler, you set the right side and then turn the upper ring to widen the spray pattern or confine it. I found it necessary to run my system for a minute or two while making the adjustments to get it just right.

Turn to Adjust Spray Pattern on Fixed Sprinkler Head

WiFi Your Life

I’ve also found our WiFi controller* to come in so handy for this type of adjustment! Instead of running back and forth to the controller which is installed in our basement/garage/store room area. I’m able to open the app on my phone and set whichever zone I’m working on for 2 or 3 minutes. Just long enough for me to evaluate and make any adjustments.

It doesn’t hurt that I can also turn on the sprinklers for the kids to run around in while I’m front-porch-sitting. I mean, it’s the little things in life that bring me joy.✨

Adjusting Sprinkler Heads to Save Water

Hopefully you can see how easy it is to quickly and cheaply adjust your sprinklers so that you’re only watering what you need. And maybe even watering less because of it which means you’re saving money along the way!

Thanks for Checking In! ~Chelsea

*This post contains affiliate links.*

Subscribe for Free Updates!

Stay up-to-date on Chelsea's latest projects, tips, useful resources and more.

Previous Post
Review of My Favorite Paint Sprayer!
Next Post
Turn a Planter into a Rain Barrel

Related Content

Brick Retaining Wall How to Waterproof and PaintWaterproofing Vertical Masonry WallSitting on Back Steps After Finally Sealing BricksStripping Paint from BricksSimple Board and Batten Fireplace UpdateDIY Double Batten Accent WallMinty Green Bathroom Vanity with White CountertopUpdating Our 1950s Bathroom with Style

Please Leave a Comment Cancel reply

Your email address will not be published. Required fields are marked *

Welcome!

I’m Chelsea. DIY
enthusiast who loves
sharing my victories
and mishaps!
Learn more
here.

CHECK IN WITH CHELSEA ON INSTAGRAM

Lookie! It’s a shelf for your bookies! 🤣Build Lookie! It’s a shelf for your bookies! 🤣Building a shelf unit custom for ANY space in your home is so simple and can be done over and over again to add much needed storage aka sanity! The kids were running all over the house at bedtime trying to find a book to read because we had them stashed in baskets and shelves in several different rooms. So I took advantage of this space in the hall next to a closet to create a central location for their books and some of mine too! Plus it adds a little character to an otherwise blah space!🙌🏻
.
.
A full how to video is on checkinginwithchelsea.com! Book nerds can be DIY nerds too!🤓
.
.
#booknerdsunite #diyskills #beginnerdiy #bookshelfie #halldecor #storagesolutions #storageideas #bookstorage #bookstorageideas
5 months in and she’s at the top of my favorites 5 months in and she’s at the top of my favorites list!🥰
.
.
Couldn’t resist using this audio.😅
Using my grandmother’s cookie press to make 🎄 Using my grandmother’s cookie press to make 🎄cookies I used to make as a kid in our brand new kitchen. My heart could burst!😭 I hope you are enjoying the preparation for the main event 😇and bring love and joy to your home, no matter what it looks like.❤️💚
.
.
#christmascookies #christmastrees #familytraditions #christmasbreak #newkitchen #kitchendecor #kitchendesign #madewithlove
3D art install in my girls’ girly bedroom!🦋😍Love this $13 pack of butterflies that comes with everything you need to fill a large wall! And it only takes 30 minutes!🙌🏻 Putting the link to the butterflies in my bio! (https://amzn.to/3VmfZsB)
.
.
First step is to layout the flow of your fluttering butterflies with the large and medium sizes from the pack, leaving room for the small ones. Then fill in spaces with the small size and pat yourself on the back! So easy!
The whole Wolfpack has been staying at my parents’ house on the river for the past week while our hardwood floors are being refinished. Since the kids had the whole week off of school it has really felt like a vacation! Complete with a sunny Sunday boat ride after Mass!🥰🚤☀️Enjoy the rest of your weekend! 😘
.
.
#generationalliving #3generations❤️ #4kidlife #grandparentlife #boatday #riverside #riverlifestyle #fowlriver #alabamalifestyle #alabamablogger #nofilterneeded
Dad and I got our tickets to the gun show!💥 . . Dad and I got our tickets to the gun show!💥
.
.
@todayshomeowner @visitmobileal #exploreyourhometown #hometownpride #mobilealabama #battleship #ussalabama #visitmobile
Load More... Follow on Instagram

Indoor Projects Outdoor Projects Craft Projects
Facebook Pagelike Widget
  • Contact
  • FAQs
  • Advertise with Chelsea
  • Media
  • Today’s Homeowner

Search This Site

Receive Free Updates Via Email

Copyright © 2023 Checking in With Chelsea • All Rights Reserved