Checking In With Chelsea

DIY ideas, crafts, and tips for your home

subscribe and never miss a thing!

Receive Free Email Updates

  • About
  • Videos
  • Projects
    • Indoor Projects
    • Outdoor Projects
    • Craft Projects
  • House Tour

Easy DIY Walkway with Gravel

September 1, 2020 By Chelsea Lipford Wolf 6 Comments

Video Playback Not Supported

How to Create an Inexpensive Gravel Pathway

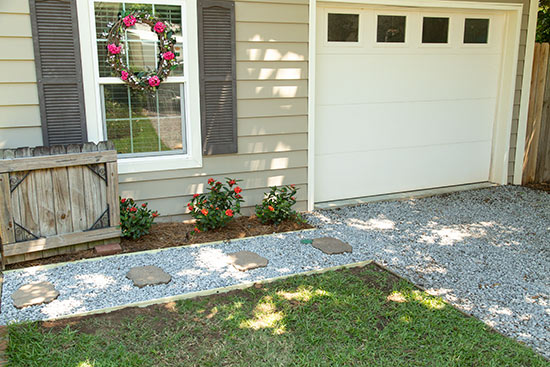
Gravel is an inexpensive material to use in your driveway or yard for a walkway. Follow these steps to create a low-maintenance gravel pathway using 1x4s and landscape fabric.
DIY Easy and Inexpensive Gravel Walkway Sidewalk

Materials

This easy DIY walkway was made even easier for me since I had everything but the 1x4s on hand already! But even if you have to purchase most of the materials, it’s relatively inexpensive. *Affiliate links are used below. I receive a small commission without increasing the cost for you.*

  • gravel*(similar)
  • landscape fabric*
  • pressure-treated 1″x4″x10′*
  • exterior screws*
  • shovel*
  • stepping stones*(similar)
  • reciprocating saw*
  • edger/trencher*

Layout Walkway

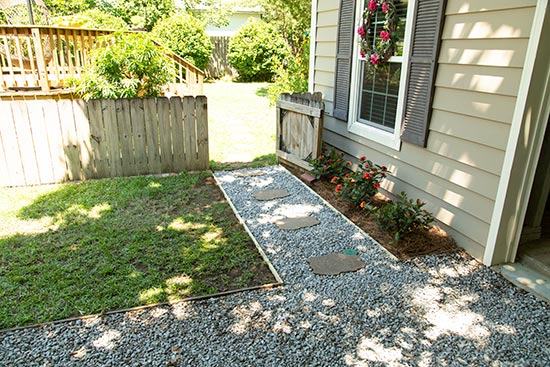
The first step in any project is to lay it out, right? Since my somewhat-already-established walkway is bordered by a flower bed on one side and the small gate on another, I’m going to replicate those borders for the other 2 sides.

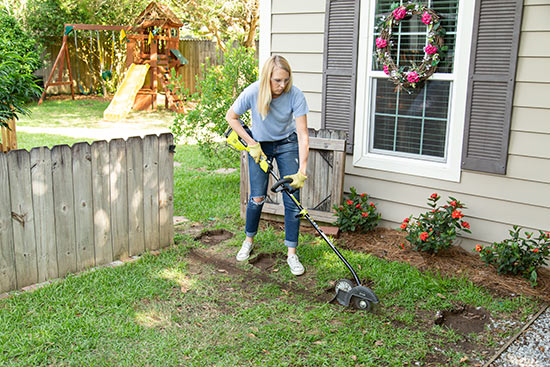
I used my edger to mark the long sides of my new gravel pathway before I began removing the sod and layer of dirt with a flat shovel. The 1x4s that will border the easy DIY walkway will need to be recessed a bit, so digging with an edger I already had on hand made it a bit easier!
Edging Trencher to Mark Edges of Walkway

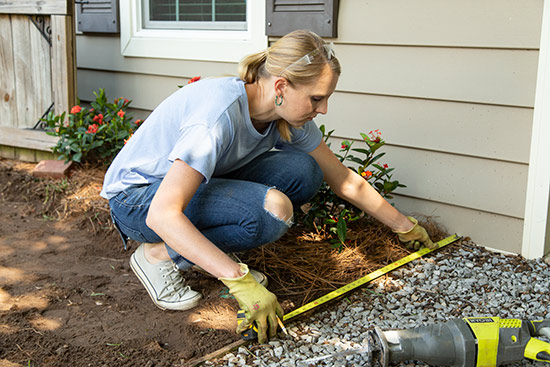
My walkway will flow off our existing gravel driveway, so I’m removing a section of the 1×4 there to re-use on the opposite side under the gate. To do that, I measure off the garage to both sides of my gate opening. Then I transfer those measurements to the 1×4 at the driveway.
Measuring Off Garage for Edge of Walkway

Using a reciprocating saw for this was an easy DIY. But a jigsaw or even a wood chisel would work too. Whatever you’ve got on hand will work!
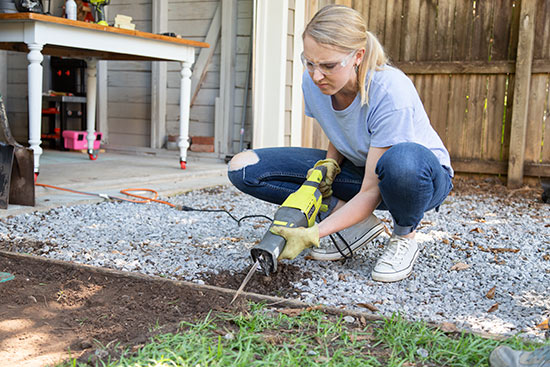
Cutting 1x4 at Driveway with Reciprocating Saw

Create Border

Now that the walkway is laid out, we need a border to keep the gravel in place. This was my only expense for this project, (2) 10 foot 1x4s. I cut them to length for the long sides. Then I had a little leftover I was able to cut into stakes with 45 degree angles.
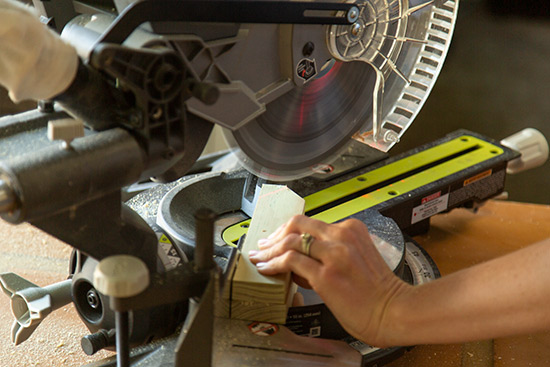
Cutting 45 Degree Angles for Stakes on a Miter Saw

Put your 1x4s up on end in place, then drive the stakes against them into the ground. Hammer the stake below the 1×4 so the gravel will cover it up later.
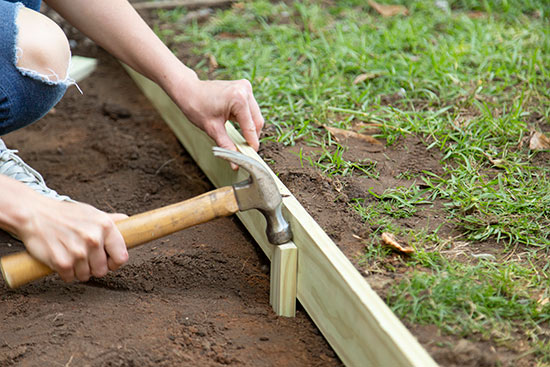
Hammering Stake Below Grade of 1x4 Border

Attach the stakes to the 1×4 border with 1-1/2″ or 1-5/8″ exterior coated screws. I had 3 stakes on the long ends and 1 stake on short border under the gate. It was also attached to the edge of the long ends to keep it upright and in the right place.
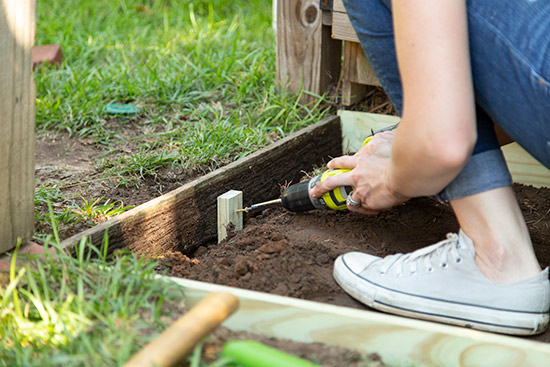
Attaching Stake to Border 1x4 with Exterior Screws

Make It Low-Maintenance

Something we did when we created our gravel driveway was add landscape fabric before adding the stones. It has stayed relatively low-maintenance over the past 8 years, so I’m not going to skip that step this time!

You can watch the full episode of my home’s exterior makeover here. The driveway is at the 10:25 mark.

Just use regular household scissors to cut it to length and lay it down in the walkway area.
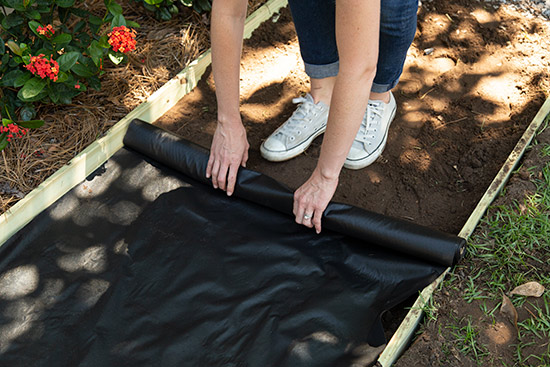
Rolling Out Landscape Fabric on Top of Dirt in Walkway

I mentioned re-using the paver stepping stones earlier. This is where they come back into play. If you don’t already have some on hand, it might be a fun option to pick up a few. I love the variation and color they add to the gravel.

Space them evenly throughout the length of the walkway and center them too! Carefully placing them will also help keep the fabric in place for the final step!

Stepping Stones in Place on Top of Landscape Fabric

Add Gravel

What makes this an easy DIY walkway is that you don’t need heavy machinery or big tools. Just a shovel to scoop the gravel into place! Now I used gravel from the thicker parts of our driveway since this is a small area to fill and we didn’t even miss it!
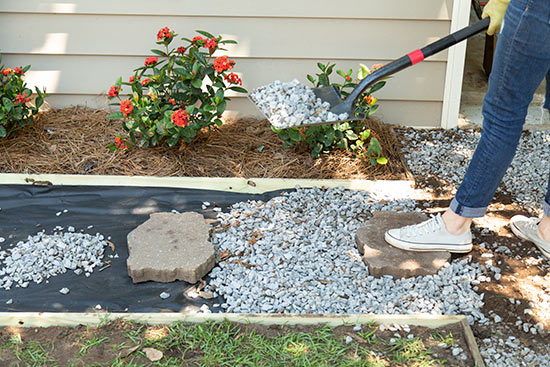
Shoveling Rocks from Driveway into New Pathway Walkway

But if you don’t have extra gravel around your yard, it comes in bags at the home improvement store. So just check out the chart on the bag and buy the number of bags you need to fill your area. Then slit the bags and pour into place! It doesn’t need to be very deep, so you won’t need as many rocks as you would think!
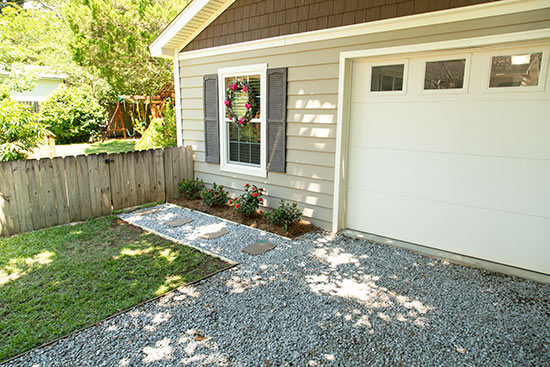
Completed Gravel and Stepping Stones Pathway

You could also use smooth rocks or pea gravel for a different look!
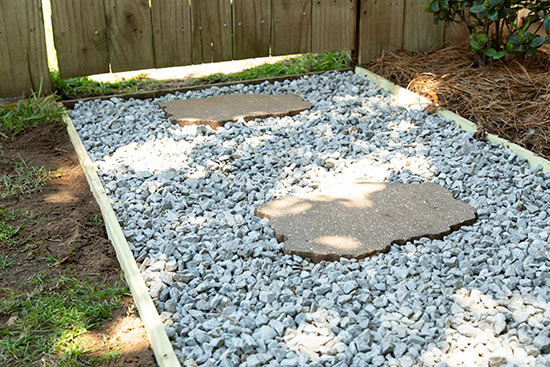
Stepping Stones and Gravel Create Inexpensive Low Maintenance Walkway

Be sure to check out my tutorial for building gates for our deck. You can use the same steps to create a regular ole gate like the one by our new gravel pathway.

Before:
Stepping Stone Pathway from Driveway to Gate
After:
Gravel Walkway Ties Driveway Into Backyard
Ahh! Much better!

Thanks for Checking In! ~Chelsea

*This post contains affiliate links.*

Subscribe for Free Updates!

Stay up-to-date on Chelsea's latest projects, tips, useful resources and more.

Previous Post
How to Install Butcher Block Counters On Your Own
Next Post
Quick New House Video Tour

Related Content

Brick Retaining Wall How to Waterproof and PaintWaterproofing Vertical Masonry WallSitting on Back Steps After Finally Sealing BricksStripping Paint from BricksSimple Board and Batten Fireplace UpdateDIY Double Batten Accent WallCompleted Wire Shelf Pantry UpgradeWire Shelf Pantry Makeover

Comments

  1. Caryl Stillings says

    September 1, 2020 at 7:34 pm

    When she laughs, I laugh ♥️🤣!

    Reply
  2. Jean Major says

    April 15, 2021 at 5:06 pm

    This is what I thought of doing, but I didn’t know if rocks as small as gravel would work, now I see that it will work. Thank you

    Reply
    • Chelsea Lipford Wolf says

      April 20, 2021 at 8:51 am

      Yep it’ll look great! ~Chelsea

      Reply
  3. Mike Robinson says

    April 29, 2021 at 11:49 pm

    How long can you expect the landscape fabric to last before it rots and allows weeds/grass to start growing?

    Reply
    • Chelsea Lipford Wolf says

      April 30, 2021 at 11:48 am

      We did not notice any rotting in our driveway where we had it for over 9 years before we moved. ~Chelsea

      Reply
      • Mike Robinson says

        May 1, 2021 at 12:00 am

        Thanks for getting back to me. I’ve had a project I’ve been meaning to do for many years but the thought of the fabric wearing out in a few years and having grass or weeds grow up through it and the gravel put me off from doing it. I just threw pavers down and every few years, I have to dig them up because they slowly sink into the ground. Now the time has come that I have to redo my front porch and I’m changing the size of it and how you enter the porch so the original project is on hold. When done with the porch, I hope to do a concrete walkway. Thanks again.

        Reply

Please Leave a Comment Cancel reply

Your email address will not be published. Required fields are marked *

Welcome!

I’m Chelsea. DIY
enthusiast who loves
sharing my victories
and mishaps!
Learn more
here.

CHECK IN WITH CHELSEA ON INSTAGRAM

Thank Heaven for little girls!💕The best part of Thank Heaven for little girls!💕The best part of having daughters is getting to dress them up in clothes from my baby hood.😍🥰Not sure where Clara got her dark hair but it’s a fun change to have a baby with actual hair this time around! Doesn’t she look like a little baby doll?!
.
.
#newbornlife #changingtable #babygirl #thankheavenforlittlegirls #mommasgirl #allpinkallthetime
Welcome home Baby Clara! We love you so much alrea Welcome home Baby Clara! We love you so much already!💕
.
.
#welcomehome #familyofsix #babygirl #happybirthday #3girls1boy
Monogrammed washcloths and clear hooks was an inex Monogrammed washcloths and clear hooks was an inexpensive fix to a constant headache in my kids’ bathroom!🤯 As with many organization projects, hanging it on a wall makes all of the ugly go away!👏🏻
What simple fixes have you done around your house lately?Washcloths used here➡️ https://amzn.to/3bd9Gpv
Clear hooks here➡️ goto.target.com/zaGZ5x
She’s a Brick. House. Who went through mighty mi She’s a Brick. House. Who went through mighty mighty changes to get here!👏🏻Peeling paint was our nemesis on this project, but we eliminated it with persistence and determination. 👊🏻
.
.
We took it a step further by waterproofing these bricks to PREVENT paint from peeling in the future. A fresh coat of matching house paint and it’s like it was always meant to be🥰
.
.
All the details are in my latest blog post which is linked in my profile now! I know it’s not a project on everyone’s list but save it if you have a painted brick house or retaining walls around!
.
.
#brickhouse #paintedbrick #bricksteps #homemaintenance #homerepair #diyrepair #diyhouse #diyhouseprojects #diypainting #ironhandrails #wroughtiron #wroughtironwork
Still pregnant over here🙃Just finished up these Still pregnant over here🙃Just finished up these concrete spheres and will have a video to share soon! I first discovered them visiting my sisters in Mountain Brook, AL. They seem to be used to keep people from parking in the yard along the street. But I think they are so neat just as yard decorations! What other purposes could they serve?
.
.
#rainymonday #39weekspregnant #yardwork #paintedbrick #exteriorrenovation #cedarshakes #cornerhouse #lawndecor #yarddesign #yarddecor #yarddecorations
For my 4th baby, clothes become nursery decor. Bud For my 4th baby, clothes become nursery decor. Budget-friendly and practical. But how stinking sweet?! Most of these my sisters and I wore as babes 30 years ago😳Still trying to figure out the origin of the sweet blue dress though.🤔
.
.
What have you reused or repurposed as wall decor in a nursery or other space? I just love personal touches like this!
Load More... Follow on Instagram

Indoor Projects Outdoor Projects Craft Projects
Facebook Pagelike Widget
  • Contact
  • FAQs
  • Advertise with Chelsea
  • Media
  • Today’s Homeowner

Search This Site

Receive Free Updates Via Email

Copyright © 2022 Checking in With Chelsea • All Rights Reserved