HAPPY NEW YEAR! Not only is it a new year, but it’s a new month. So I have a new project video for you!
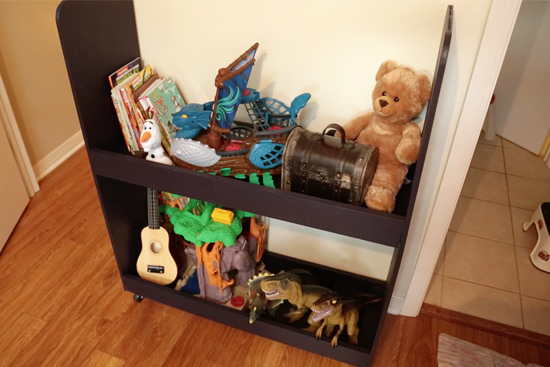
Since organization and storage always seem to be the rage at the start of a new year, I thought I’d join in with a storage cart for toys and books! It’s a simple design requiring minimal tools, so I’d say it’s an easy to moderate DIY build.
To start, here are the materials we used:
- plywood
- (2) 6 ft 1x4s
- tape measure
- jigsaw
- circular or miter saw
- speed square
- sander and sandpaper
- drill/driver
- pocket hole jig
- clamp
- wood screws
- wood glue
- paint and paint brush
- (4) casters
To avoid having to borrow a table saw, we had our plywood ripped to size at the home center when we were picking up our materials. The sides are 12″ wide by 42″ tall. The shelf boards are 10-1/2″ wide by 36″ long. Obviously feel free to reduce the sizes to better fit in your available space!
We used our quart-sized paint can to trace rounded edges on the tops of the 42″ side pieces. They were cut out (slowly) with a jigsaw.
Our next step was to cut the 1x4s to length. They’ll become the sides, or edges, of the shelves so they should be the same length, 36″. So basically cut your 6 foot 1x4s in half. And don’t forget to bias your center mark to account for the width of the saw blade.
With all of our cuts made, we sanded everything, especially the cut ends, with a palm sander. You can use anywhere from 120 to 220 grit sandpaper. If your jigsaw cuts are extra rough, start with 80-grit and followup with 220 to give it a smooth finish before painting.
After I borrowed a pocket hole jig to build a laundry sorter, I went out and bought a similar one for myself. And this was my first project to use it on. What it does is gives you the proper angle to drill a hole so that when you attach screws, the heads of the screws are mostly hidden out of sight. It just makes it look cleaner and polished when your piece is complete!

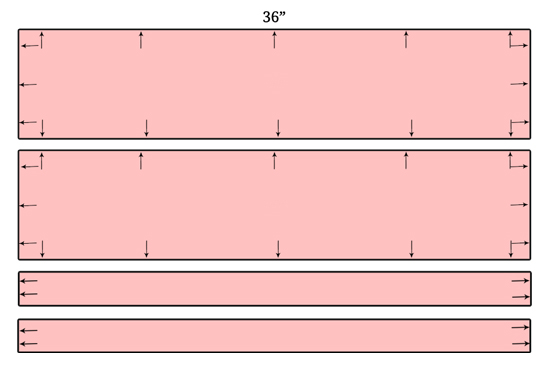
You’ll drill pocket holes on the bottom of both shelf boards and the inside of the shelf sides. The arrows in the diagram below indicate approximately where you should drill holes. (Definitely watch the video above for a closer look at the pocket hole jig in use if you’ve never used one before!)
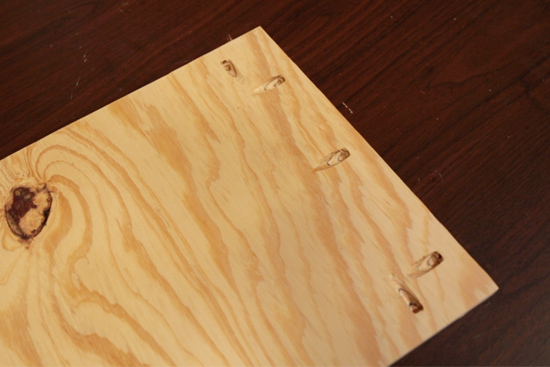
Ahh the sight of fresh pocket holes!
Once all of your holes are drilled using the fancy bit that comes with the jig, it’s time to start attaching everything! We used short wood screws to attach the edges of the shelves to the shelves themselves. You’ll want the bottom of the shelf (the side with the pocket holes) to be flush with the bottom of the edge piece, making sure the pocket holes on the edge piece are facing inside toward the shelf. Use the pocket holes on the long sides of the shelf to attach them together.
After you’ve got 2 edges pieces on each shelf, measure how high up you want the top shelf to be and mark on both side walls. Then use the 3 pocket holes on the short side of the shelf board and the 4 on each shelf side edge to attach the top shelf to the side walls of the overall cart.
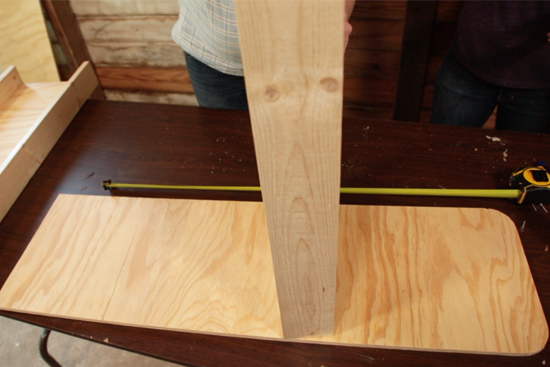
We flushed up our bottom shelf with the bottom of the side panels to attach it the same way as the top shelf. (If you buy the same jig I have, you’ll also need a long driver bit. The next step up on pocket hole jig kits comes with one, but since I already had a long bit, I opted for the cheaper, simpler jig.)
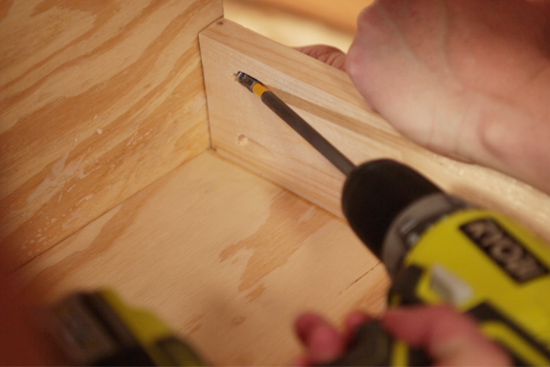
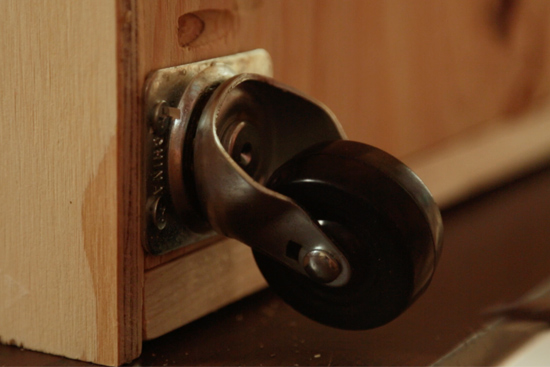
With all of those many screws now in place, we turned the cart on its side so we could attach our industrial-style casters in each corner. We placed them about a half inch from the corner so that they were only on the plywood shelf, not being attached to the side panels of the cart.
Lastly, we turned the cart upright and gave it 2 good coats of paint. (We used paint I had leftover from when my husband and I made a bench for the foot of our bed.) After it dried thoroughly, Lindsay’s son, Holden, got to test its strength and durability while he loaded it up with his books and toys! Of course, he had to roll it around some too!
What kind of storage solutions are you incorporating into your house this year? What have you used in the past that seems to work? Share in the comments below because I’m sure we could all use a little help! Pretty soon, I’ll be building a toy cart for Mary Helen’s toys and things. They are taking over the whole house!!
Thanks for Checking In! ~Chelsea


Cute project, Chelsea! And what parent doesn’t need more storage for kid-items??? I like that you added casters – mobility is important so you can roll the cart along to collect items at the end of the day (because you know they end up ALL OVER THE HOUSE!)
WOW