Checking In With Chelsea

DIY ideas, crafts, and tips for your home

subscribe and never miss a thing!

Receive Free Email Updates

  • About
  • Videos
  • Projects
    • Indoor Projects
    • Outdoor Projects
    • Craft Projects
  • House Tour
You are here: Home / Outdoor Projects / Stripping Sealer from Concrete

Stripping Sealer from Concrete

January 4, 2017 By Chelsea Lipford Wolf 7 Comments

The rug I painted on my garage floor is still going strong! (If you haven’t watched the how-to video yet, what are you waiting on?) But one thing I left out of the video was how I messed up the first time I applied the sealer to the floor.
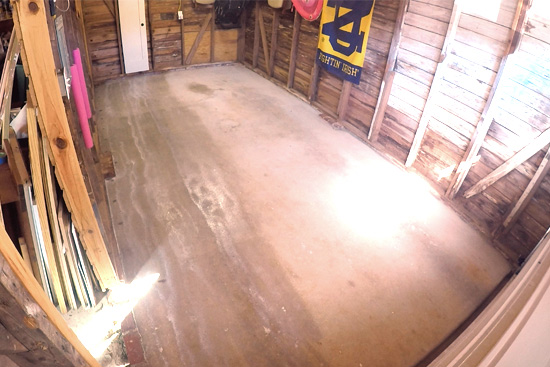
Sealing Concrete Garage Floor with Thompson's Water Seal Multisurface Waterproofer

The mistake I made was a total rookie move. I simply applied it too thick. You would think, oh let me coat it really good so I don’t miss any spots. But what happens is that it doesn’t cure, or dry, very well. And it ends up tacky and streaky.

Exhibit A:
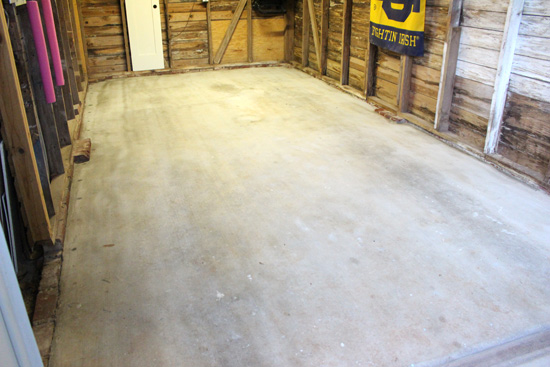
Garage Floor After Waterproofer Dried

I couldn’t very well leave it like that before moving on and painting my rug. So I did a little research and found a fairly easy way to essentially strip the sealer from the concrete.

Streaks on Concrete After Applying Sealer

Even though the worst of the streaks was on the left side, where I started applying the sealer, I figured I should just do the whole floor and keep it even.

The method I decided to go with involves laying a towel/sheet/drop cloth over the trouble spot and soaking it in a solvent. So instead of using up towels from the house or my lovely paint drop cloths, I picked up some single flat sheets from Walmart.
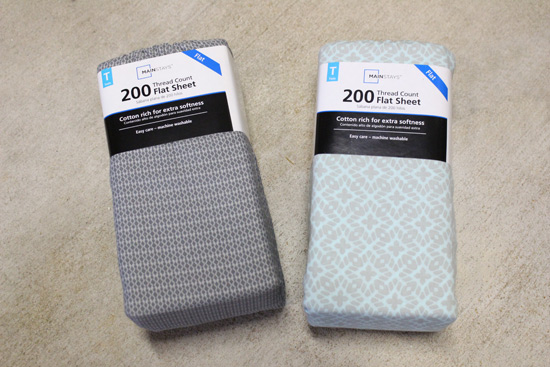
Flat Sheets Used as Drop Cloths

These are twin-sized and were about $5 each. Together they covered half of the garage. Not bad for such a large ‘drop cloth’!

The solvent I used was Xylene*. I picked up a couple gallons from the paint department.

Gallon of Xylene for Stripping Concrete Sealer

I laid out the sheets over the floor, trying to smooth out as many folds and gathers in the sheets to keep it as flat to the ground as possible. Then I had to get my husband to help me pour the Xylene over both sheets until they were fully saturated. A pregnant lady doesn’t need to be inhaling those kinds of fumes!

We left it overnight for the sealer to be absorbed by the Xylene into the sheets. Then we picked them up and moved them to the other half of the garage and repeated the process.
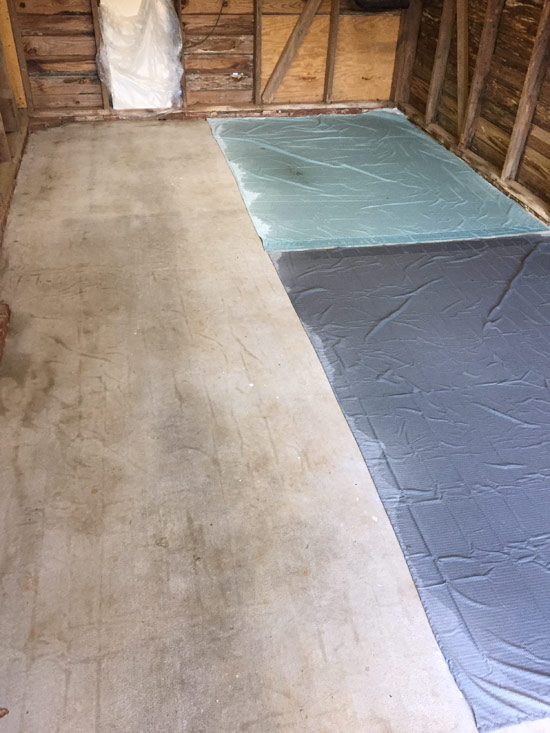
Sheets Soaked in Xylene on Garage Floor

You can see the wrinkles from the sheets were left behind on the left side until it had a chance to ‘breathe’ and evaporate after removing the sheets. It looked much better before I started the sealing process over.

So yes. Since I removed the sealer I did go back after a few days and reapply it (lightly this time!) before carrying on with the painting prep. I’m glad I took the time to make it right, though. If it had just been the streaks, I might have been able to overlook it. But since it was also sticky to the touch, I didn’t want that to interfere with the adhesion of my garage floor paint.

Whether you applied your sealer too thick or you want to remove it for other reasons, give this trick a try! I like that you pour it and forget about. No scrubbing involved like some sealer strippers!

Have you applied sealer too thick before? What did you do about it? Did you know you can also apply it too thick on a wood deck too? Thin and light is key! Comment below to share your experiences!

Thanks for Checking In! ~Chelsea

*This post may contain affiliate links.*

Subscribe for Free Updates!

Stay up-to-date on Chelsea's latest projects, tips, useful resources and more.

Previous Post
Upcycle: Potting Bench
Next Post
Chelsea’s Choice: Safe Bath Time

Related Content

Brick Retaining Wall How to Waterproof and PaintWaterproofing Vertical Masonry WallSitting on Back Steps After Finally Sealing BricksStripping Paint from BricksDining Room View from Living Room Ready to SellHow to Sell Your House Fast and CheapDenim Pants with Latex Paint on Them on Tile Floor with Rubbing Alcohol and Scrub BrushHow To Remove Latex Paint

Comments

  1. Pat Brown says

    June 21, 2017 at 6:58 pm

    I messed up concrete sealer and need to remove it. Your method sounds like the easy way to go. Once you put the sheets down and soak with xylene, do you let them dry? The sealer absorbs into the sheets? I need all the details! Thank you

    Reply
    • Chelsea Lipford Wolf says

      June 27, 2017 at 3:47 pm

      Yep, Pat! I left the sheet overnight so it could dry. The sealer gets pulled out of the concrete into the sheet by the xylene. Hope you get your concrete sealer fixed! ~Chelsea

      Reply
  2. Leo Simone says

    September 5, 2017 at 5:43 pm

    I would be very cautious about using xylene. I would use a respirator, goggles and would be certain that the area is well ventilated. Xylene may be carcinogenic.

    I found your site to have a lot of great ideas.

    Reply
  3. Jo says

    September 1, 2020 at 11:38 am

    How did you spread the xylene on the cloth?

    Reply
    • Chelsea Lipford Wolf says

      September 1, 2020 at 11:43 am

      Hi Jo! We just poured it over the sheets after they were laid out on the concrete! ~Chelsea

      Reply
  4. Jo Ann says

    September 10, 2020 at 8:57 am

    I have used your method on my uncovered outdoor patio using a double bed sheet with success. I still have some area yet to do. Can I use the same sheet, which has been used on both sides as I continue, or do I need a clean sheet. (I have discovered that sealer on outdoor concrete does not work well, with moisture eventually creeping in and harming the appearance)

    Reply
    • Chelsea Lipford Wolf says

      September 10, 2020 at 1:15 pm

      I think you’re fine to re-use them if you let them dry first! Your theory is interesting! Exact opposite of its purpose. Sorry the sealer didn’t work out for you! ~Chelsea

      Reply

Please Leave a Comment Cancel reply

Your email address will not be published. Required fields are marked *

Welcome!

I’m Chelsea. DIY
enthusiast who loves
sharing my victories
and mishaps!
Learn more
here.

CHECK IN WITH CHELSEA ON INSTAGRAM

Ask me how I know😑Whether you’re doing a smal Ask me how I know😑Whether you’re doing a small patch or a whole room, this drywall sanding hack will keep the dust at bay and keep the rest of your house looking good😎
.
.
#drywall #diyhack #tipsandtricks
A Spring Break to remember! Thanks to CeeCee and P A Spring Break to remember! Thanks to CeeCee and Pop Daddy for bringing the Wolfpack along on vacation! A long travel day ahead of us but it’s always worth it to spend time with family and get some r&r.☀️😴 Happy weekend!
9 years!✨Brandon and I will be celebrating 9 yea 9 years!✨Brandon and I will be celebrating 9 years of marriage this week. And how perfect we were invited to a wedding tonight walking distance from our home.🥰Sometimes reality is better than the movies and this weekend is one of those times. Enjoy, friends!☀️
What else do you use paper plates for besides eati What else do you use paper plates for besides eating?? Spray paint onto a paper plate and dab a small paint brush to do spot touch ups! Life hack when you’re working on a project but don’t need to paint the whole surface!👏🏻
.
.
#lifehack #diyhacks #spraypainting #painttips #paintprep #paintpro #shutters #craftsman #1940style
Didn’t mean for this to be #ASMR but here we are Didn’t mean for this to be #ASMR but here we are!🤷🏼‍♀️ I bought this orchid 15 months ago to use the flowers in our hair for my sister’s wedding. I’ve already repotted it once and it’s bloomed 3-4 times! Time to do it again with a pretty new pot that matches our new kitchen cabinets!🤩
.
.
Steps to repot an orchid:
1-large pot without drainage holes
2-plastic pot slightly smaller with holes
3-trim if needed so plastic pot is at or below outside pot
4-add layer of orchid specific potting mix (it looks like bark!)
5-add orchid, fill in around roots with more bark- don’t forget to add some mix under the leaves!
6-to water, soak bark and fill up outside pot, rinse the leaves too!
7-let sit for 5-10 minutes, then drain and dry the outside of your pot.
8-set in place and enjoy!🌷
New laundry, who dis? Our laundry room was a BLANK New laundry, who dis? Our laundry room was a BLANK slate after the kitchen renovation left it reconfigured too. So Dad and I tackled simple projects that make this space functional and of course visually pleasing too!👏🏻The full project airs this weekend on @todayshomeowner!
.
.
I love that the cabinets and hardware match what we have in the kitchen since the spaces are right next to each other! Synergy!
.
.
What do you love about your laundry room?
Load More... Follow on Instagram

Indoor Projects Outdoor Projects Craft Projects
Facebook Pagelike Widget
  • Contact
  • FAQs
  • Advertise with Chelsea
  • Media
  • Today’s Homeowner

Search This Site

Receive Free Updates Via Email

Copyright © 2023 Checking in With Chelsea • All Rights Reserved