Manly Metal Redo
We’ve had a sick bug going around our house this week. Ugh. So far the baby has been spared (and I hope that continues!), but apparently several of the parents with babies in the same daycare room have been sick as well. So I have not completed the projects I had planned to complete and share with you!
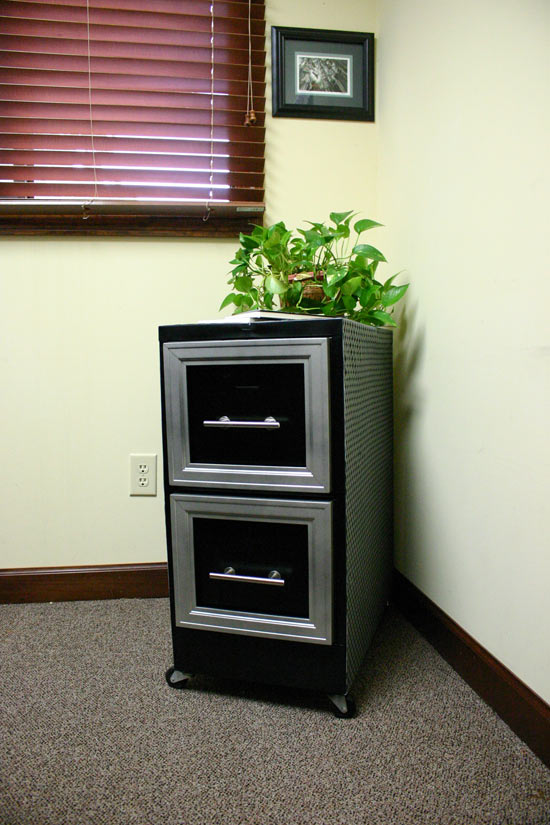
I did, however, complete another file cabinet makeover last week that I think you’ll like!
A male co-worker of mine at Today’s Homeowner saw my last file cabinet makeover that now resides in my office and wanted one for himself, albeit a bit more masculine.
And since we have a pile of old filing cabinets in a storage closet, I happily obliged.
It had a pretty rough former life as parts storage for my dad’s construction company. (After it served as an actual file cabinet.)
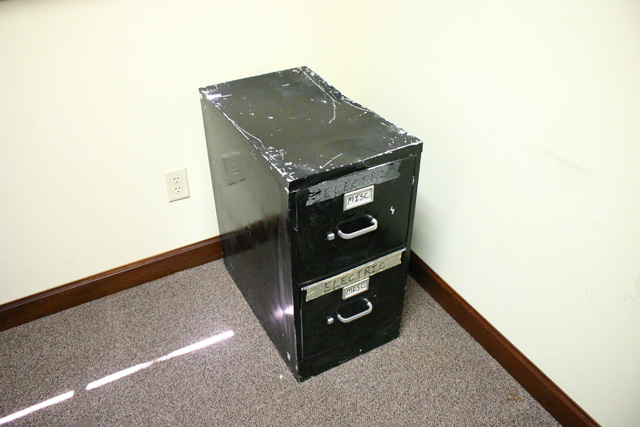
I’m guessing it was dropped a time or two based on the huge indentation on the side.

And then there’s the lovely tape labeling system…men… 🙂

My whole inspiration was diamond plate garage storage, like this:
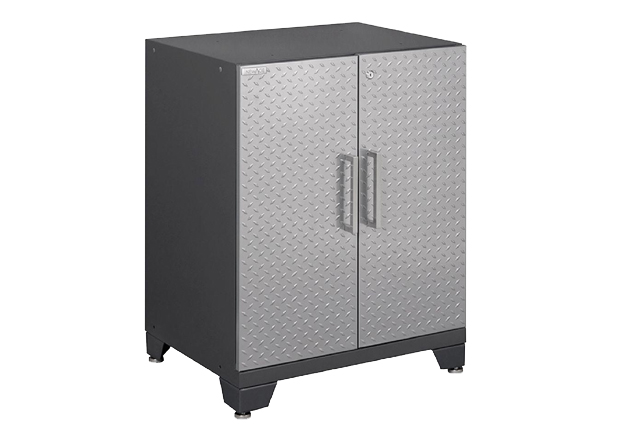
(image from HomeDepot.com)
I used many of the same steps to create his as I did mine. But I also changed up a few things I think will come in handy if you’re doing one of your own.
I started by removing all of the hardware on the drawers. Mike, my co-worker, did not need or want the label holders or the little tabs you slide to open the drawer. The drawers function just fine without them. And good thing because to remove them, you have to break them!

I also used a little Goo Gone to remove the old residue from the tape “labels”.
Then I measured the drawer fronts and bought picture frames (using a 50% off coupon at Michael’s!) with the closest measurements. Of course, you’ll want to measure the frame itself, not the size of the photo that can displayed in it.

Just like my previous cabinet, these will serve as trim to decorate the face of the drawers. To go with our diamond plate theme, we decided to spray them with a satin nickel metallic spray paint.

While that was drying, I worked on filling in the holes left from the label holders and the tab thingy on the drawers. First, I put painter’s tape on the inside to cover the holes.
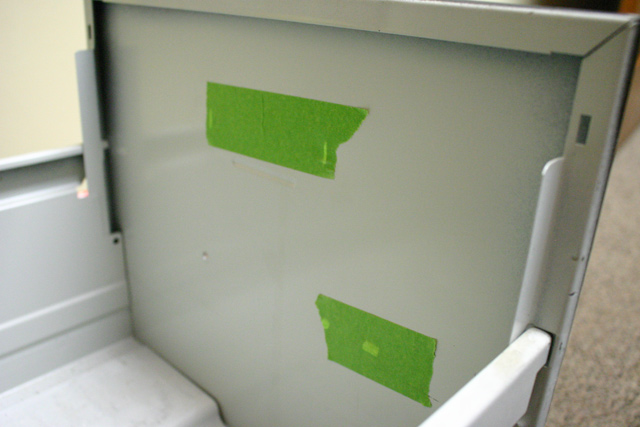
Then I mixed up some Bondo on a paper plate and smoothed it into the holes from the front.
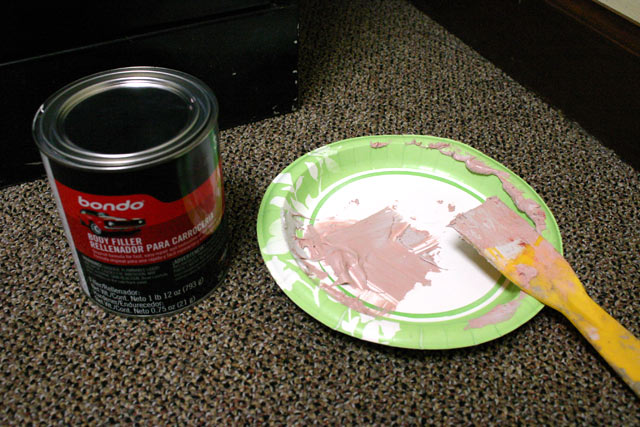
If you’ve never used Bondo or auto body filler, it’s great for filling in holes, especially in wood. There are two things you should know about using it. It smells awful. And you need to work FAST. It hardens quickly. So only mix up what you can apply in few minutes’ time.
After it hardened, I used 100-grit sandpaper to make sure it was level with the surrounding surface, and then followed up with 400 grit sandpaper to get it really smooth.
The handles on this particular filing cabinet, did not match any standard cabinet hardware. So in order to upgrade them, I drilled a new hole right next to an existing one so we could fit 96mm pulls.

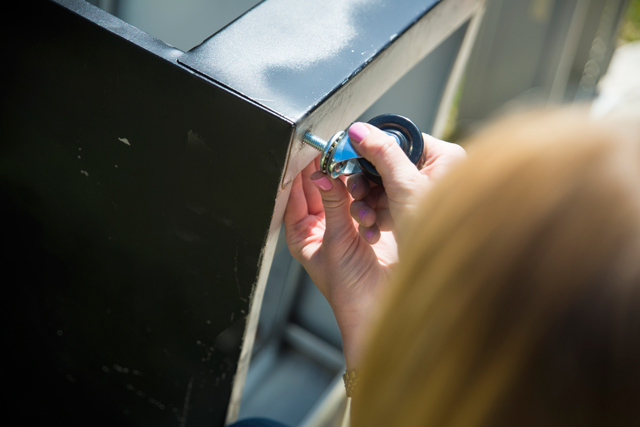
To further match the look of garage cabinets, we drilled holes on the bottom to add casters.
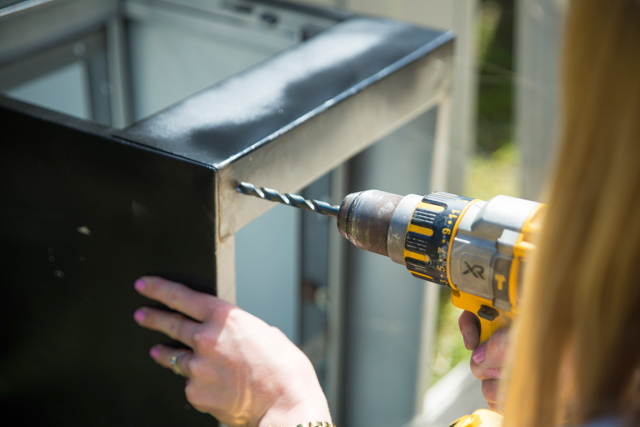
Get a drill bit a hair wider than the bolt on your casters. You’ll also need nuts that fit the bolt. Drill the holes you’ll need before spray painting
Drill the holes for new handles (if you need them) and for the casters before spray painting. One other thing we did before painting was beating out the indentation on the side as best we could using a hammer from the inside.
Then we used black satin spray paint to cover the front of the cabinet and just the front edge of the top and sides. They will largely be covered with fabric later on.
Speaking of fabric, while the paint dried, I hemmed one of the long edges of our fabric using no-sew hem tape and a clothes iron. (Check out the file cabinet I made over for my office for more information on this.)
When the paint was dry, I attached the 4 casters in each corner.
Then I pulled out some spray adhesive to attach the fabric.

This stuff you spray on then let it set up for a few minutes before making the bond. I attached the two sides and top, then wrapped it around the bottom edges and the back like a present.
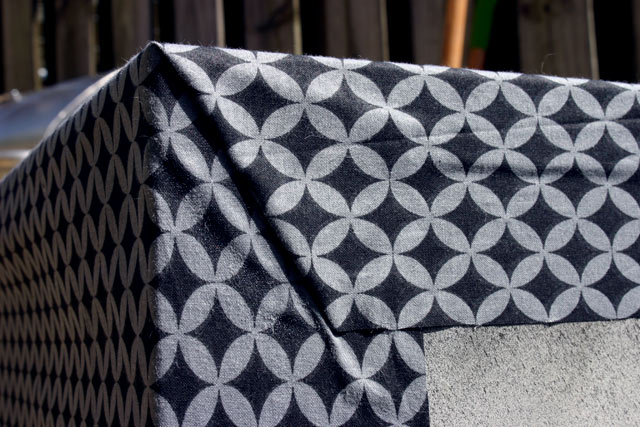
It gave it a much cleaner line AND it was less hassle than having to hem all four sides of the fabric before attaching it.
To finish up the drawers, I attached our new hardware with some washers to cover up the old hole and add to our “garage” feel.

I also used some adhesive we had around the shop to attach the frames.

Our offices aren’t the prettiest background for such an awesome transformation, but maybe our sweet new/old file cabinets will improve on that.
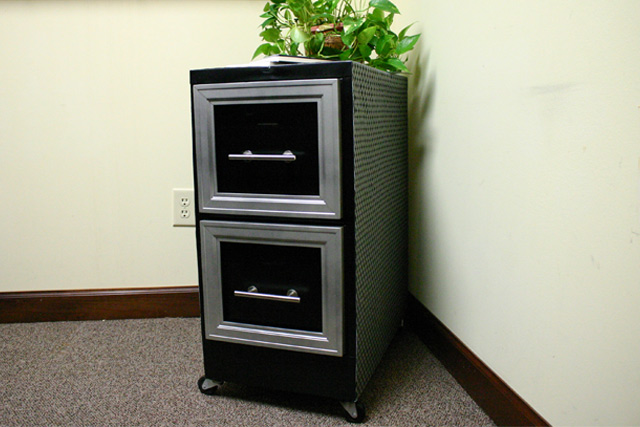
And that’s my manly file cabinet redo.
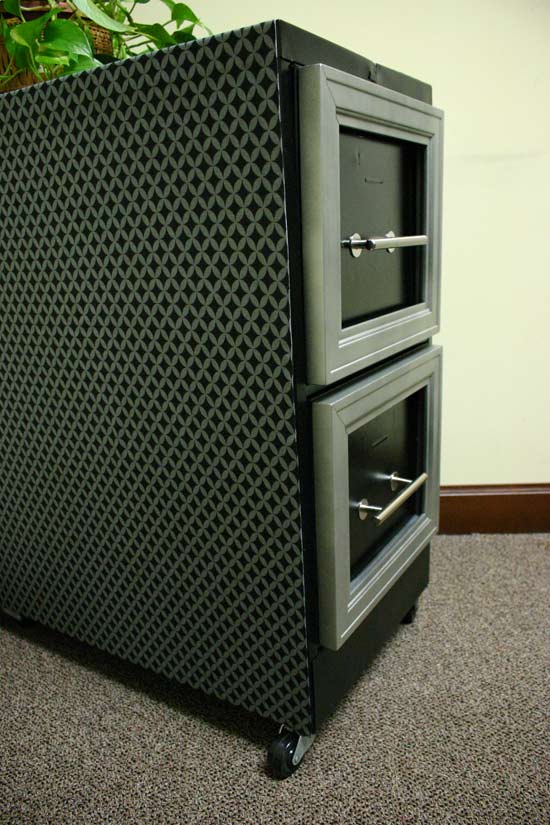
I asked Mike today if he had anything in his file cabinet yet. He said he didn’t even need the storage space. He just wanted a place to set his lamp! (Silly me!) He still hasn’t brought this mystery lamp in, though. So he borrowed my plant for the time being.
What do you think about this manlier version of my file cabinet makeover? I love the casters!
Someone got new light fixtures installed in her living room and is dying to share it with you! Hopefully soon!
Thanks for Checking In! ~ Chelsea

