Checking In With Chelsea

DIY ideas, crafts, and tips for your home

subscribe and never miss a thing!

Receive Free Email Updates

  • About
  • Videos
  • Projects
    • Indoor Projects
    • Outdoor Projects
    • Craft Projects
  • House Tour
You are here: Home / Craft Projects / DIY Artwork Display Wire

DIY Artwork Display Wire

August 12, 2019 By Chelsea Lipford Wolf 1 Comment

Inexpensive Way to Hang Kids’ Art Projects
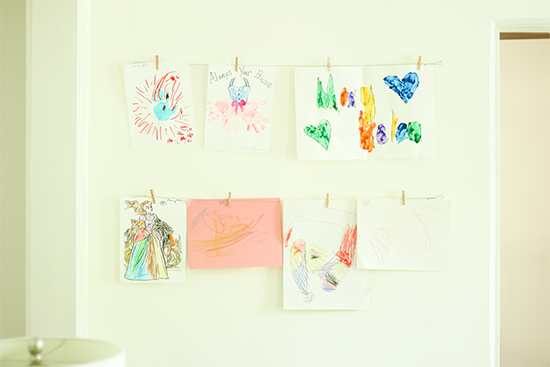
How To Hang Children Artwork on Wall

A quick trip down the hardware aisle and you’ll have all you need to create a a simple display for your kids’ or grandkids’ artwork and school projects!

Materials

Everything you need for this project cost less than $10! Except for the kids. They cost A LOT more than that.🤣 <–that’s me cracking myself up!

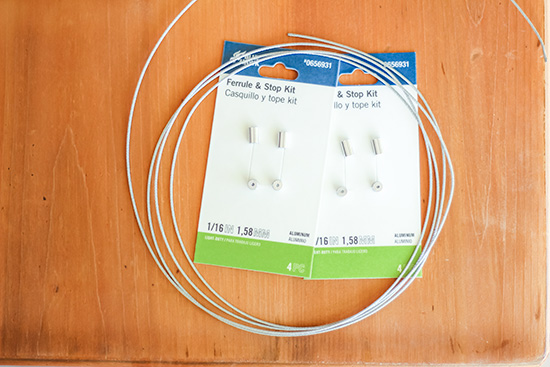
  • 1/16 inch steel cable kit*
  • wire cutters*
  • cup hooks*
  • cute clothespins* or these*
  • cute kids😊

Ferrule and Stop Kits for Kids Art Hanging Wire

Attach Ferrules and Stops

First of all, the ferrule is the part in the kit with two channels. The stops just have one channel. Start by sliding one ferrule on one end, looping the wire and feeding it back through the other channel.
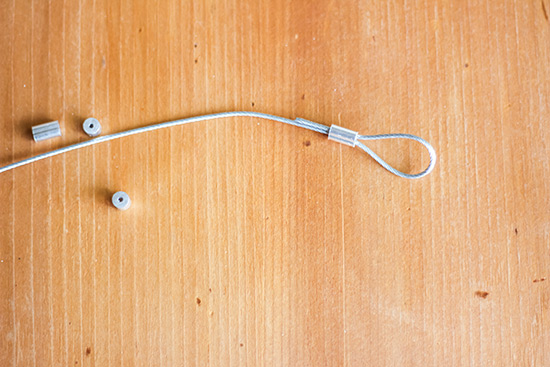
Loop Wire Through Ferrule First

Then you slide a stop onto the end. To maximize the wire that I had, I attached the stop to the very end of my wire.

If you already have a ‘swaging tool’, as they’re called, you can use it to tighten the stop. But then again, if you already have one or know what one is, you probably aren’t reading this tutorial! I just used a hammer to smush the stop closed on the concrete floor of my garage.
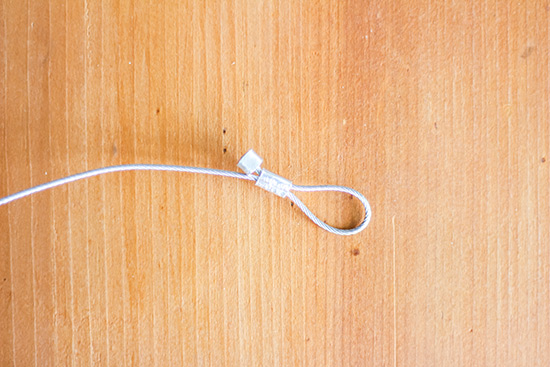
Use Hammer to Attach Stop and Ferrule to Wire

Once the stop is secure, you can play a little with how large or small you want the loop to be before hammering the ferrule closed.

Cut to Size

Determine how long you want your wire to be. Mine is about 41 inches from loop to loop. Cut the wire using anything that will work! You’ll probably need something more than scissors. I’ve had these cutting pliers for a while and use them for all sorts of things.

Cut Wire to Desired Length Before Attaching Ferrule and Stop

Leave slack for looping through the ferrule and stop.

Attach Second Ferrule and Stop

Slide on another ferrule to the end you just cut. I looped the wire through and measured from the end of my first loop to the new loop, adjusting as needed to get it to the right length. Try to make your loops equal in size as well. Then attach your second stop and cut any excess wire.
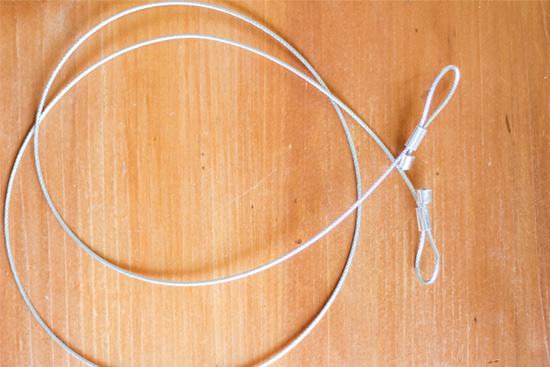
Wire with Loops for Hanging

Repeat as needed to create as many wires for hanging as you want! I made 2 to fill the wall in our living room.

Install Cup Hooks

Once I was done creating the wires and loops, I installed white cup hooks into the wall. Since they aren’t holding anything heavy, you can use the smaller cup hooks you’ll find in the hardware aisle.

To get a tight wire, I actually measured my wires and installed the hooks a little shorter. Maybe 1/4 inch. You can always turn the hook to the side to slip the wire on and then twist it to tighten it back up.
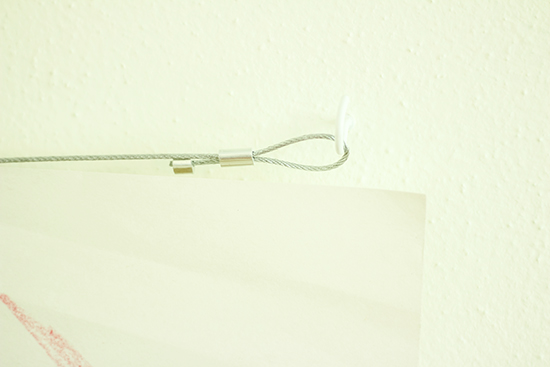
Wire Loop Hanging on Cup Hook in Wall

Since I have plaster walls, I used the smallest masonry bit I had to pre-drill a hole. It made it so much easier to screw the hooks in!

Select and Hang Art

The hardest part of this project is selecting which pieces of art to hang! If you’re like me, your heart melts at every handprint artwork your kids bring home! I love how it freezes time just a little bit and captures just how small/big they are at that moment.
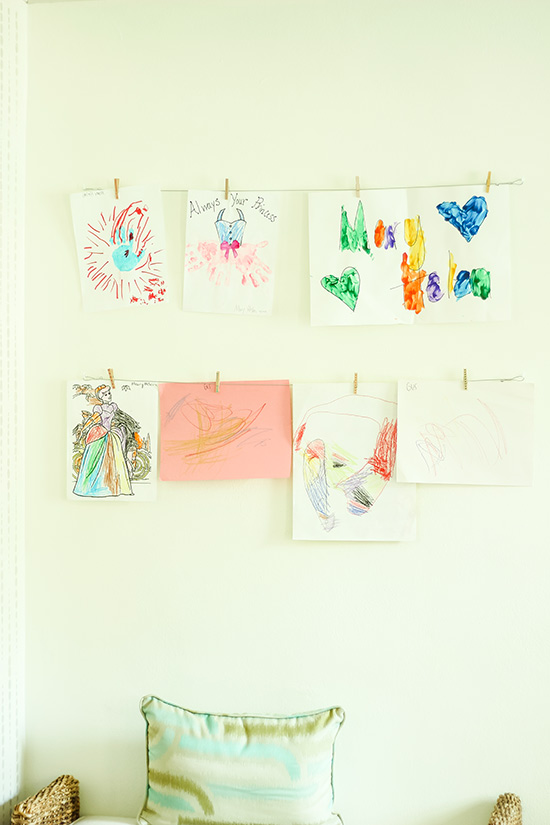
Hooks and Wire to Hang Kid School Projects

Of course you can’t hang them with just any clip! I picked up some cute, small clothespins from the craft store.
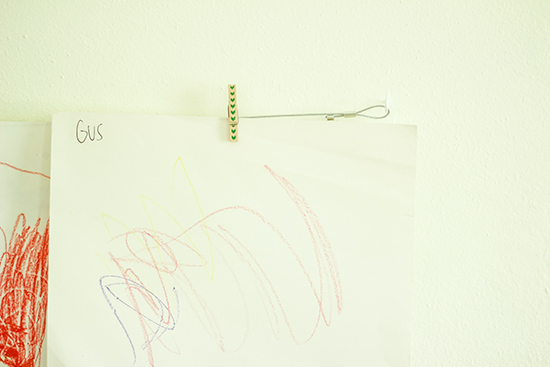
Cute Clips to Hang Kid Work on Wire

I love using their handiwork to decorate our home. And I love how easy it is to change out the art so our decor will always be evolving in this little space!

How To Hang Children Artwork on Wall

And they are so excited and proud to bring home new projects to hang! What’s your favorite art your child or grandchild has brought home? Share in the comments below!

Thanks for Checking In! ~Chelsea

*This post may contain affiliate links*

Subscribe for Free Updates!

Stay up-to-date on Chelsea's latest projects, tips, useful resources and more.

Previous Post
Double-Duty Homeschool Playroom
Next Post
Cherry-Picked: Phone Wallet

Related Content

Completed Hand Painted Pennant Flag Banner Kid BedroomDIY Pennant Banner for Kids RoomCompleted Girls Bedroom Makeover Pink PanelingPink Girls’ Shared Bedroom EvolutionCompleted Large Lighted Two and Zero NumbersDIY Lighted Marquee Numbers1950s Ranch Kitchen Before Renovation1950s Kitchen Renovation Ideas

Comments

  1. Brian C says

    September 2, 2019 at 6:07 am

    Great ideas Chelsea. I can’t wait for the new season to start.
    Say hi to the family for me,
    Brian C.

    Reply

Please Leave a Comment Cancel reply

Your email address will not be published. Required fields are marked *

Welcome!

I’m Chelsea. DIY
enthusiast who loves
sharing my victories
and mishaps!
Learn more
here.

CHECK IN WITH CHELSEA ON INSTAGRAM

What else do you use paper plates for besides eati What else do you use paper plates for besides eating?? Spray paint onto a paper plate and dab a small paint brush to do spot touch ups! Life hack when you’re working on a project but don’t need to paint the whole surface!👏🏻
.
.
#lifehack #diyhacks #spraypainting #painttips #paintprep #paintpro #shutters #craftsman #1940style
Didn’t mean for this to be #ASMR but here we are Didn’t mean for this to be #ASMR but here we are!🤷🏼‍♀️ I bought this orchid 15 months ago to use the flowers in our hair for my sister’s wedding. I’ve already repotted it once and it’s bloomed 3-4 times! Time to do it again with a pretty new pot that matches our new kitchen cabinets!🤩
.
.
Steps to repot an orchid:
1-large pot without drainage holes
2-plastic pot slightly smaller with holes
3-trim if needed so plastic pot is at or below outside pot
4-add layer of orchid specific potting mix (it looks like bark!)
5-add orchid, fill in around roots with more bark- don’t forget to add some mix under the leaves!
6-to water, soak bark and fill up outside pot, rinse the leaves too!
7-let sit for 5-10 minutes, then drain and dry the outside of your pot.
8-set in place and enjoy!🌷
New laundry, who dis? Our laundry room was a BLANK New laundry, who dis? Our laundry room was a BLANK slate after the kitchen renovation left it reconfigured too. So Dad and I tackled simple projects that make this space functional and of course visually pleasing too!👏🏻The full project airs this weekend on @todayshomeowner!
.
.
I love that the cabinets and hardware match what we have in the kitchen since the spaces are right next to each other! Synergy!
.
.
What do you love about your laundry room?
So funny the number of people who told us they loo So funny the number of people who told us they looked at our house when it was on the market but didn’t buy. Guess we’re the only suckers🤣🤣We’ve brought her a long way since closing day though! 👏🏻😍🤩
.
.
#ranchrevival #ranchreno #1950shouse #beforeandafter #housereno #pinkgirlroom #girlsbedroom #diningroomdecor #familydining
Exploring new cities is fun but there’s no place Exploring new cities is fun but there’s no place like my hometown! Come visit!💜💛
.
.
#mobilealabama #visitmobile #mardigras #travelbloggervibes #southerncharm
Lookie! It’s a shelf for your bookies! 🤣Build Lookie! It’s a shelf for your bookies! 🤣Building a shelf unit custom for ANY space in your home is so simple and can be done over and over again to add much needed storage aka sanity! The kids were running all over the house at bedtime trying to find a book to read because we had them stashed in baskets and shelves in several different rooms. So I took advantage of this space in the hall next to a closet to create a central location for their books and some of mine too! Plus it adds a little character to an otherwise blah space!🙌🏻
.
.
A full how to video is on checkinginwithchelsea.com! Book nerds can be DIY nerds too!🤓
.
.
#booknerdsunite #diyskills #beginnerdiy #bookshelfie #halldecor #storagesolutions #storageideas #bookstorage #bookstorageideas
Load More... Follow on Instagram

Indoor Projects Outdoor Projects Craft Projects
Facebook Pagelike Widget
  • Contact
  • FAQs
  • Advertise with Chelsea
  • Media
  • Today’s Homeowner

Search This Site

Receive Free Updates Via Email

Copyright © 2023 Checking in With Chelsea • All Rights Reserved