Checking In With Chelsea

DIY ideas, crafts, and tips for your home

subscribe and never miss a thing!

Receive Free Email Updates

  • About
  • Videos
  • Projects
    • Indoor Projects
    • Outdoor Projects
    • Craft Projects
  • House Tour
You are here: Home / Indoor Projects / Merry Christmasy Projects

Merry Christmasy Projects

December 22, 2014 By Chelsea Lipford Wolf 4 Comments

It’s Christmas week y’all! Hope that phrase ignites more excitement than anxiety! Weeeee!

I finished up a few small projects to decorate my house for the Christmas season. And I thought it wasn’t too late to share them with you all!

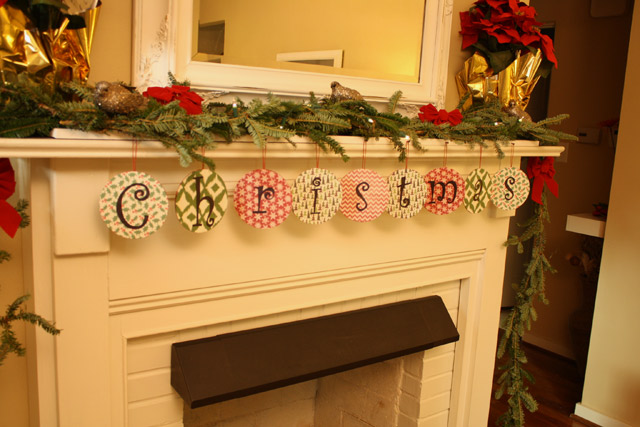
The first is a Christmas Mantel Sign I had made previously for my mantel.

DVDs wrapped in scrapbook paper hanging from mantel to spell Christmas with red poinsettias douglas fir garland

BLACK+DECKER saw it and had me recreate it for their blog. You can read all about how I made it by going over to blog.blackanddecker.com!

It would be a good project if you have little ones around the house.

Another very small thing I did was to fill my glass vase that usually stores wine corks with Christmas lights and ornaments.

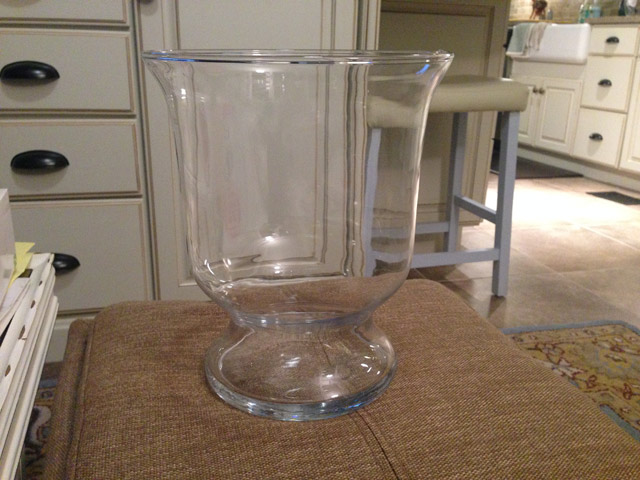
I started with the empty vase.

empty glass vase sitting on tan ottoman in sunroom

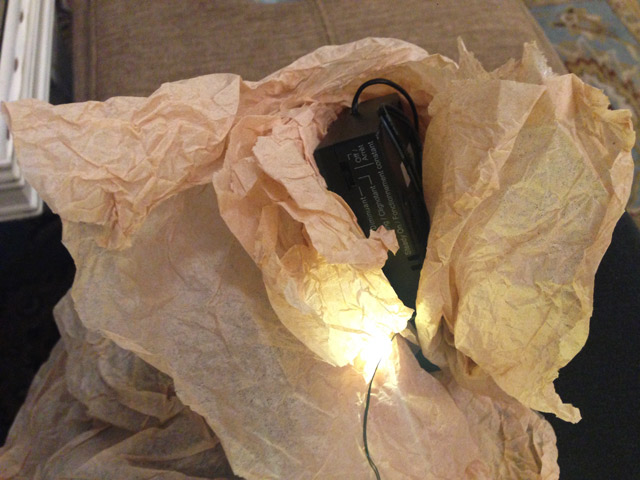
Then I took a strand of battery-powered LED lights, turned them on, and wrapped the black box in tan tissue paper.

black box from battery-powered Christmas light wrapped in tan tissue paper

I didn’t realize until later that my lights were on a timer. Once you turn it on, they stay on for 6 hours. Then they’re off for 18 hours. Boo! So if your lights are like that, turn them on at 4 in the afternoon. They’ll be lit for the evening hours and turn off around bedtime!

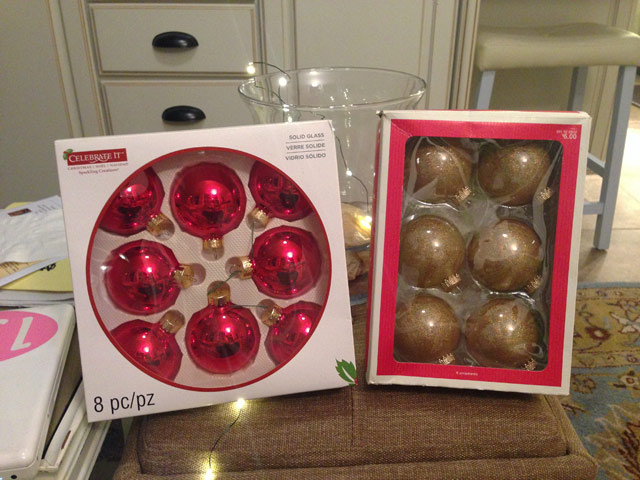
Moving on, I got out some discount ornaments I bought during the after-Christmas sales last year.

boxes of red and gold Christmas ornaments sitting on tan ottoman in sunroom

I used them to fill this same vase, but without the lights. And trust me, lights are wayyy cooler!

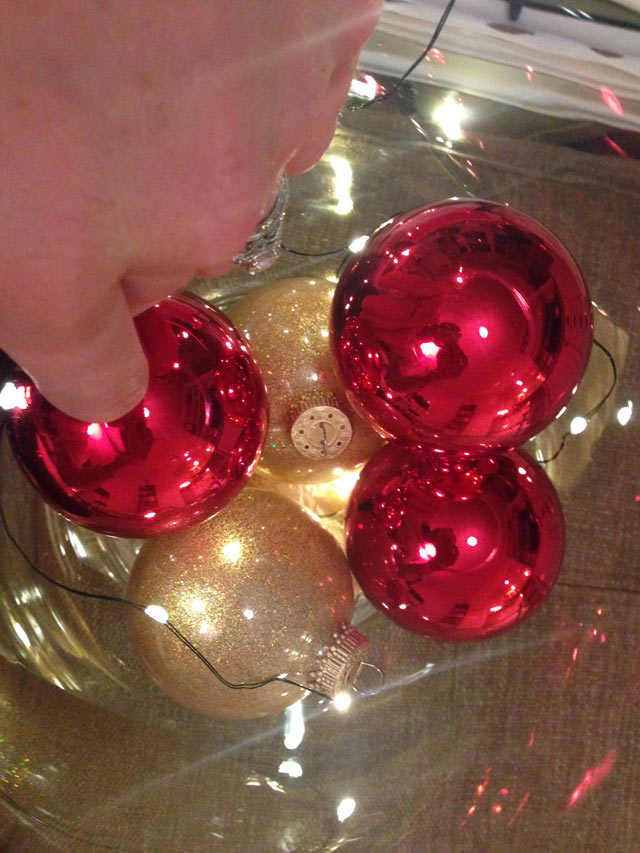
The ornaments were added one by one, alternating between the red and gold. I also made sure the light strand was woven adequately. I didn’t want it all lumped on one side or hidden in the middle!

setting red and gold ornaments in glass vase with lights

It’s a simple project, but adds a little Christmas cheer to the dining table! I set my vase on a mirrored tile with my little light bulb salt and pepper shakers.

glass vase filled with ornaments and lights set on white dining table with mirror tile

And with that, I’ll leave you to enjoy your Christmas with your loved ones! May the peace of Christ be with you on His birthday!

Please comment below to share your Christmas DIY projects! I love hearing from you!

Thanks for Checking In! ~Chelsea
Subscribe for Free Updates!

Stay up-to-date on Chelsea's latest projects, tips, useful resources and more.

Previous Post
Brick Wall, Waterfall
Next Post
Update: The Bathroom Situation

Related Content

Completed Hand Painted Pennant Flag Banner Kid BedroomDIY Pennant Banner for Kids RoomCompleted Girls Bedroom Makeover Pink PanelingPink Girls’ Shared Bedroom EvolutionCompleted Large Lighted Two and Zero NumbersDIY Lighted Marquee Numbers1950s Ranch Kitchen Before Renovation1950s Kitchen Renovation Ideas

Comments

  1. Penny says

    January 3, 2015 at 10:44 am

    So pretty! Did the tissue paper get hot when it was wrapped around the battery?

    Reply
    • Chelsea Lipford Wolf says

      January 7, 2015 at 3:28 pm

      No it did not! It helped, too, that they were LED lights!

      Reply
  2. danielle henshaw says

    November 15, 2020 at 3:33 am

    I can’t get the B&D’s page to open, so what did you use for the discs for your Christmas mantle decoration?

    Reply
    • Chelsea Lipford Wolf says

      November 20, 2020 at 12:52 pm

      Old CD and DVDs! ~Chelsea

      Reply

Please Leave a Comment Cancel reply

Your email address will not be published. Required fields are marked *

Welcome!

I’m Chelsea. DIY
enthusiast who loves
sharing my victories
and mishaps!
Learn more
here.

CHECK IN WITH CHELSEA ON INSTAGRAM

Ask me how I know😑Whether you’re doing a smal Ask me how I know😑Whether you’re doing a small patch or a whole room, this drywall sanding hack will keep the dust at bay and keep the rest of your house looking good😎
.
.
#drywall #diyhack #tipsandtricks
A Spring Break to remember! Thanks to CeeCee and P A Spring Break to remember! Thanks to CeeCee and Pop Daddy for bringing the Wolfpack along on vacation! A long travel day ahead of us but it’s always worth it to spend time with family and get some r&r.☀️😴 Happy weekend!
9 years!✨Brandon and I will be celebrating 9 yea 9 years!✨Brandon and I will be celebrating 9 years of marriage this week. And how perfect we were invited to a wedding tonight walking distance from our home.🥰Sometimes reality is better than the movies and this weekend is one of those times. Enjoy, friends!☀️
What else do you use paper plates for besides eati What else do you use paper plates for besides eating?? Spray paint onto a paper plate and dab a small paint brush to do spot touch ups! Life hack when you’re working on a project but don’t need to paint the whole surface!👏🏻
.
.
#lifehack #diyhacks #spraypainting #painttips #paintprep #paintpro #shutters #craftsman #1940style
Didn’t mean for this to be #ASMR but here we are Didn’t mean for this to be #ASMR but here we are!🤷🏼‍♀️ I bought this orchid 15 months ago to use the flowers in our hair for my sister’s wedding. I’ve already repotted it once and it’s bloomed 3-4 times! Time to do it again with a pretty new pot that matches our new kitchen cabinets!🤩
.
.
Steps to repot an orchid:
1-large pot without drainage holes
2-plastic pot slightly smaller with holes
3-trim if needed so plastic pot is at or below outside pot
4-add layer of orchid specific potting mix (it looks like bark!)
5-add orchid, fill in around roots with more bark- don’t forget to add some mix under the leaves!
6-to water, soak bark and fill up outside pot, rinse the leaves too!
7-let sit for 5-10 minutes, then drain and dry the outside of your pot.
8-set in place and enjoy!🌷
New laundry, who dis? Our laundry room was a BLANK New laundry, who dis? Our laundry room was a BLANK slate after the kitchen renovation left it reconfigured too. So Dad and I tackled simple projects that make this space functional and of course visually pleasing too!👏🏻The full project airs this weekend on @todayshomeowner!
.
.
I love that the cabinets and hardware match what we have in the kitchen since the spaces are right next to each other! Synergy!
.
.
What do you love about your laundry room?
Load More... Follow on Instagram

Indoor Projects Outdoor Projects Craft Projects
Facebook Pagelike Widget
  • Contact
  • FAQs
  • Advertise with Chelsea
  • Media
  • Today’s Homeowner

Search This Site

Receive Free Updates Via Email

Copyright © 2023 Checking in With Chelsea • All Rights Reserved