
How to Deck Out your Laundry Sorter
Part 2 of How to Build a Beautiful Laundry Sorter
Follow my plans to build a 4-hamper laundry sorter, then check out this post for details on how to stain the top, paint the base, and install the drawer hardware to complete the dresser look!

Materials
- (5) 1×4 poplar boards, if staining top
- (5) 1×4 pine or whitewood, if painting top
- wood stain or paint (I used Minwax’s Espresso)
- stain rags* or paint brush
- drill/driver*
- 3/16″ drill bit*
- drawer pulls*
- small chain*
- small wood screws*
I included the materials for the top of the sorter in the shopping list in my last post, (5) 1×4 poplar boards cut to 74 inches. If you’re choosing to paint your top the same as the bottom of your sorter, save a few dollars and get 1×4 pine or whitewood. Poplar is relatively inexpensive but it looks much better than whitewood if you’re staining like me.
Assemble Top
While I was drilling the pocket holes for the rest of the piece, I also drilled pocket holes in 4 of my 5 boards. The holes don’t have to line up with each other.

Be selective and drill the holes on the less-pretty side of your 1x4s. I did it on the side with the stickers so I didn’t have to remove them! 🙂
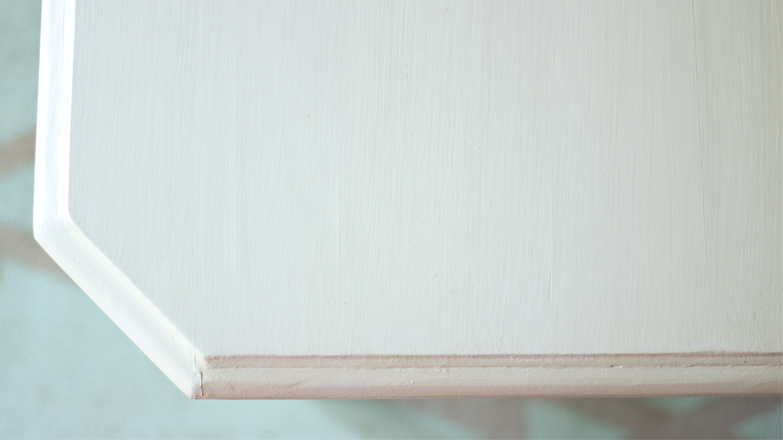
When you’re screwing the boards together (using the same pocket hole screws used on the rest of the sorter), make sure the tops of the boards are flush with each other so that you’ll have a smooth surface when it’s all said and done. Oh! And also add wood glue between each board, but just a little so it doesn’t ooze out onto your pretty top.
Stain Poplar Boards
Once I was satisfied with my top, I laid it out on some plastic to start staining!

I used wood stain I already had on hand, Espresso by Minwax. Can’t remember what I used it on in the past, but I’m sure it was pretty! 🙂
Just using a clean rag, I dipped and spread the stain in long strokes until it was all covered. Don’t forget to pay attention to the edges too! I also stained a little on the bottom all the way around since there would be an overhang after it’s installed on the bottom.

Add Top to Sorter Base
I went back in forth between working on the main part of the sorter and the top, so while the stain was drying I was still moving and grooving. At some point I attached it to the vertical supports, the back support and the side panels using the trusty pocket holes screws and already-drilled pocket holes. Use a tape measure to ensure your top is centered and you have the same amount of overhang on either side.
Also, as you’re attaching, check that the vertical supports are evenly spaced side-to-side.
Call it stubbornness, or whatever, but I really wanted to have the top installed before painting the body of the sorter. I needed a sense of accomplishment and completion! So when it came time to prep for paint, I carefully covered the stained top with plastic and painter’s tape to protect it. It had probably dried for an hour or so at this point. I knew I’d be removing the plastic as soon as the paint was applied, so it wasn’t going to hinder the stain-drying process.
Prep and Paint
Another step before I could paint was puttying all of the nail holes and seams on the drawer trim. I used your run-of-the-mill wood putty to fill the holes. There were a few spots at the seams that needed sanding before putty so I hit those with 220-grit sandpaper.
Once all of the puttying and sanding was complete, though, I was ready to whip out my new best friend.

I mentioned in my last post that the color used here is Behr’s Casual Gray. I was able to pour the paint straight into the cup of my paint sprayer*, add a tiny amount of water and stir. I was done painting before I knew it. Probably a total of 10 minutes for 1 coat and a few touch ups. Game. Changer.
I’ve used a paint sprayer before but I don’t think it was the right type for the application so it wasn’t as exciting as using this one this go-round. (*Wagner sent me this paint sprayer to test out. Though, all opinions are 100% my own*.)

After enough time had passed, I turned my attention back to the stained top to apply the first coat of polyurethane to protect it. I went with a satin finish and used a cheapy foam brush.
Of course I had to wait for everything to dry well before bringing it inside. There I installed the drawer pulls which took longer than it took me to paint!
Adding Drawer Pulls
Since these are fake drawers I couldn’t use a cabinet hardware jig that I would typically recommend for installing multiple pulls or knobs. So I had to measure and mark each “drawer” individually. I used a 3/16″ drill bit to make room for the screws that came with the hardware.
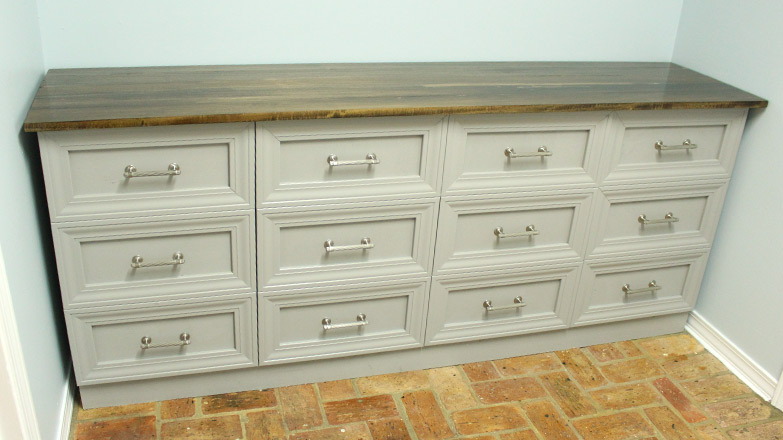
Then I attached the satin nickel pulls with the provided screws and a screwdriver. And just like that it looked like a dresser!

I hosted a giveaway for this line of cabinet hardware, Amerock, a few months ago and they offered to send some hardware for this project! These are from their new Sea Grass collection. And they look great against the gray paint.

The last finishing touch I added was a chain inside each pullout.

As you can imagine, this will help keep the kids of the house from throwing the pullout onto the floor every time they go to sort their clothes. I just used some 1-1/4″ wood screws I had on hand to attach it to the vertical support at an angle.

Then used the same screws to attach it to the inside of the pullout panel. It’s best to put your plastic hampers in place first so you know just how long to make your chain.

I had to come back the next day to sand the stained top (with 220-grit sandpaper) and apply another coat of polyurethane. Then after another 24 hours, the sorter was ready to be put to good use!

I’ll admit it ended up costing more than I originally thought and took a decent amount of time to complete by myself. So take that into consideration before taking on this project. It’d probably take a full weekend to complete from start to finish. But it sure looks good when it’s done!!

Of course I’d be making one for my house if my laundry room was more than a closet! What’s your laundry room situation like? Let me know in the comments below! Thanks for Checking In! ~Chelsea
If you missed part 1 of my laundry sorter how-to, click here to check it out now!
6 Comments
Cathy
I love your laundry sorter! I do not have room for it in my laundry room closet either but it would work well in my bedroom and could double as a media chest. Great idea, thanks.
Chelsea Lipford Wolf
That’d be great to have it double as a media chest too! Smart thinking, Cathy! ~Chelsea
Molly
I am planning on building one just like this! Where did you get your actual plastic bins? Did you plan your measurements off of those?
Thanks!
Chelsea Lipford Wolf
I got the bins from Amazon. Unfortunately it looks like they aren’t sold anymore. 🙁 Here’s the link in case you want to find something else with similar dimensions: https://www.amazon.com/gp/product/B002BA5EY4/
natalie
Where did you get the chain? Any specific kind?
Chelsea Lipford Wolf
Hi Natalie! If you click ‘small chain’ under Materials, it shows the exact chain I used-#16 steel jack chain. The best price is to go in to the store and cut the length you need yourself. Otherwise you can purchase longer lengths online. Here’s an affiliate link for 100 feet on Amazon: https://amzn.to/373u85J Hope that helps! ~Chelsea