Checking In With Chelsea

DIY ideas, crafts, and tips for your home

subscribe and never miss a thing!

Receive Free Email Updates

  • About
  • Videos
  • Projects
    • Indoor Projects
    • Outdoor Projects
    • Craft Projects
  • House Tour
You are here: Home / Outdoor Projects / Featured on Today’s Homeowner: Spring!

Featured on Today’s Homeowner: Spring!

March 11, 2016 By Chelsea Lipford Wolf 2 Comments

If you haven’t noticed by now, I’ve been highlighting different episodes of Today’s Homeowner that I co-host. It won’t be every week. But when there’s a project I’m excited about, I’ll be sharing with you!

This week’s episode is a handy, dandy checklist to get your home ready for Spring. We’ve broken down the “must-dos” from the “could dos” to make it easier than ever to maintain your home year-round. This is the 1st of 4 from our Four Seasons of Homeownership episodes.

Dad, Allen and I had a great time helping Sharla and Stuart work inside and outside of their home doing some improvements to make a big difference for the changing seasons.
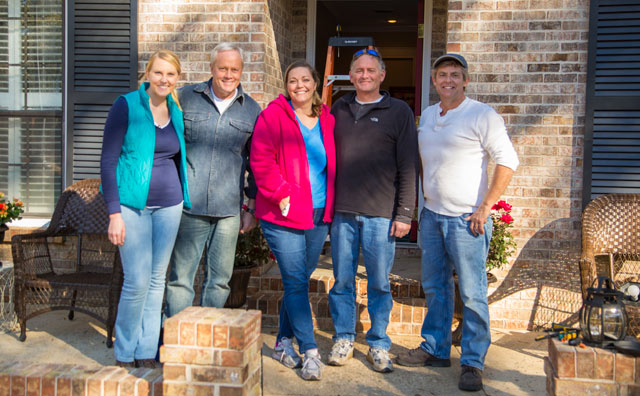
THDL Crew with Homeowners

The biggest improvements were done on the front of the house, so that’s what I’ll show you. You can watch all of the other repairs on this week’s episode. (Click here to find where it airs in your area!)

Instead of a front porch, this house had more of a front patio.
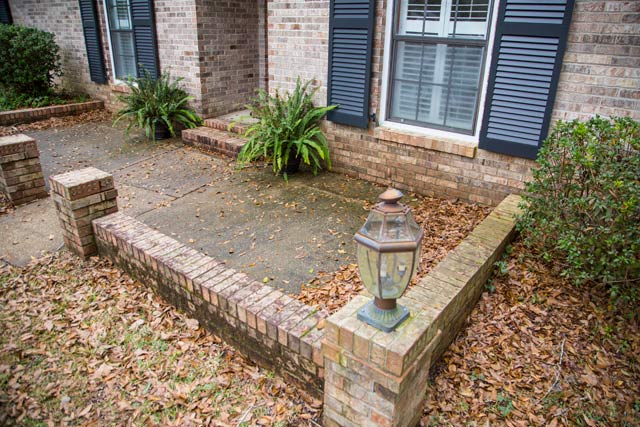
grungy concrete patio and brick wall with old carriage light

And it hadn’t seen the end of a power washer’s wand in quite some time. So we introduced Sharla to it and she was in love! I think she’d be perfectly happy to receive a power washer as a birthday or Mother’s Day gift…just an idea, Stuart!

Dad and Allen replaced the old, dingy lights on the end of the brick wall with new ones from Lamps Plus.
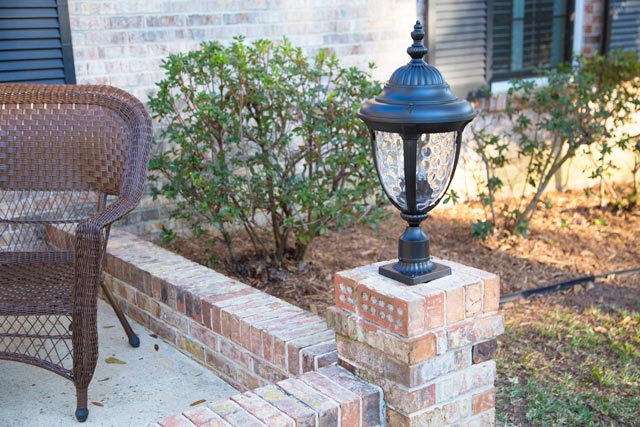
black outdoor carriage lights lamps plus

And Sharla and I sealed the freshly cleaned concrete with a masonry sealer.
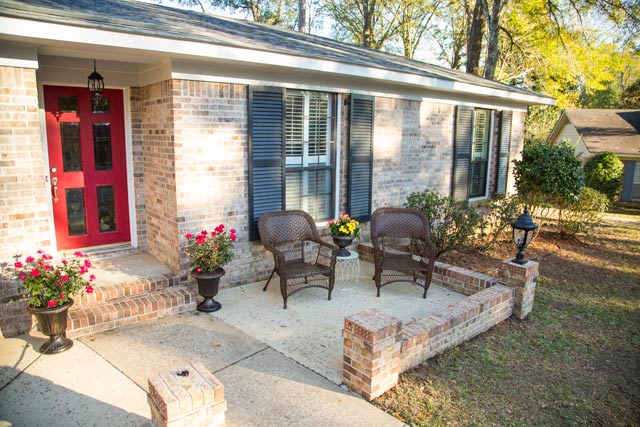
Front Entrance After Spring Spruce Up

Looks much more inviting for sure!

While we were out front, Sharla and I also tackled cleaning up their front flower beds. She admitted to raking the leaves from their yard during the fall up under and around their azalea bushes. Nothing wrong with that, but it does leave something to be desired.
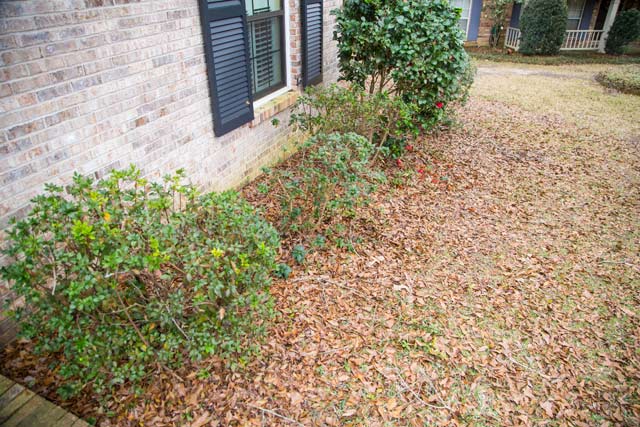
Front Beds Before Cleanup

So we raked up the leaves and bagged them for big trash day which we have every other week here. Now that’s a lot of leaves…
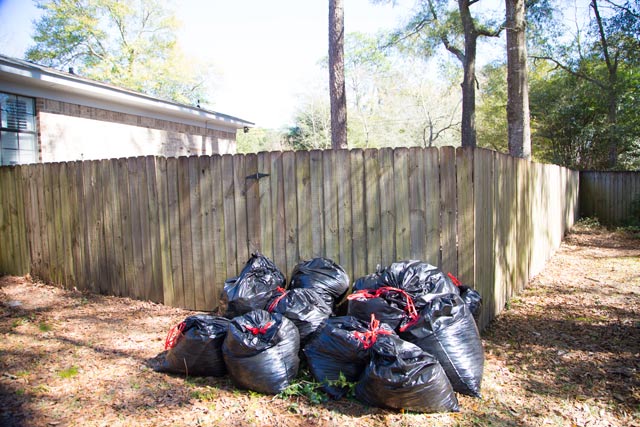
Bagged Leaves for Trash Day

Then we were able to see any weeds or the like that needed to be pulled. We also trimmed some lower branches on her Camellias to help them look a little more groomed. Before we laid new mulch, we ran some landscape edging to really define the beds once and for all.

The results…
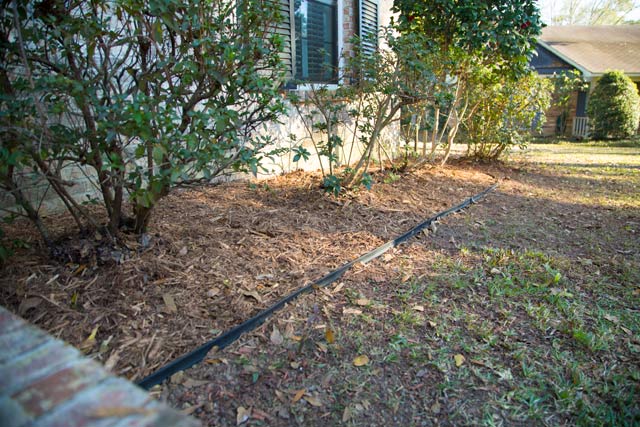
Front Bed After Cleanup and Edging

With the weather finally starting to get decent, it’s a great time to head outside your house and see what needs a little sprucing! A little work here and there really can make a difference. Even if your neighbors don’t notice, you’ll be able to see and appreciate the difference!

Thanks for Checking In! ~ Chelsea
Subscribe for Free Updates!

Stay up-to-date on Chelsea's latest projects, tips, useful resources and more.

Previous Post
As Seen on TV: File Cabinet Makeover
Next Post
Chelsea’s Choice: Love Where You Live

Related Content

Dining Room View from Living Room Ready to SellHow to Sell Your House Fast and CheapChelsea Lipford Wolf on Deck with Small Bug-Repellent Container GardenEasy Way to Keep Mosquitos AwayChelsea Killing Weeds without Chemicals on Concrete Sidewalk Red Brick StepsHow I Kill Weeds Without ChemicalsDenim Pants with Latex Paint on Them on Tile Floor with Rubbing Alcohol and Scrub BrushHow To Remove Latex Paint

Comments

  1. Rachel Lewter says

    May 27, 2016 at 9:10 pm

    I enjoyed this show, heck I enjoy all of them. My DVR will soon be full of all the “reference” episodes I’ve kept. You “ain’t” living, if you aren’t learning.

    Reply
    • Chelsea Lipford Wolf says

      May 31, 2016 at 7:57 am

      Great to hear, Rachel! Thanks for stopping by! ~ Chelsea

      Reply

Please Leave a Comment Cancel reply

Your email address will not be published. Required fields are marked *

Welcome!

I’m Chelsea. DIY
enthusiast who loves
sharing my victories
and mishaps!
Learn more
here.

CHECK IN WITH CHELSEA ON INSTAGRAM

Ask me how I know😑Whether you’re doing a smal Ask me how I know😑Whether you’re doing a small patch or a whole room, this drywall sanding hack will keep the dust at bay and keep the rest of your house looking good😎
.
.
#drywall #diyhack #tipsandtricks
A Spring Break to remember! Thanks to CeeCee and P A Spring Break to remember! Thanks to CeeCee and Pop Daddy for bringing the Wolfpack along on vacation! A long travel day ahead of us but it’s always worth it to spend time with family and get some r&r.☀️😴 Happy weekend!
9 years!✨Brandon and I will be celebrating 9 yea 9 years!✨Brandon and I will be celebrating 9 years of marriage this week. And how perfect we were invited to a wedding tonight walking distance from our home.🥰Sometimes reality is better than the movies and this weekend is one of those times. Enjoy, friends!☀️
What else do you use paper plates for besides eati What else do you use paper plates for besides eating?? Spray paint onto a paper plate and dab a small paint brush to do spot touch ups! Life hack when you’re working on a project but don’t need to paint the whole surface!👏🏻
.
.
#lifehack #diyhacks #spraypainting #painttips #paintprep #paintpro #shutters #craftsman #1940style
Didn’t mean for this to be #ASMR but here we are Didn’t mean for this to be #ASMR but here we are!🤷🏼‍♀️ I bought this orchid 15 months ago to use the flowers in our hair for my sister’s wedding. I’ve already repotted it once and it’s bloomed 3-4 times! Time to do it again with a pretty new pot that matches our new kitchen cabinets!🤩
.
.
Steps to repot an orchid:
1-large pot without drainage holes
2-plastic pot slightly smaller with holes
3-trim if needed so plastic pot is at or below outside pot
4-add layer of orchid specific potting mix (it looks like bark!)
5-add orchid, fill in around roots with more bark- don’t forget to add some mix under the leaves!
6-to water, soak bark and fill up outside pot, rinse the leaves too!
7-let sit for 5-10 minutes, then drain and dry the outside of your pot.
8-set in place and enjoy!🌷
New laundry, who dis? Our laundry room was a BLANK New laundry, who dis? Our laundry room was a BLANK slate after the kitchen renovation left it reconfigured too. So Dad and I tackled simple projects that make this space functional and of course visually pleasing too!👏🏻The full project airs this weekend on @todayshomeowner!
.
.
I love that the cabinets and hardware match what we have in the kitchen since the spaces are right next to each other! Synergy!
.
.
What do you love about your laundry room?
Load More... Follow on Instagram

Indoor Projects Outdoor Projects Craft Projects
Facebook Pagelike Widget
  • Contact
  • FAQs
  • Advertise with Chelsea
  • Media
  • Today’s Homeowner

Search This Site

Receive Free Updates Via Email

Copyright © 2023 Checking in With Chelsea • All Rights Reserved