Checking In With Chelsea

DIY ideas, crafts, and tips for your home

subscribe and never miss a thing!

Receive Free Email Updates

  • About
  • Videos
  • Projects
    • Indoor Projects
    • Outdoor Projects
    • Craft Projects
  • House Tour
You are here: Home / Indoor Projects / Featured on Today’s Homeowner: Energy Efficiency

Featured on Today’s Homeowner: Energy Efficiency

January 15, 2016 By Chelsea Lipford Wolf Leave a Comment

This past weekend across the country, my husband and I (and Mary Helen in utero) were featured on the Today’s Homeowner with Danny Lipford TV show I co-host. I mentioned this episode, titled “Energy Efficiency for the Family”, before when I made the Roman shades for the nursery. But now the episode is online in case you missed it! Click here to watch us!

I was 8 months pregnant when we got a new HVAC system. So it’s fun to re-watch the episode and relive those days full of joyful anticipation waiting for Mary Helen to arrive!

You wouldn’t believe how large our old HVAC unit was unless you saw it in person. It was a “package” unit, meaning there were no parts of the system inside. Some people have their air handlers in a closet inside their house. This one had that all outside. It worked out well since our house and closet space is so limited as is. But it was time for it to go.
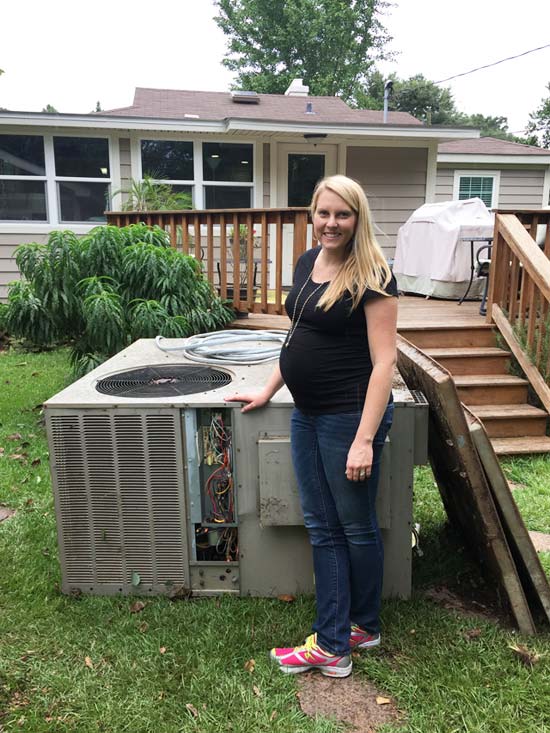
old, large package HVAC unit with chelsea 8 months pregnant

In its place, we installed a brand new heat pump unit from Carrier. Can you believe this tiny thing is way more efficient than “The Beast”? Say what?!

carrier heat pump installed

Part of the reason it’s much smaller is it is not a package unit. Part of its installation included adding an air handler inside the house in the attic. Not excited about losing that valuable storage area in the attic, BUT the new unit heats and cools waaayyyy more efficiently. So I’m ok with the trade off!

Another part of the installation of the new unit was removing all of the old, improper and inefficient ducts under the house and running new ductwork and vents in the attic and ceiling. Which means there were a bunch of holes left in the floor in each room of the house where the old vents were located.
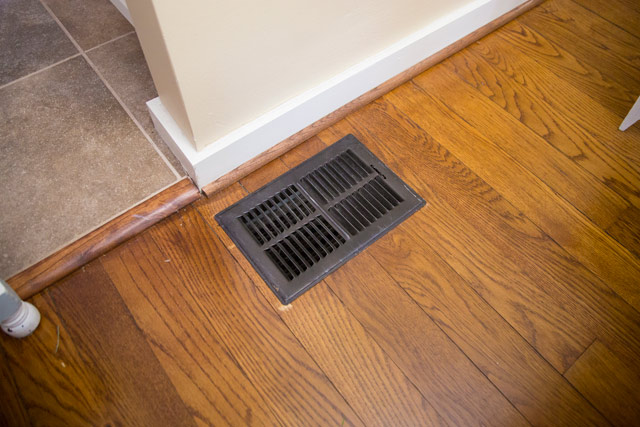
floor register hardwood english chestnut tile floor

Fortunately, I had a little help from Dad and Allen to replace some tile in the kitchen and this spot in the dining room hardwood. You would never know there used to be a grate there!

hardwood floor seamless patch near tile floor

We cut pieces of duct to put in the other vents we didn’t patch to keep unwanted air and critters out. I’m hoping to tackle the bathroom and one in our bedroom sometime this year. (In the midst of the many other projects I’d like to accomplish.) Then there’s the one in the nursery, guest room, living room and 2 in the sunroom to think about…

But in the meantime, while you’re waiting for another riveting project from myself, 🙂 , head over to TodaysHomeowner.com and see all of these projects I mentioned in action! You can click here to watch the “Energy Efficiency for the Family” episode! And I hope you will!

Next week I’m heading to Las Vegas for the annual International Builder’s Show. I hope to share some fun products new to the market with you on my Facebook page. So be sure to follow me there and on Instagram to stay in touch!

Thanks for Checking In! ~ Chelsea

Subscribe for Free Updates!

Stay up-to-date on Chelsea's latest projects, tips, useful resources and more.

Previous Post
Hanging Hooks on a Hollow Door
Next Post
Now Trending: Kitchens & Baths

Related Content

Chelsea’s Choice: Little Black Box…and the First Power Billgreen arrow indicating top of white bed moldingPutting the Molding to BedEasy Way To Clean Mold on CaulkEasy Way to Clean Moldy Caulk and Keep It That Way

Please Leave a Comment Cancel reply

Your email address will not be published. Required fields are marked *

Welcome!

I’m Chelsea. DIY
enthusiast who loves
sharing my victories
and mishaps!
Learn more
here.

CHECK IN WITH CHELSEA ON INSTAGRAM

Ask me how I know😑Whether you’re doing a smal Ask me how I know😑Whether you’re doing a small patch or a whole room, this drywall sanding hack will keep the dust at bay and keep the rest of your house looking good😎
.
.
#drywall #diyhack #tipsandtricks
A Spring Break to remember! Thanks to CeeCee and P A Spring Break to remember! Thanks to CeeCee and Pop Daddy for bringing the Wolfpack along on vacation! A long travel day ahead of us but it’s always worth it to spend time with family and get some r&r.☀️😴 Happy weekend!
9 years!✨Brandon and I will be celebrating 9 yea 9 years!✨Brandon and I will be celebrating 9 years of marriage this week. And how perfect we were invited to a wedding tonight walking distance from our home.🥰Sometimes reality is better than the movies and this weekend is one of those times. Enjoy, friends!☀️
What else do you use paper plates for besides eati What else do you use paper plates for besides eating?? Spray paint onto a paper plate and dab a small paint brush to do spot touch ups! Life hack when you’re working on a project but don’t need to paint the whole surface!👏🏻
.
.
#lifehack #diyhacks #spraypainting #painttips #paintprep #paintpro #shutters #craftsman #1940style
Didn’t mean for this to be #ASMR but here we are Didn’t mean for this to be #ASMR but here we are!🤷🏼‍♀️ I bought this orchid 15 months ago to use the flowers in our hair for my sister’s wedding. I’ve already repotted it once and it’s bloomed 3-4 times! Time to do it again with a pretty new pot that matches our new kitchen cabinets!🤩
.
.
Steps to repot an orchid:
1-large pot without drainage holes
2-plastic pot slightly smaller with holes
3-trim if needed so plastic pot is at or below outside pot
4-add layer of orchid specific potting mix (it looks like bark!)
5-add orchid, fill in around roots with more bark- don’t forget to add some mix under the leaves!
6-to water, soak bark and fill up outside pot, rinse the leaves too!
7-let sit for 5-10 minutes, then drain and dry the outside of your pot.
8-set in place and enjoy!🌷
New laundry, who dis? Our laundry room was a BLANK New laundry, who dis? Our laundry room was a BLANK slate after the kitchen renovation left it reconfigured too. So Dad and I tackled simple projects that make this space functional and of course visually pleasing too!👏🏻The full project airs this weekend on @todayshomeowner!
.
.
I love that the cabinets and hardware match what we have in the kitchen since the spaces are right next to each other! Synergy!
.
.
What do you love about your laundry room?
Load More... Follow on Instagram

Indoor Projects Outdoor Projects Craft Projects
Facebook Pagelike Widget
  • Contact
  • FAQs
  • Advertise with Chelsea
  • Media
  • Today’s Homeowner

Search This Site

Receive Free Updates Via Email

Copyright © 2023 Checking in With Chelsea • All Rights Reserved