DIY Gates for Deck Stairs
How to Build Gates for a Wood Deck
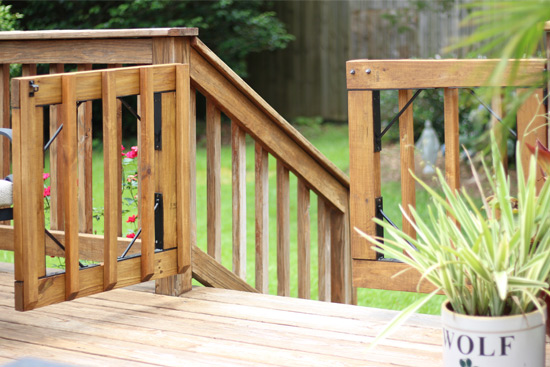
If you have little ones roaming around, you know the feeling when you see them head towards the stairs! For inside stairs you can buy a pre-made gate in a color that suits your house. But what do you do about outdoor stairs like those on a deck?
You build some yourself!
Materials
I took this picture with every intention of building these gates with some leftover wood I had on hand, but that changed half way through the project.
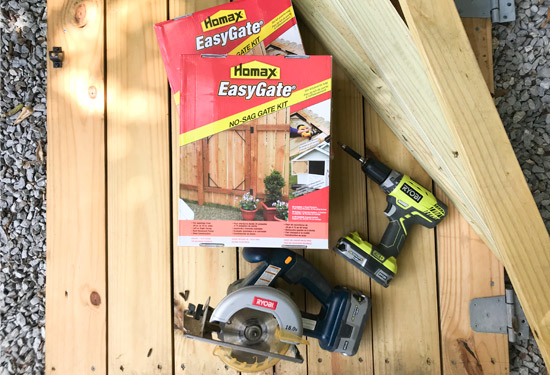 (And yes, my old, blue Ryobi saw is still going strong!)
But here’s what I actually ended up using:
- (2) gate kits from Homax* (This decorative version is actually cheaper.*)
- 10 pre-cut balusters*
- 2x4s*
- gate latch*
- drill*
- circular saw
When I was picking up 2x2s to make the balusters, I did some math. And the pre-cut balusters with the 45 degree angle on the end were actually cheaper than buying a couple of 8-foot 2x2s and cutting the angles myself. So price shop at your local lumber yard to see if it’s the same for you! I love me a bargain!
Assembly
Since I was making 2 gates to fill my opening, I took the width of the opening, subtracted an inch (for the hinges and a little breathing room) and then divided by 2. Only subtract half an inch if you’re making 1 gate.
From this point forward all directions will be for 2 gates. Adjust accordingly. I cut (4) 2x4s to half the width of my opening. Then attached them to the horizontal parts of the braces from the kit, according to the directions. (I used these same kits to make a Dutch door for a shed in an episode of my web series. Click to watch now!)
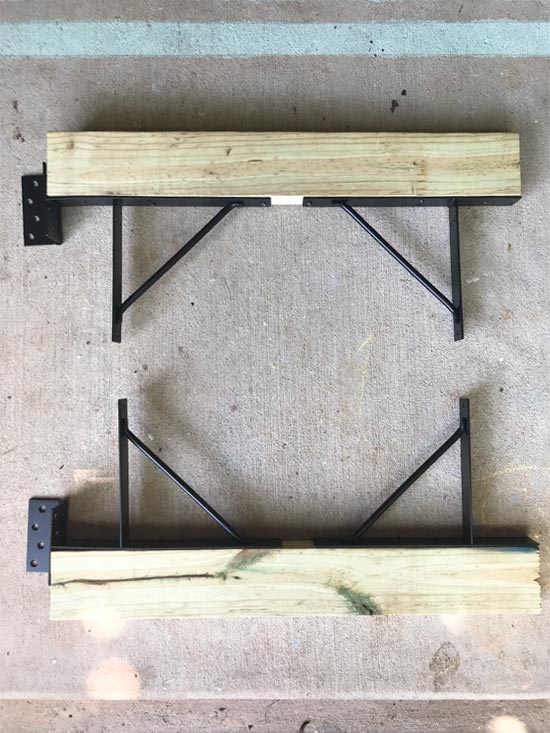
Take your overall height measurement, mine was around 31 inches so that it would line up nicely with my existing handrails. Lay out the partially assembled pieces to that height. Now you can measure inside the braces to determine how long to cut your (4) vertical pieces. Attach the 2x4s, though it’ll be a tight fit and may require some strong-arming to keep it in place while you drive the screws.
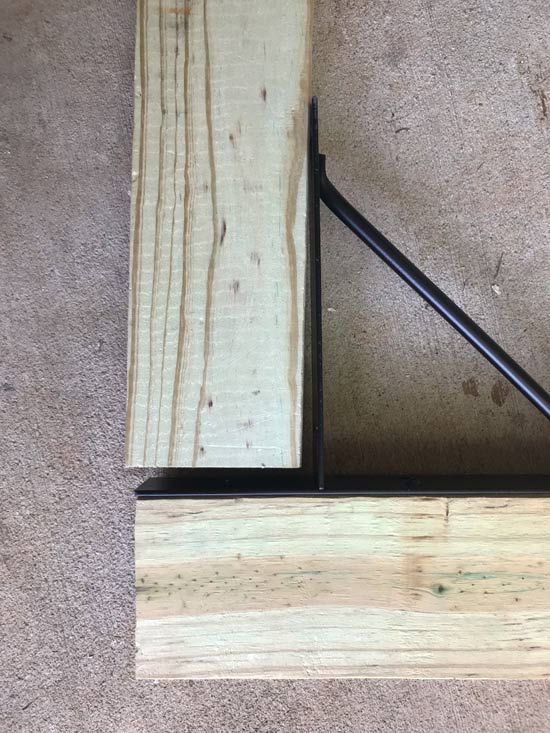
Attach to Posts
At this point, I attached the hinges to the 4×4 posts at the top of my stairs. I originally wanted them to swing out, but I realized once the 2x2s were attached on the front, they would hit the handrail and wouldn’t be able to open all the way. So I revised my plans!
I screwed the hinges in so they were flush with the inside edge of the 4×4, somewhat creating the illusion that the gate was a continuation of the handrail itself.
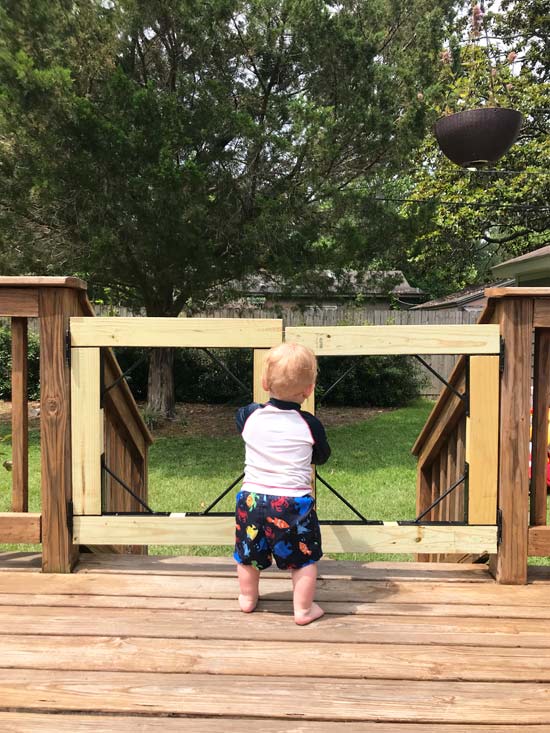
Of course no project goes on around here without a helping hand or two!
Then, and only then, did I realize that the 4×4 on the right is not straight.🤨 So the gate leaned and did not match up with its counterpart at the top. Boo! One way to fix it would be to shim the bottom hinge so that it was plumb. But I decided to shave the top 2×4 so that after I hung it higher than the other gate they would match up perfectly in the most obvious place, the middle.
Staining
Part of the reason I wanted to hang the gates before adding the 2x2s was so that I could stain everything separately, eliminating having to cut in around the balusters. So once the top board was shaved, I took measurements where each baluster would be and cut them to size. They’re spaced about the same amount as the balusters on the deck handrails, which is according to our local code.
I used stain we had leftover from staining the deck a few years ago. I brushed it on the gate frames in place but laid out the balusters on a drop cloth and stained 3 sides before letting it dry and staining the 4th side. Once they were all dry, I used my nail gun to attach the balusters in place (5 on each gate).
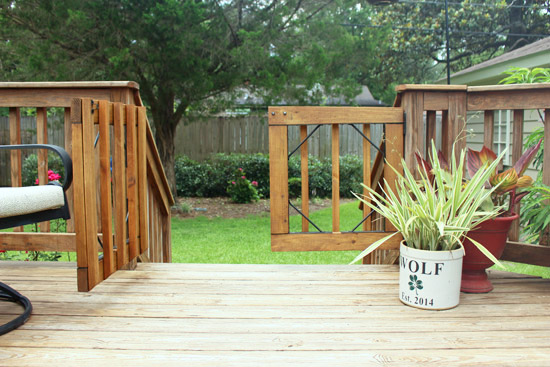
Gate Latch
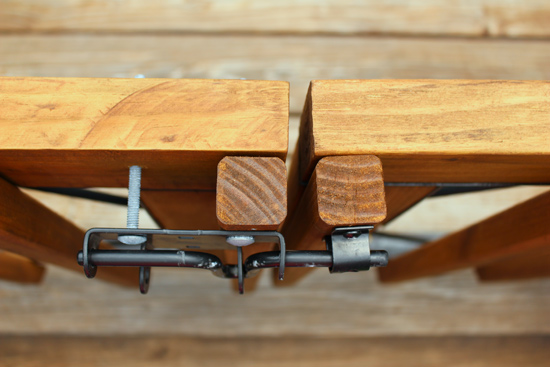
Lastly, you can’t have a gate without a latch! I was able to re-use this sliding gate latch from another project. I had to pick up extra long carriage bolts, though, since it needed to mount on the outside away from little fingers. Here’s a top-down view to show you how I did it. The piece on the right only attaches with screws.
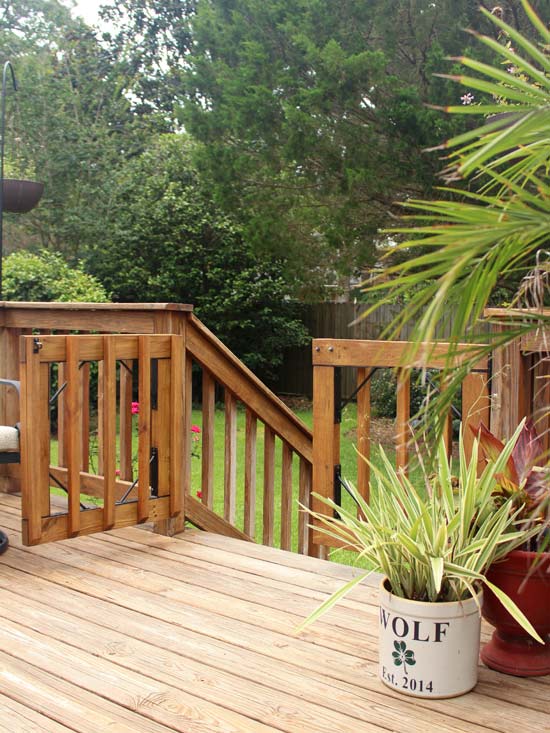
Now our gate is ‘baby proof’! Since kids seem to LOVE to play outside and this momma doesn’t enjoy it quite as much, I can safely let them play outside on the deck while I’m in the kitchen (right inside the door, which I leave open) preparing dinner. That’s what I call a win-win!
What hack have you discovered lately that makes your life easier? Leave me a comment to share!
Thanks for Checking In! ~Chelsea
*This post may contain affiliate links*


2 Comments
Katrina Rhett
Hey! Thanks so much for this! I’ve finished all but the balusters. What size screw did you use to secure them?
Chelsea Lipford Wolf
2″ or 2-1/2″ screws will work! ~Chelsea